
English
Quick Start
This page explains the configuration method, example scenarios, and basic implementation approach of the Approval Detail Page JS plugin.
Plugin Configuration Steps
Before using an example to get started quickly, you should first understand how the plugin is configured.
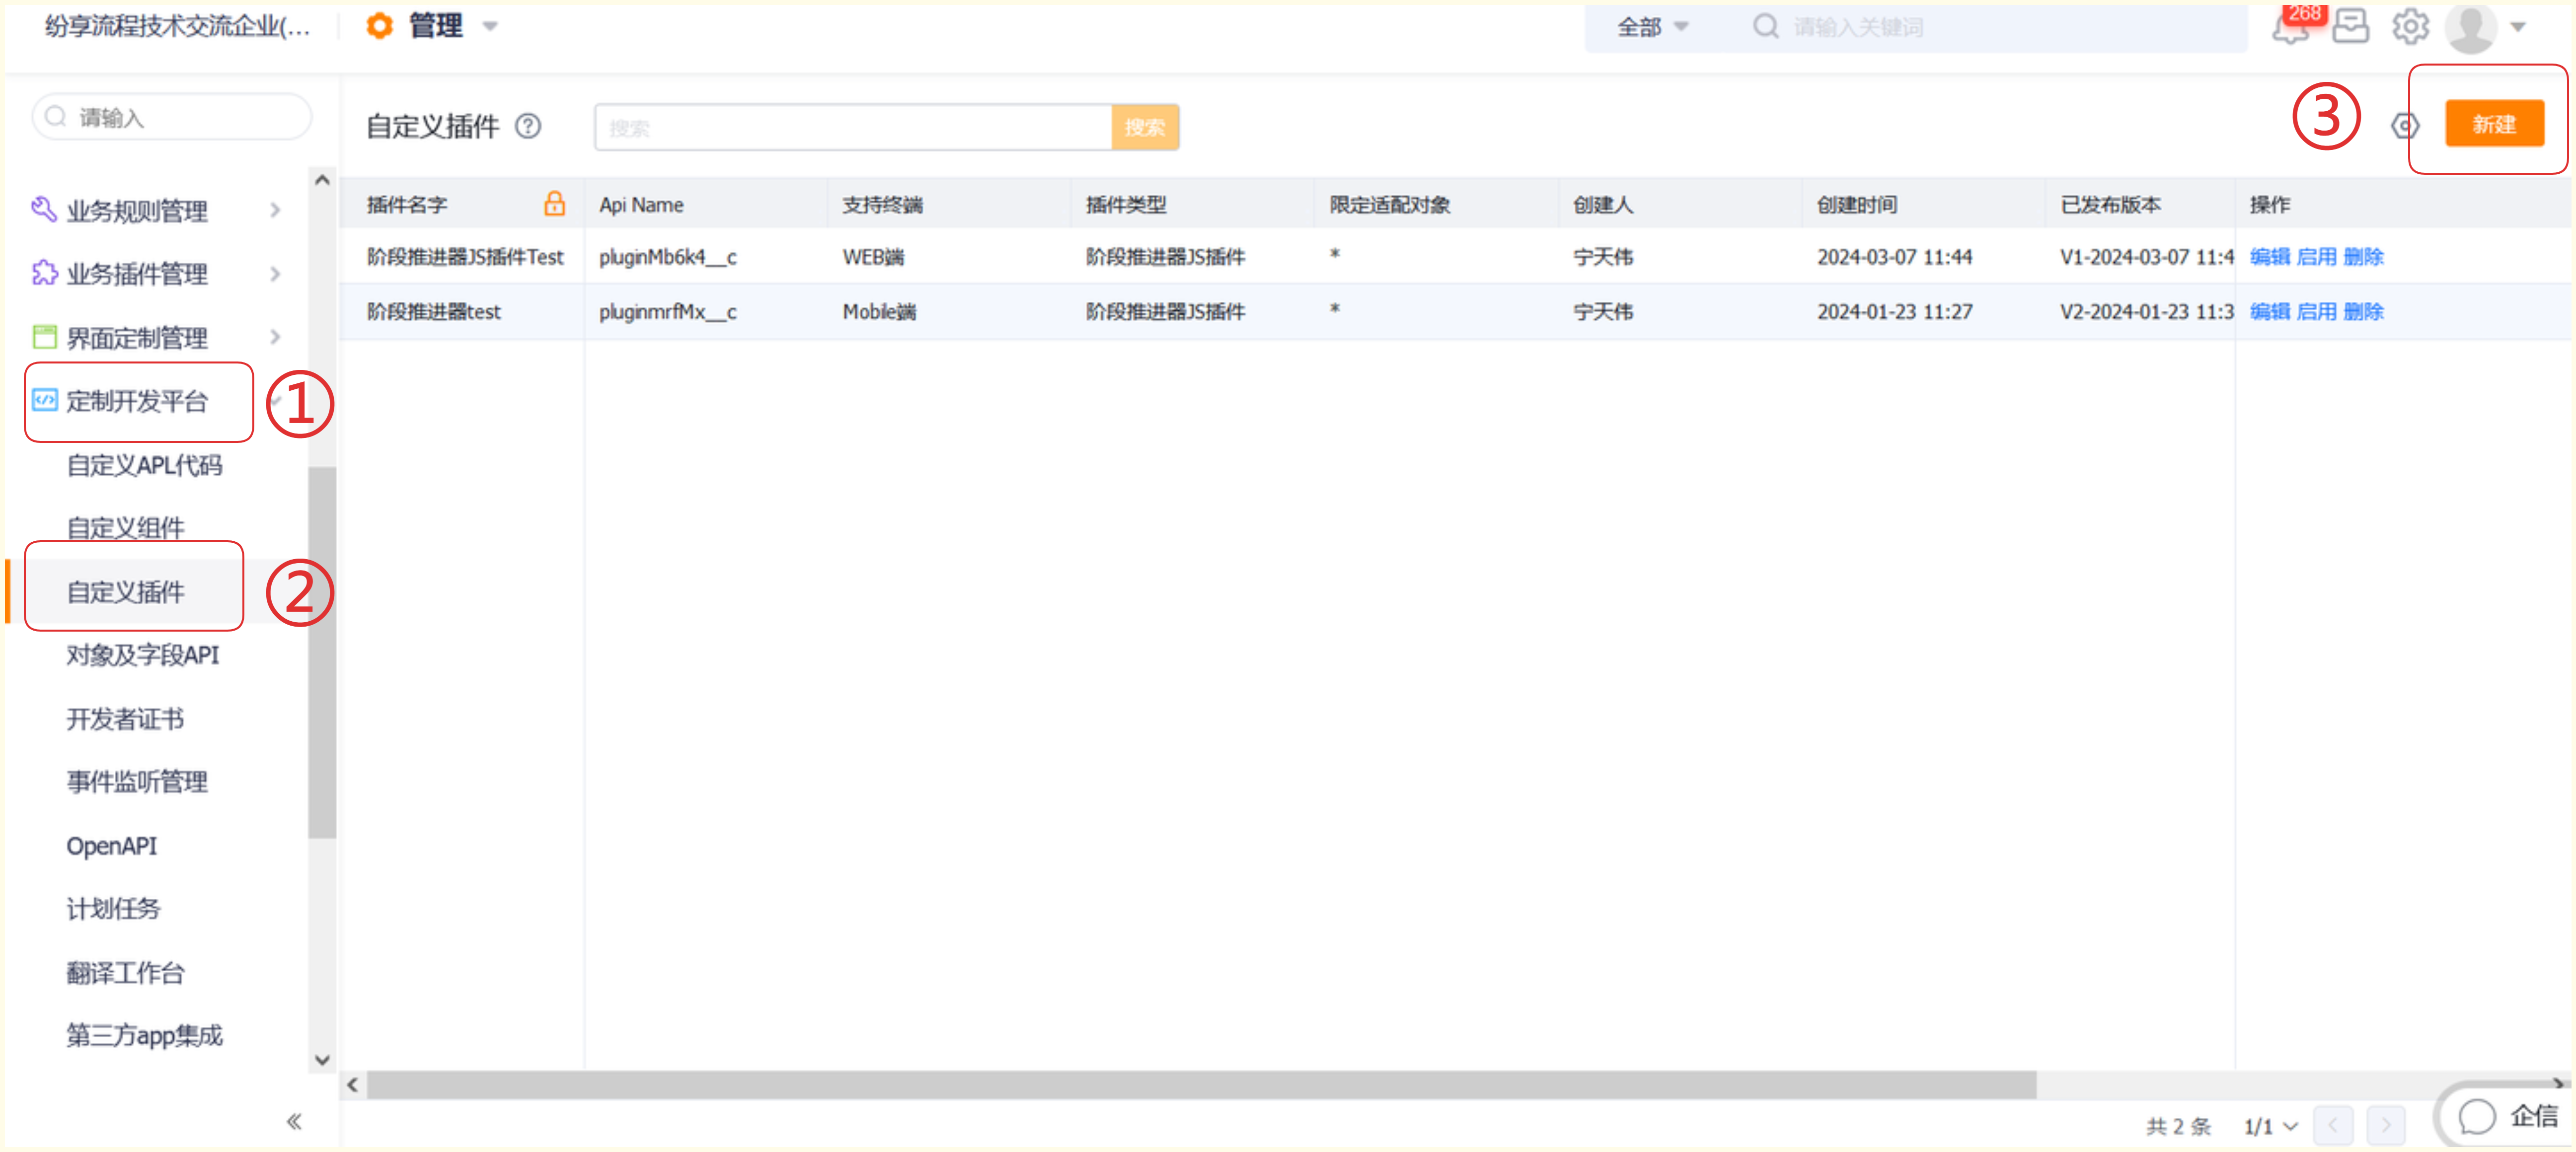
When you want to configure a plugin for the approval detail page, first go to Admin Console > Custom Development Tools, find Custom Plugins, and click New.
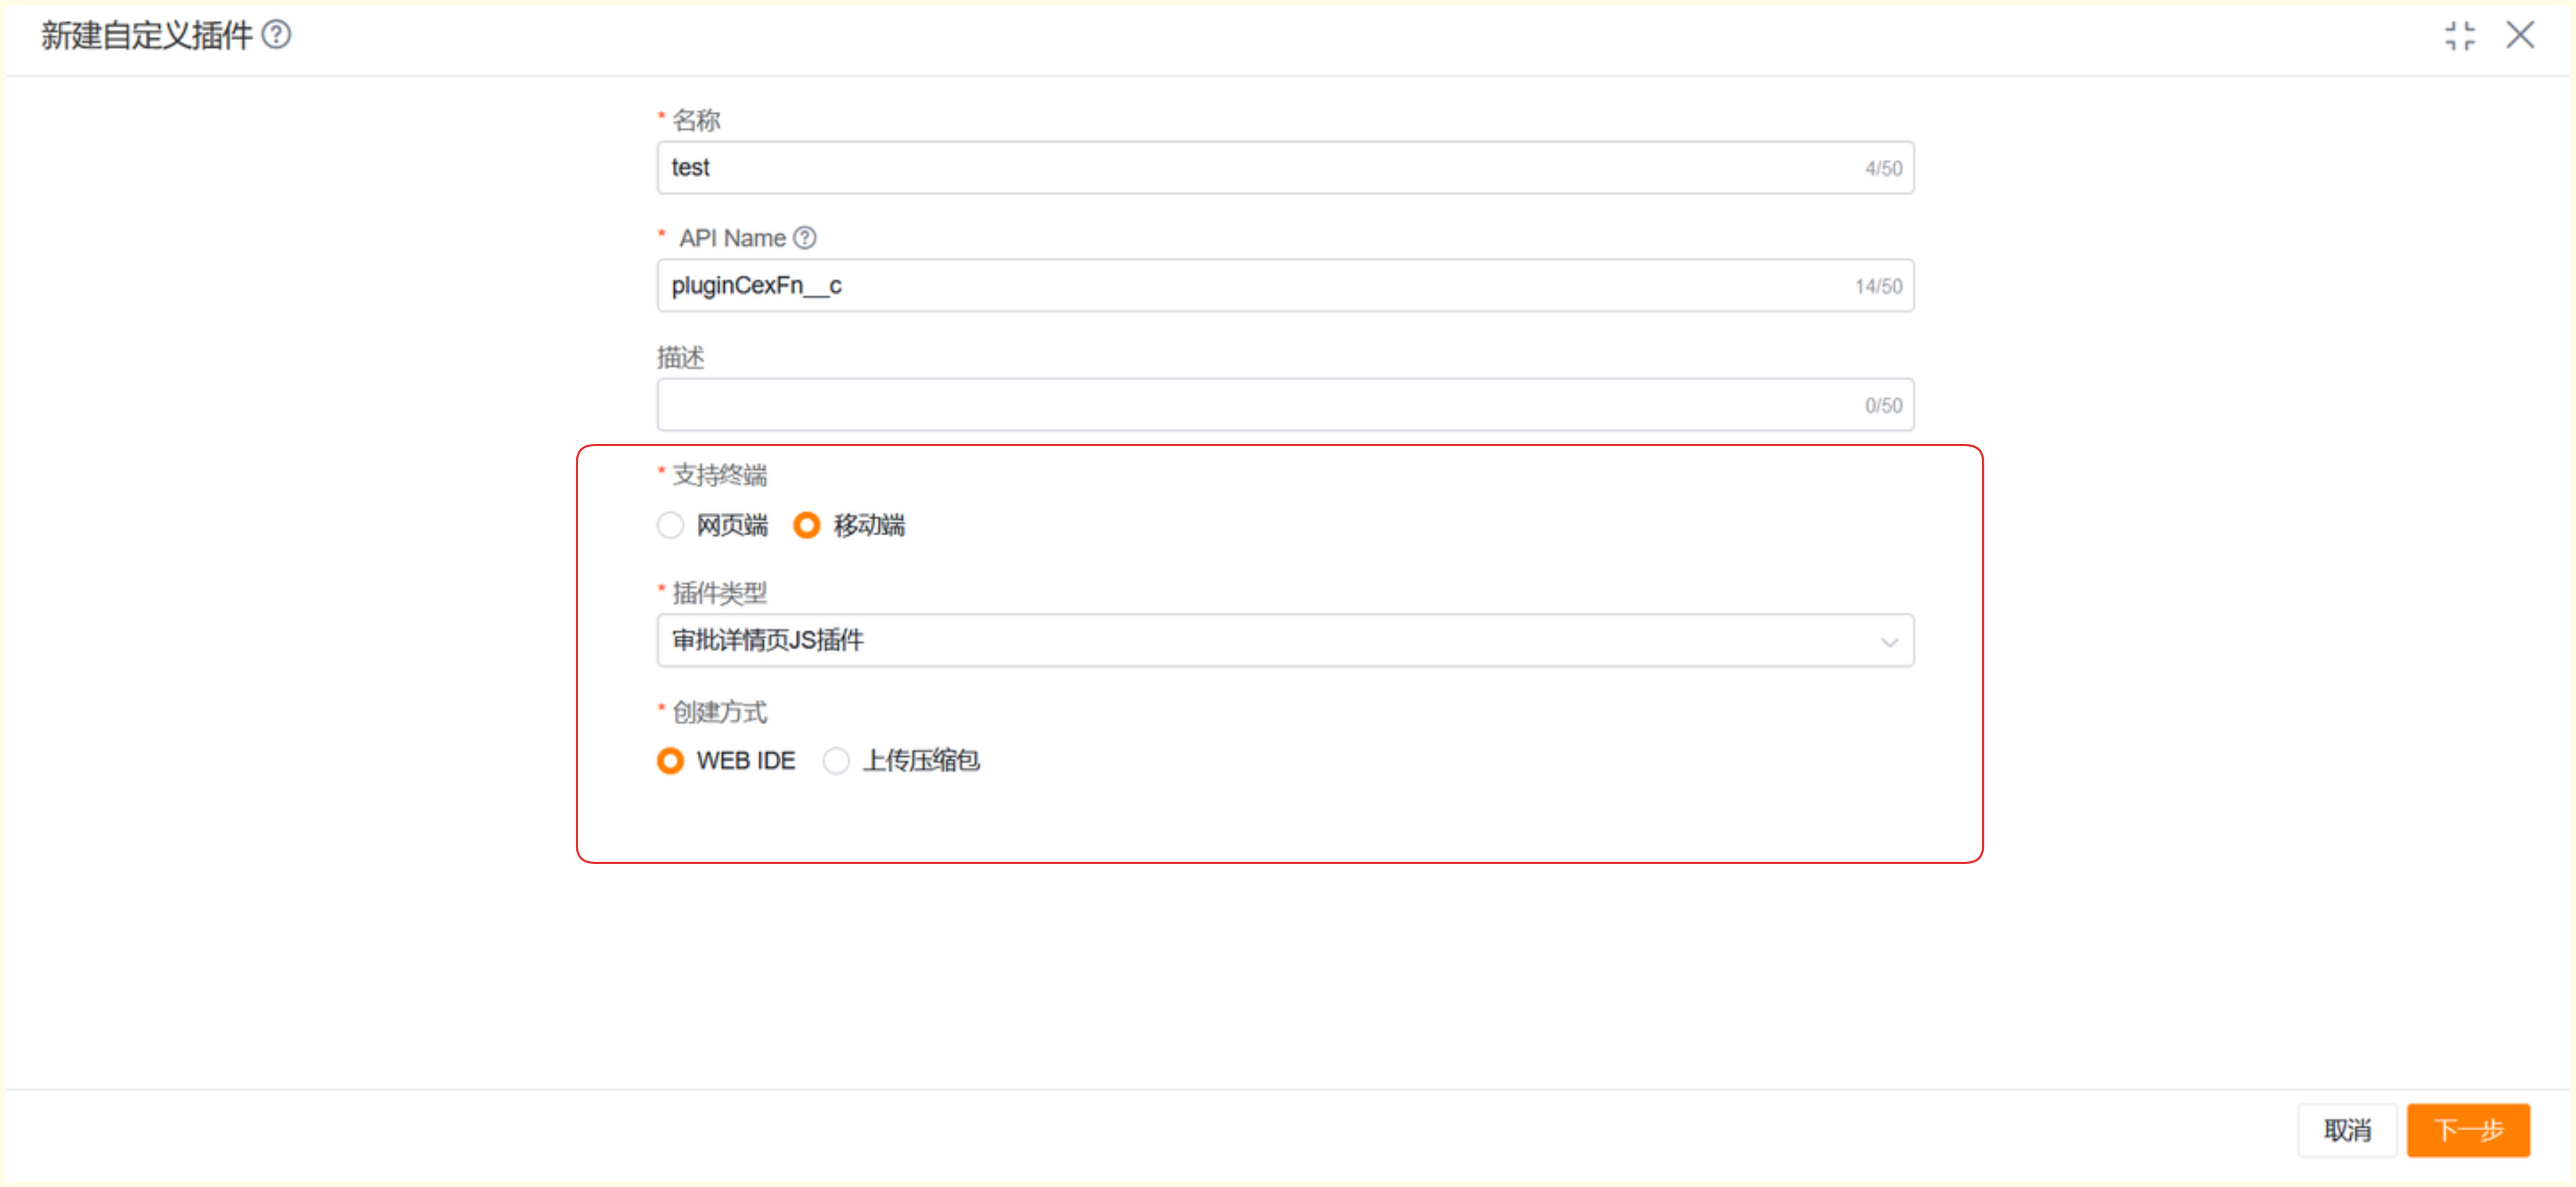
Configure the basic information of the plugin. Pay attention to selecting the supported terminal type and the plugin type you need. For example, if you want to use the Approval To-Do List JS plugin, select that type. On mobile, in addition to writing the plugin through the WEB IDE, you can also configure it by uploading a ZIP package. Here, WEB IDE creation is used as the example.
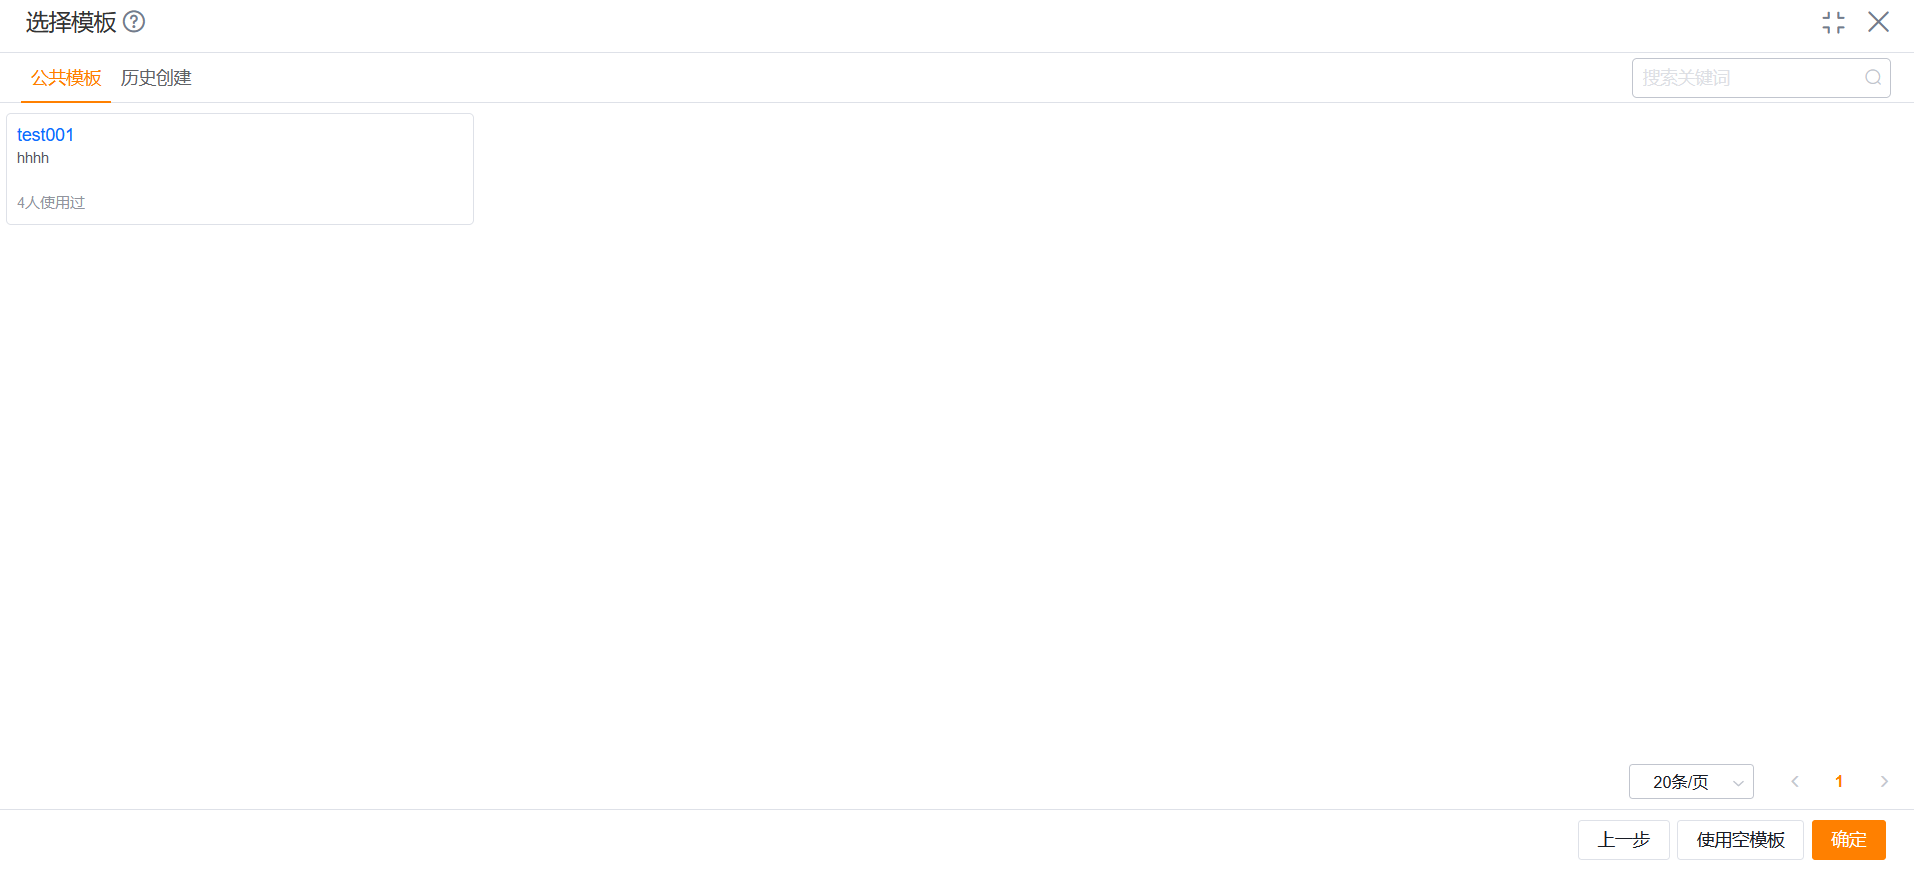
After configuring the basic plugin information, you can choose Public Template, History Template, or Use Empty Template. Both Public Template and History Template are previously created templates. You can select one and make simple modifications according to your needs. If you choose Use Empty Template, you will need to write the plugin content yourself.
As shown below, write the plugin content and specify the plugin entry, for example:
plugins/testplugin.js. After configuration, click Save or Publish.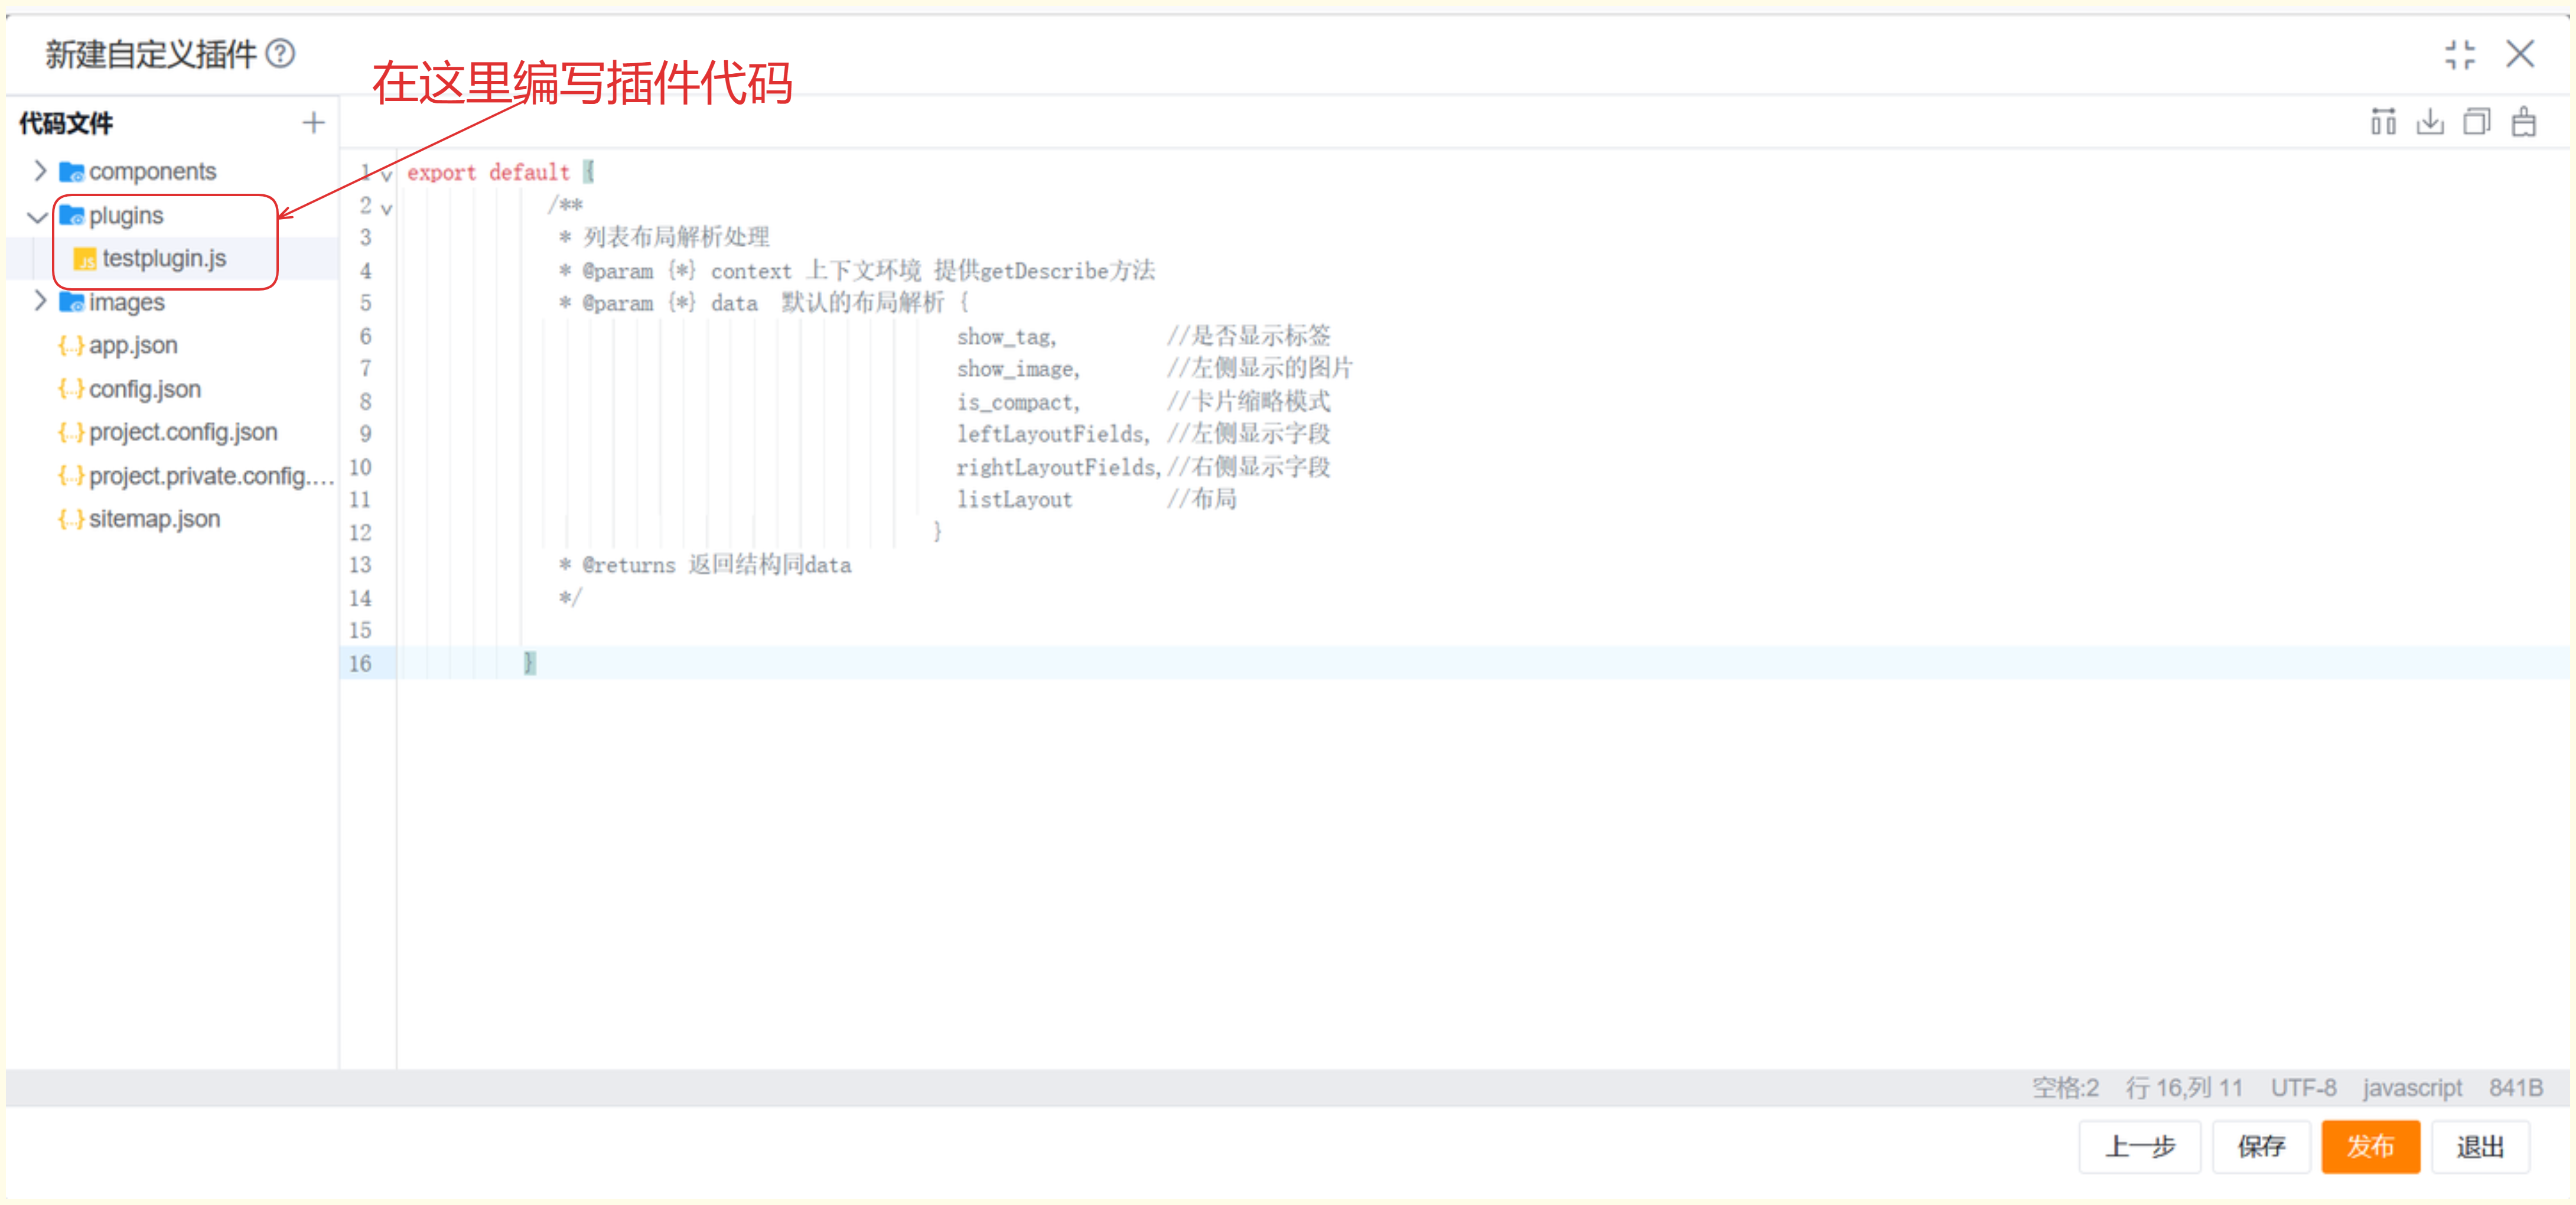

After the plugin is written, go to Advanced Configuration of the corresponding workflow, find Custom Plugin Configuration, and select the plugin you want to use.

Simple Requirement Description
- Suppose there is a requirement to hide the after-add-sign feature when filling in an approval opinion. In this case, the Approval Detail Page JS plugin can be used to implement the requirement.
Code Example
module.exports = function (context, pluginService, pluginParam) {
    return {
        apply() {
            let self = this;
            return [
                {
                    event: "flow.approval.opinion.page.render.before",
                    functional: async function (context, options) {
                        let arg = options && options.arg;
                        // isSupportAfterTag = false, hide the after-add-sign feature
                        arg.isSupportAfterTag = false;
                        return Promise.resolve({
                            arg: arg
                        });
                    }
                }
            ];
        }
    };
};
Result Display

Plugin Structure Description
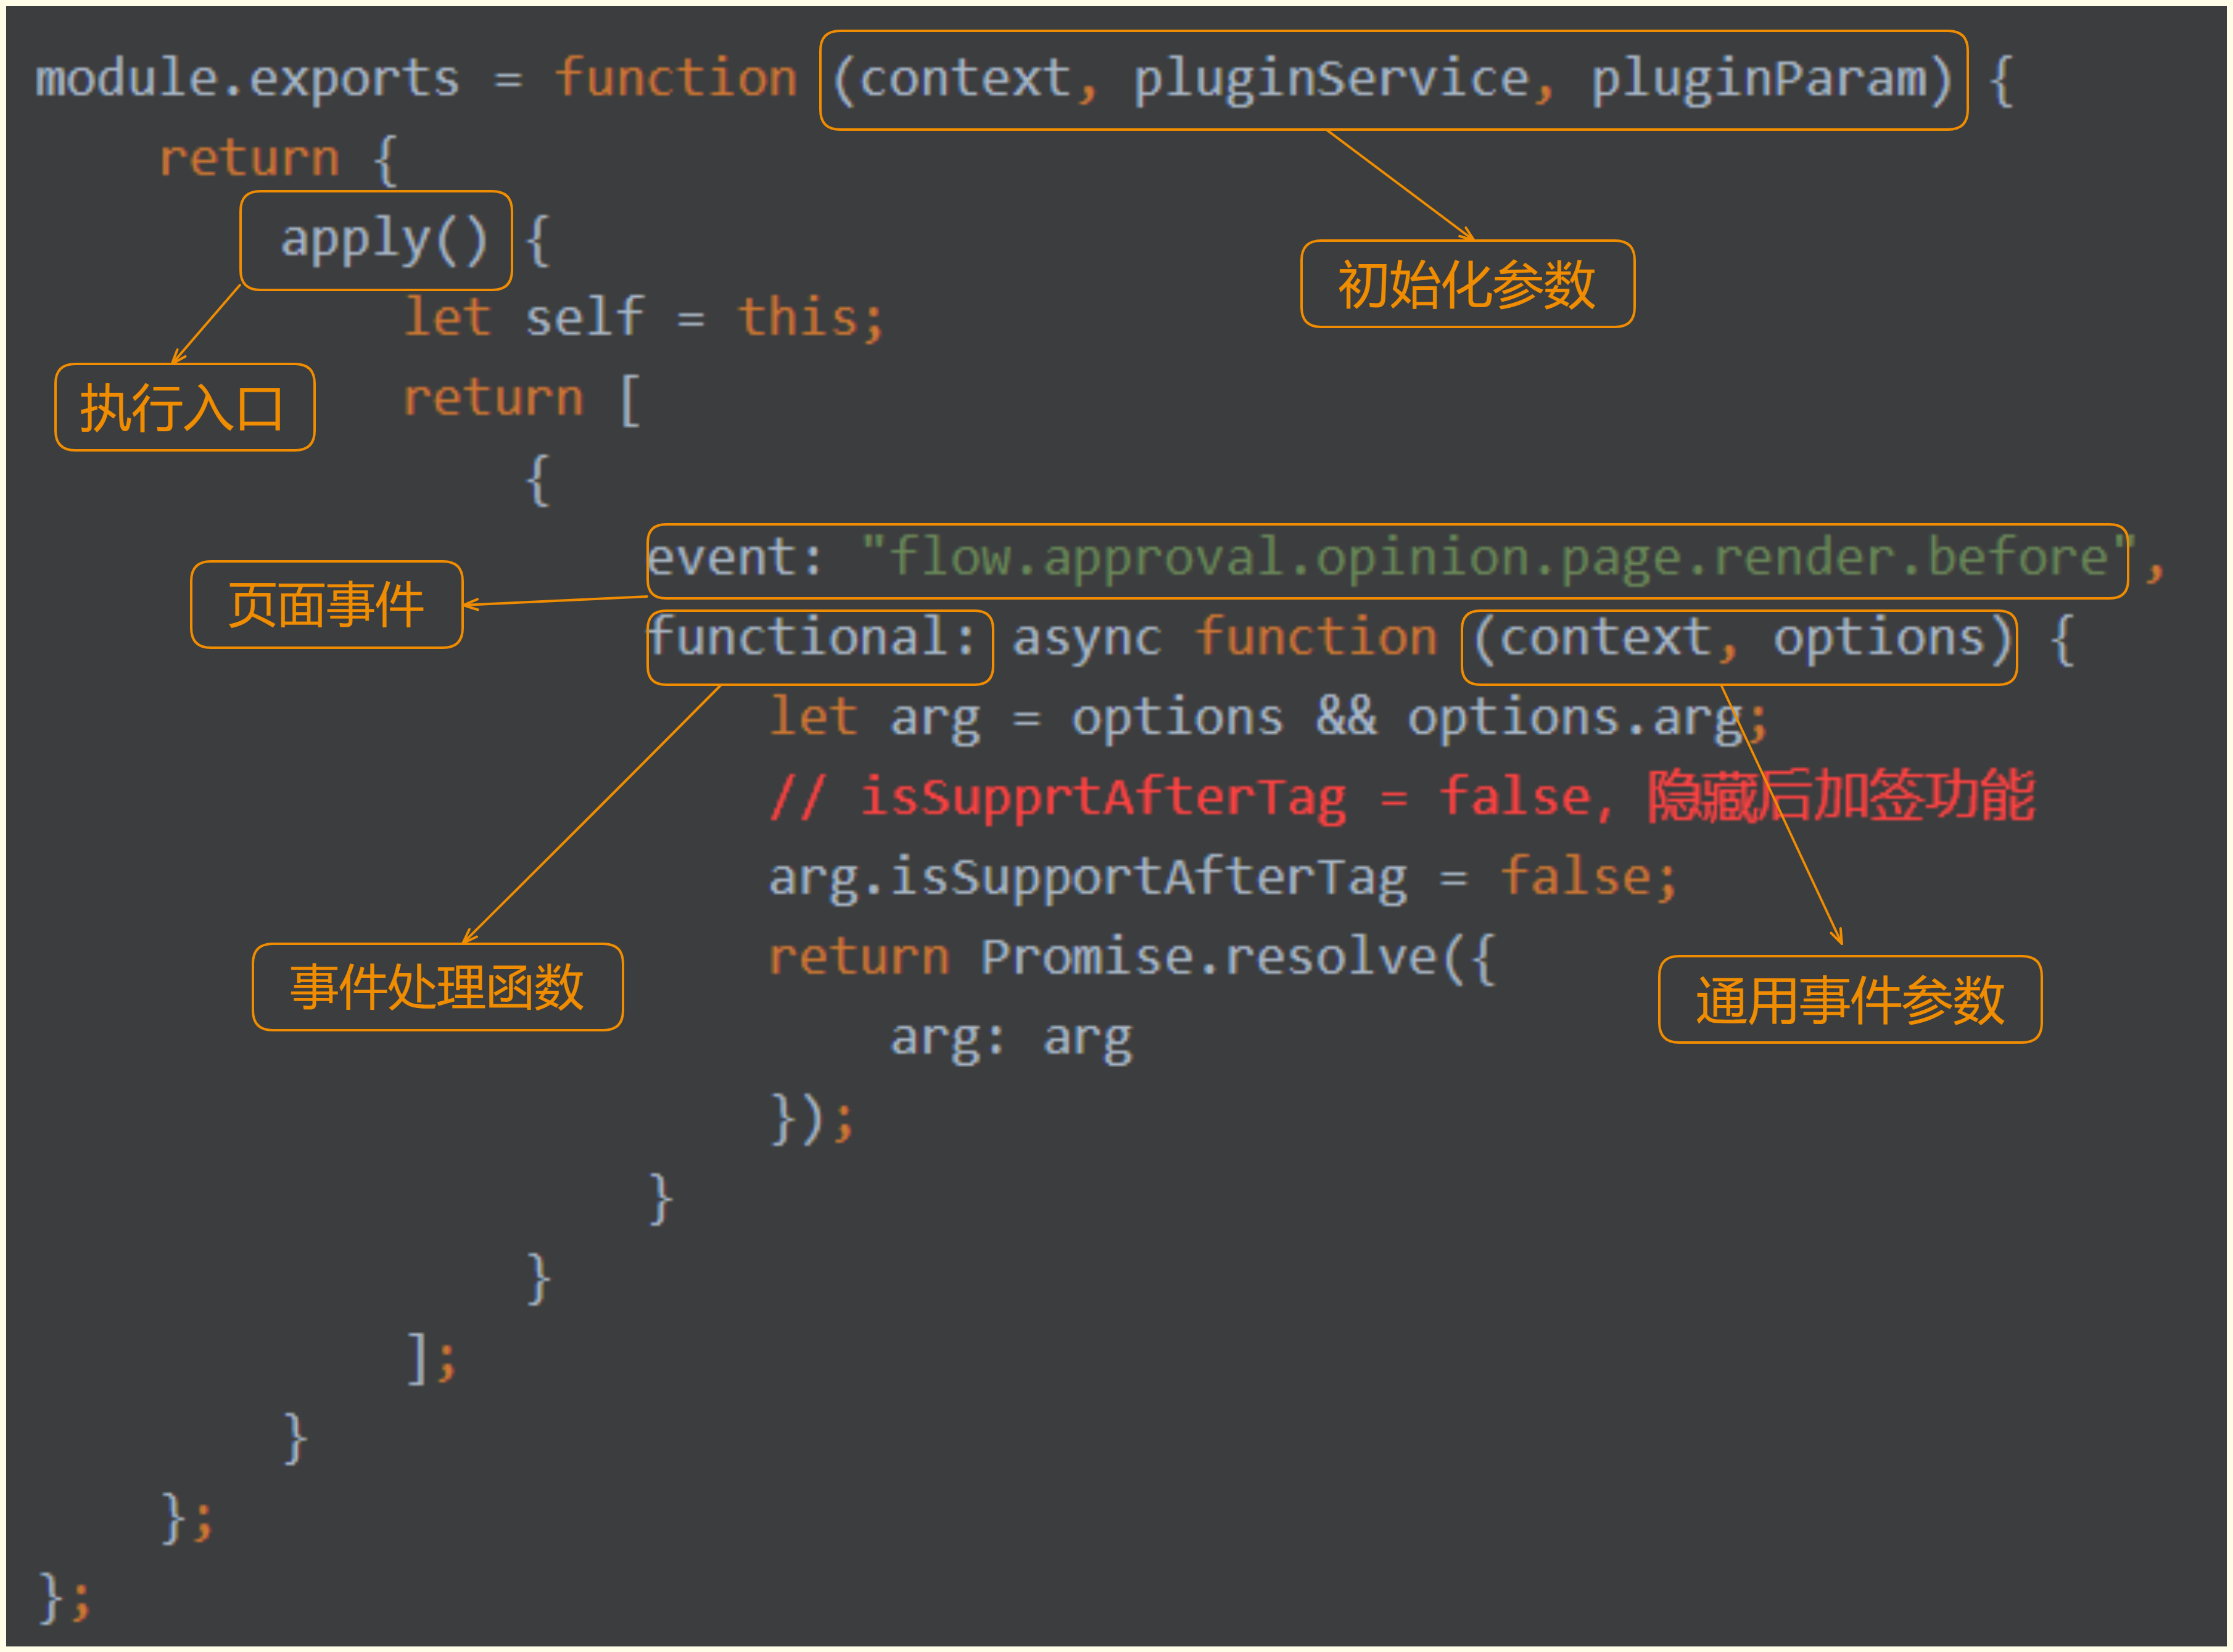
- The code is mainly implemented around
eventandfunctional. event: different requirements use different events. In the current example, the requirement is to hide the after-add-sign feature in the edit approval opinion dialog, so the chosen event is before the edit approval opinion dialog/page is rendered.functional: this is the handler function corresponding to the current event, that is, the specific functionality we need to implement. In this example, since we need to hide the after-add-sign feature, we modify the display behavior of that feature throughoptions.arg.isSupportAfterTag.