English
Quick Start
This page explains the configuration method, example scenarios, and basic implementation approach of the Stage View JS plugin.
Plugin Configuration Steps
Before using an example to get started quickly, you should first understand how the plugin is configured.
When you want to configure a stage view plugin, first go to Admin Console > Custom Development Tools, find Custom Plugins, and click New.
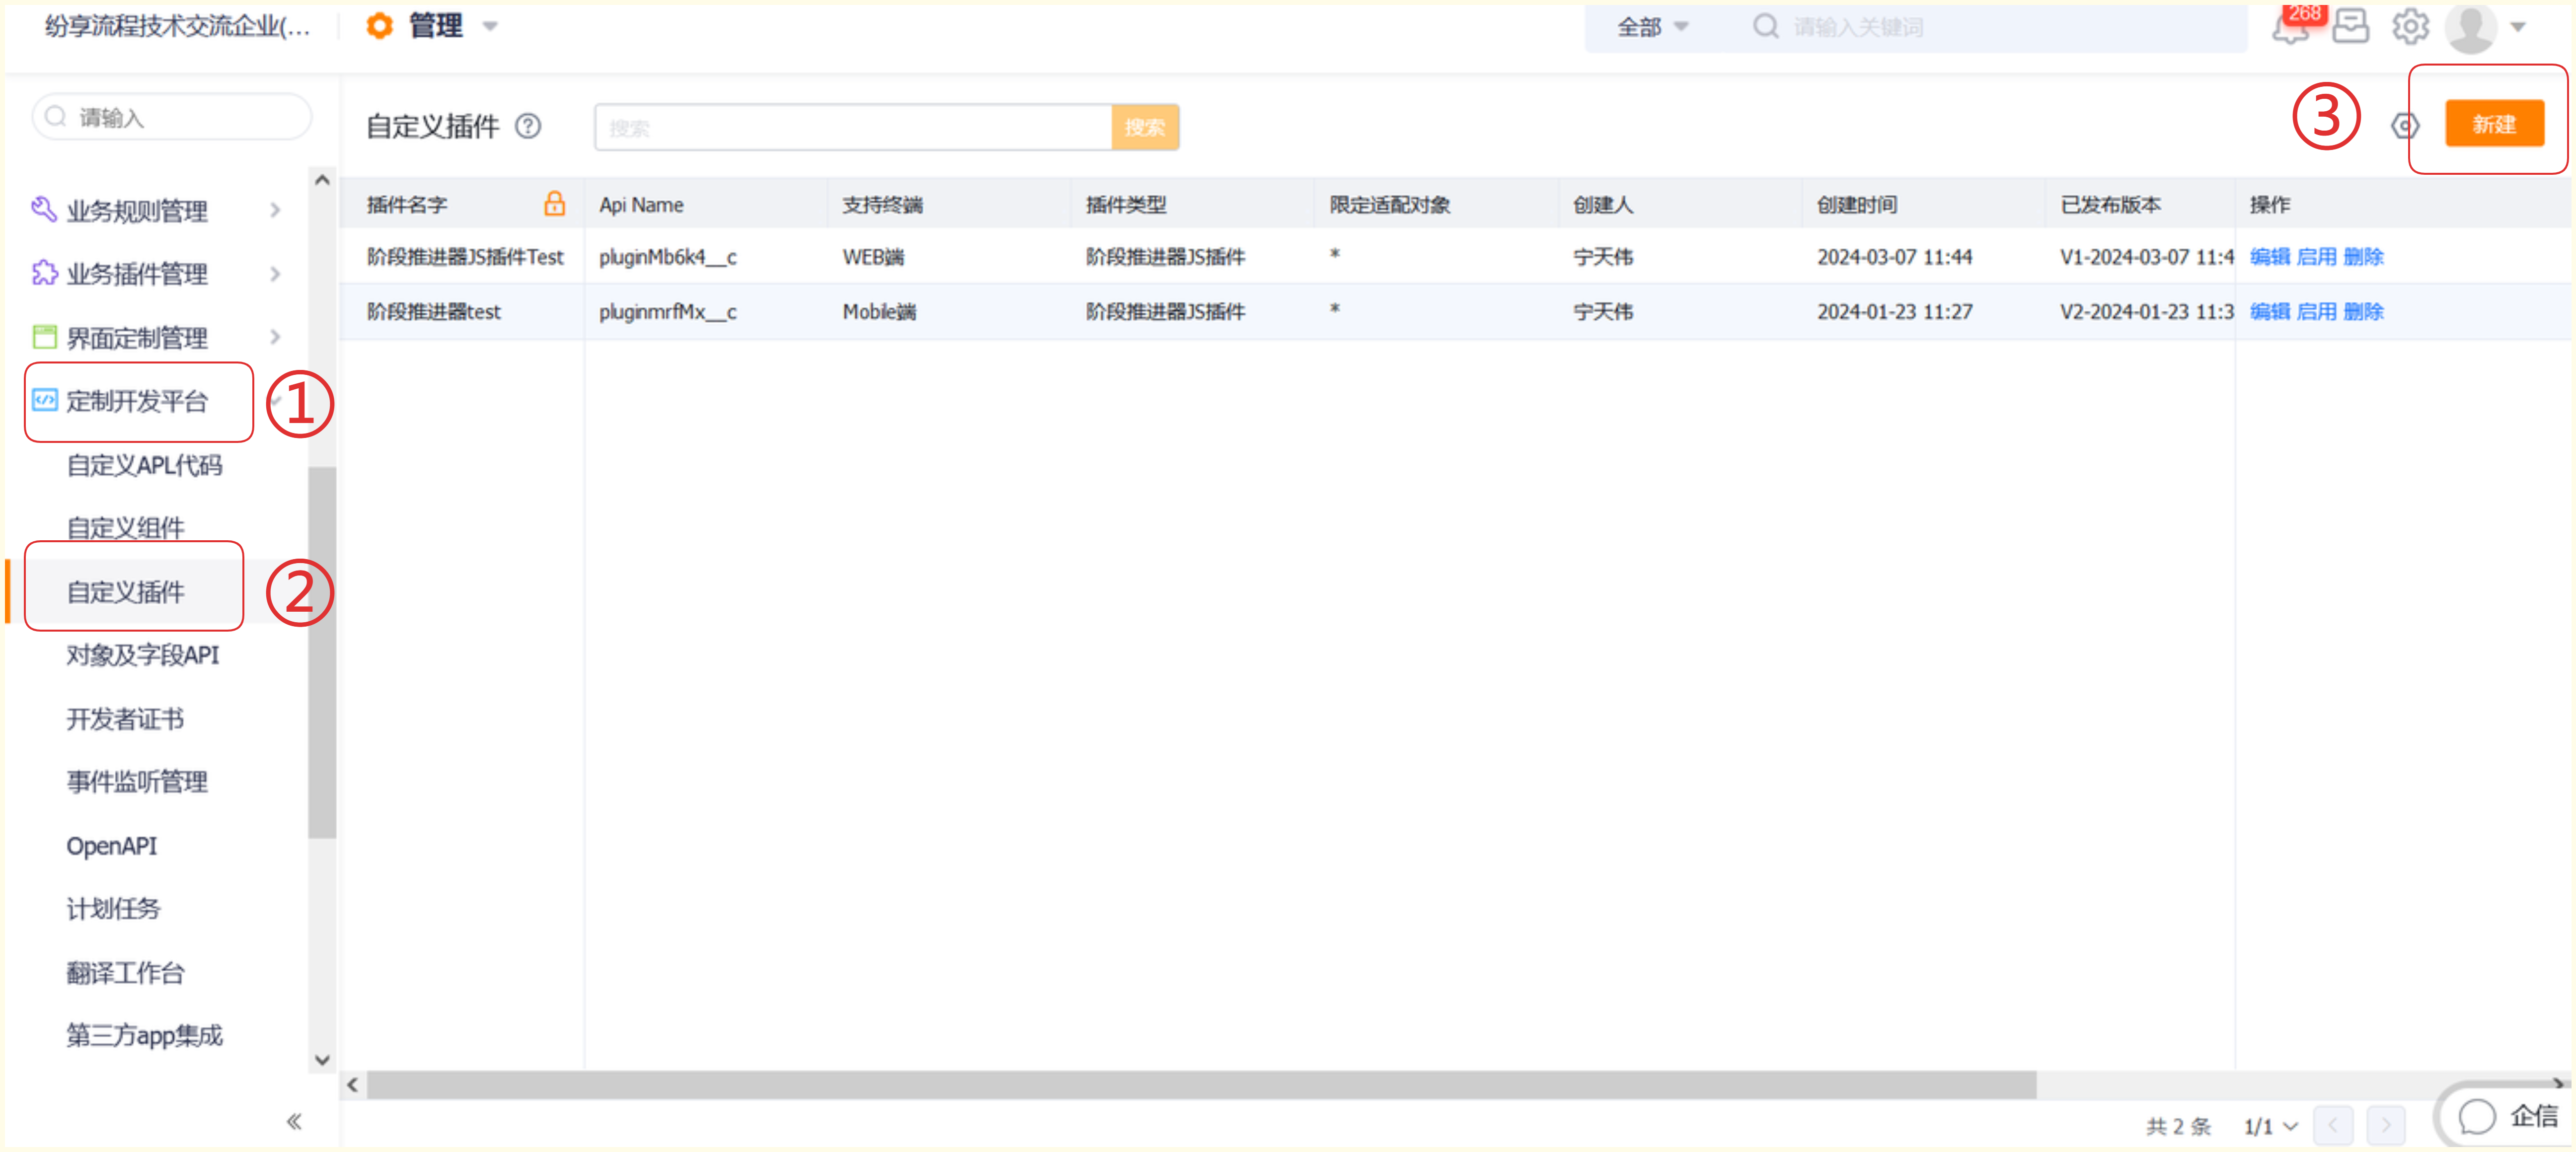
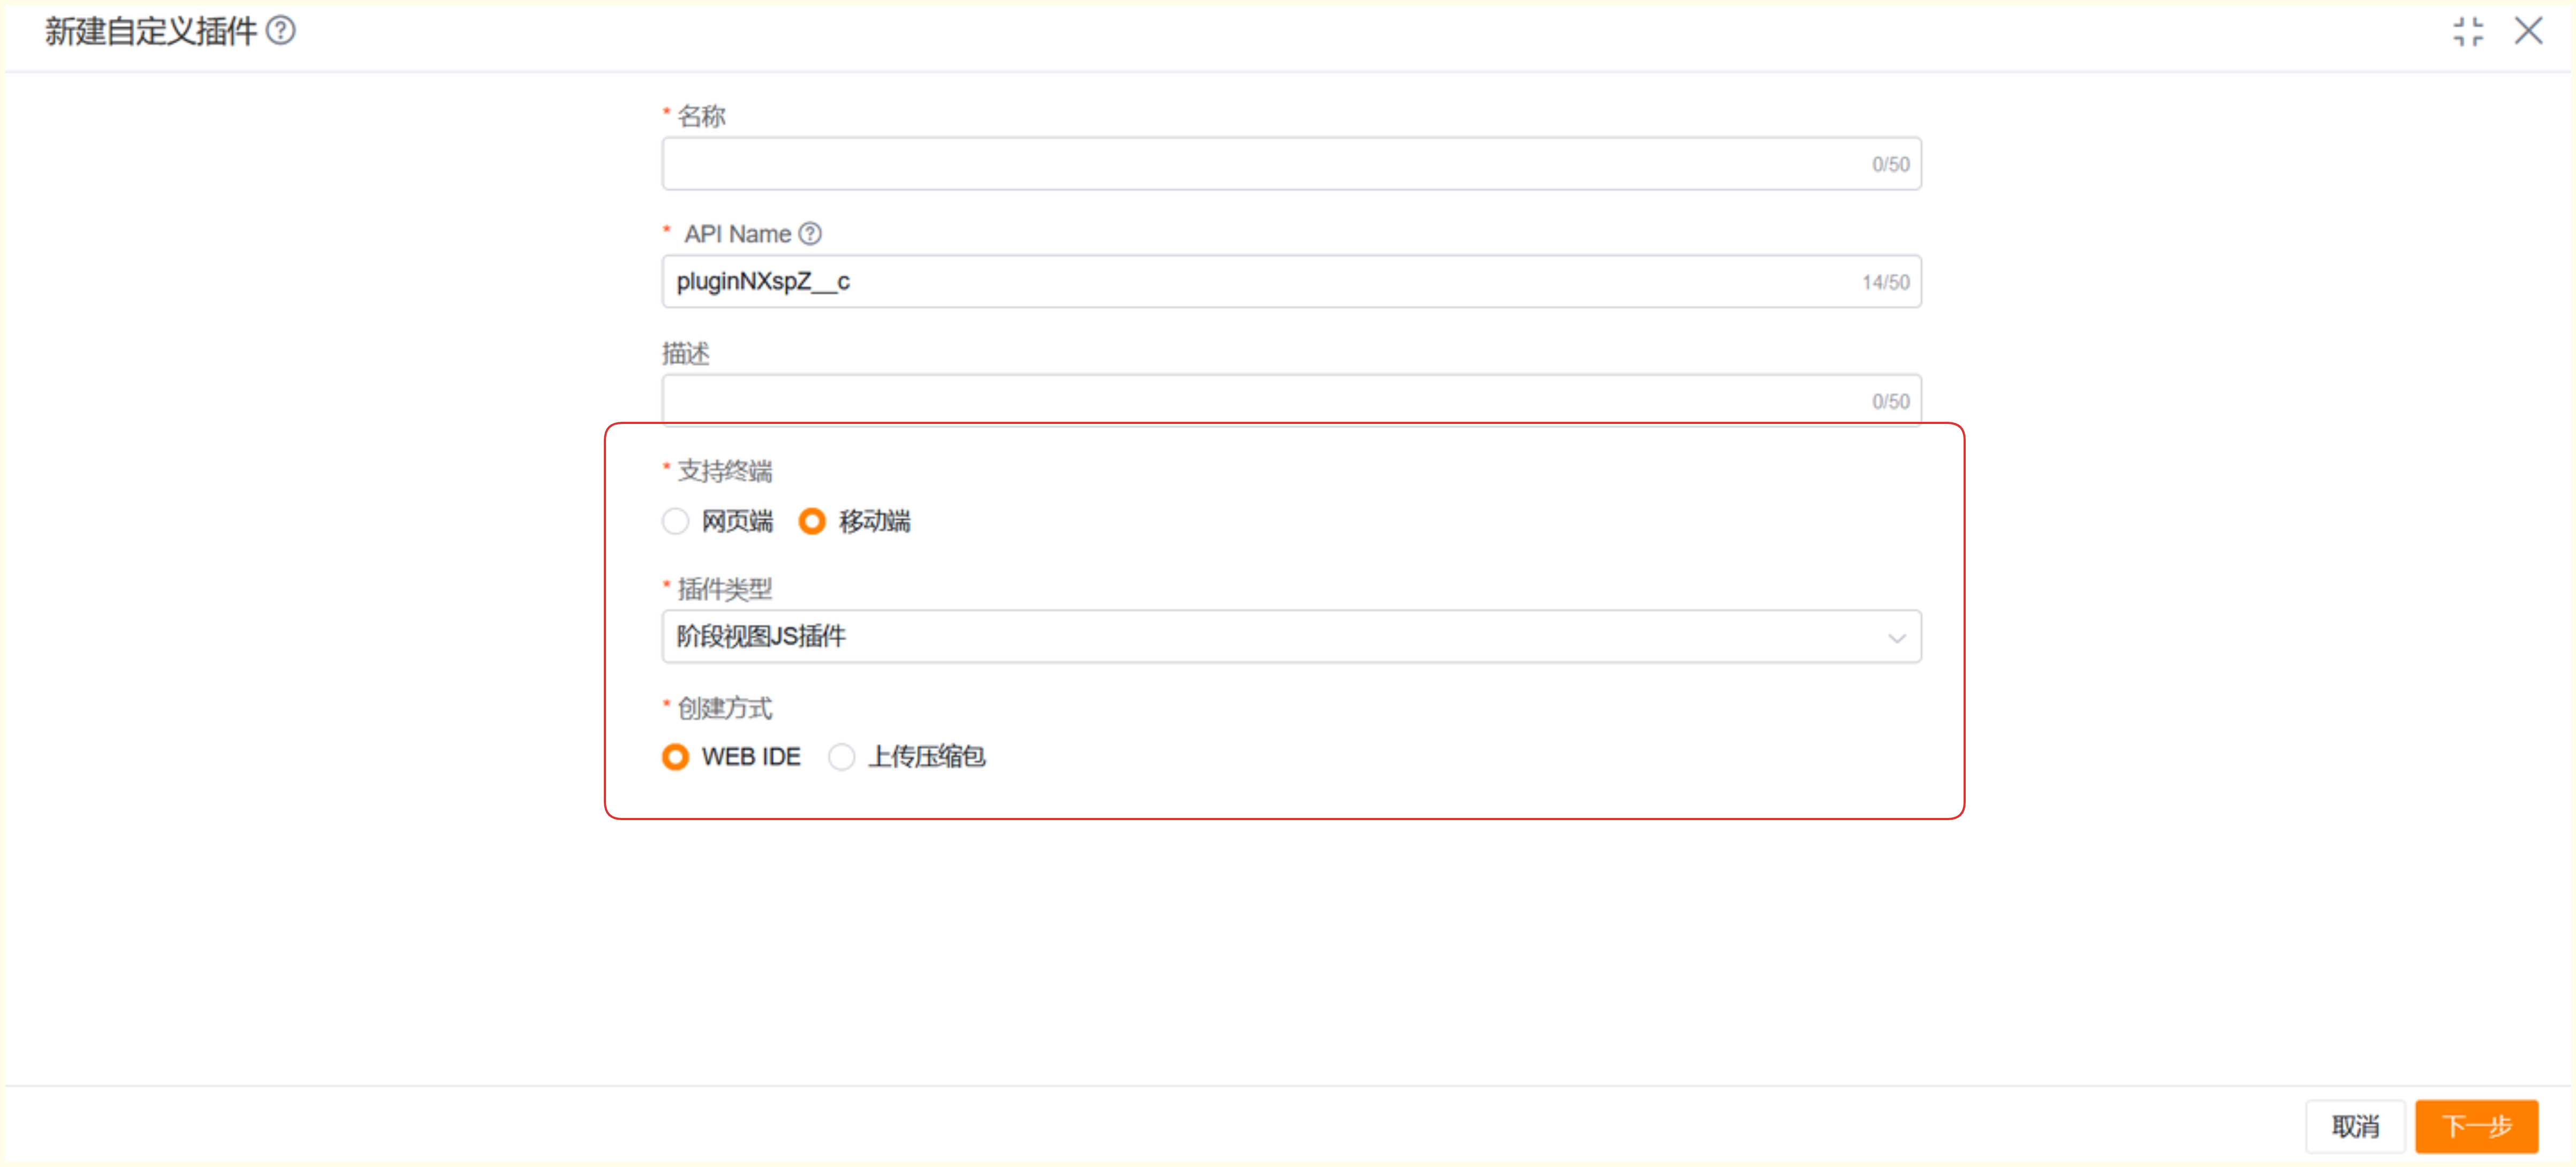
Configure the basic information of the plugin. Pay attention to selecting the supported terminal type and the plugin type you need. For example, if you want to use the Stage View JS plugin, select that type. On mobile, in addition to writing the plugin through the WEB IDE, you can also configure it by uploading a ZIP package. Here, WEB IDE creation is used as the example.
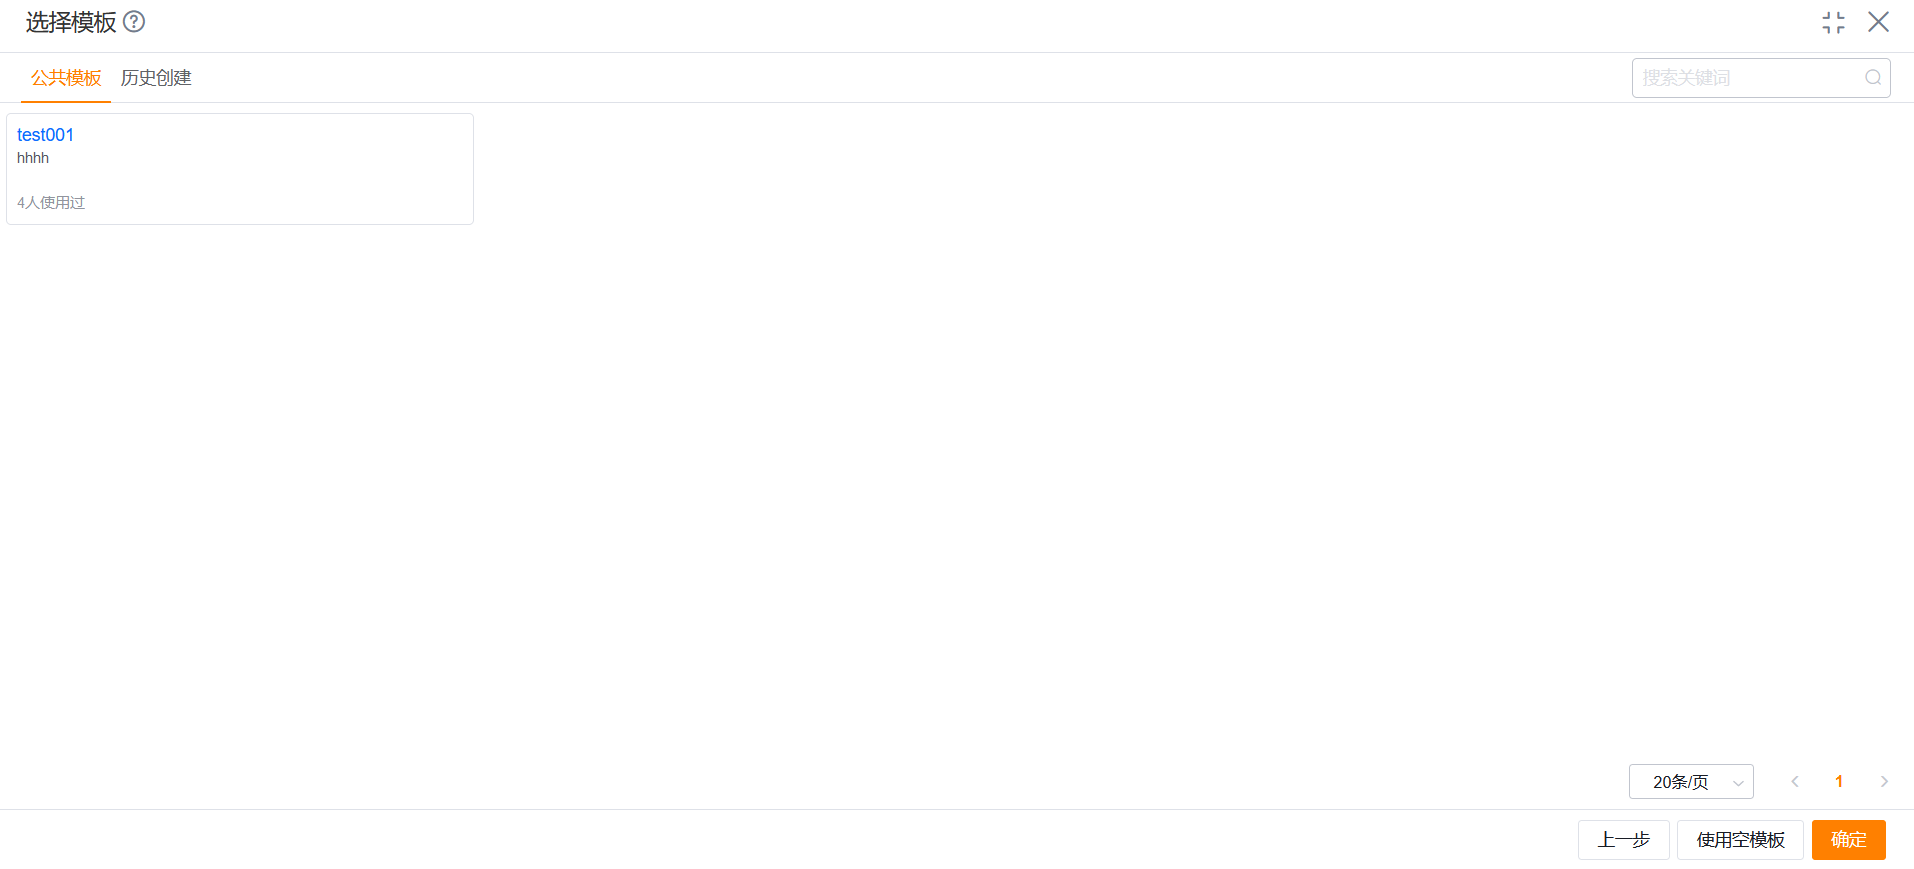
After configuring the basic plugin information, you can choose Public Template, History Template, or Use Empty Template. Both Public Template and History Template are previously created templates. You can select one and make simple modifications according to your needs. If you choose Use Empty Template, you will need to write the plugin content yourself.
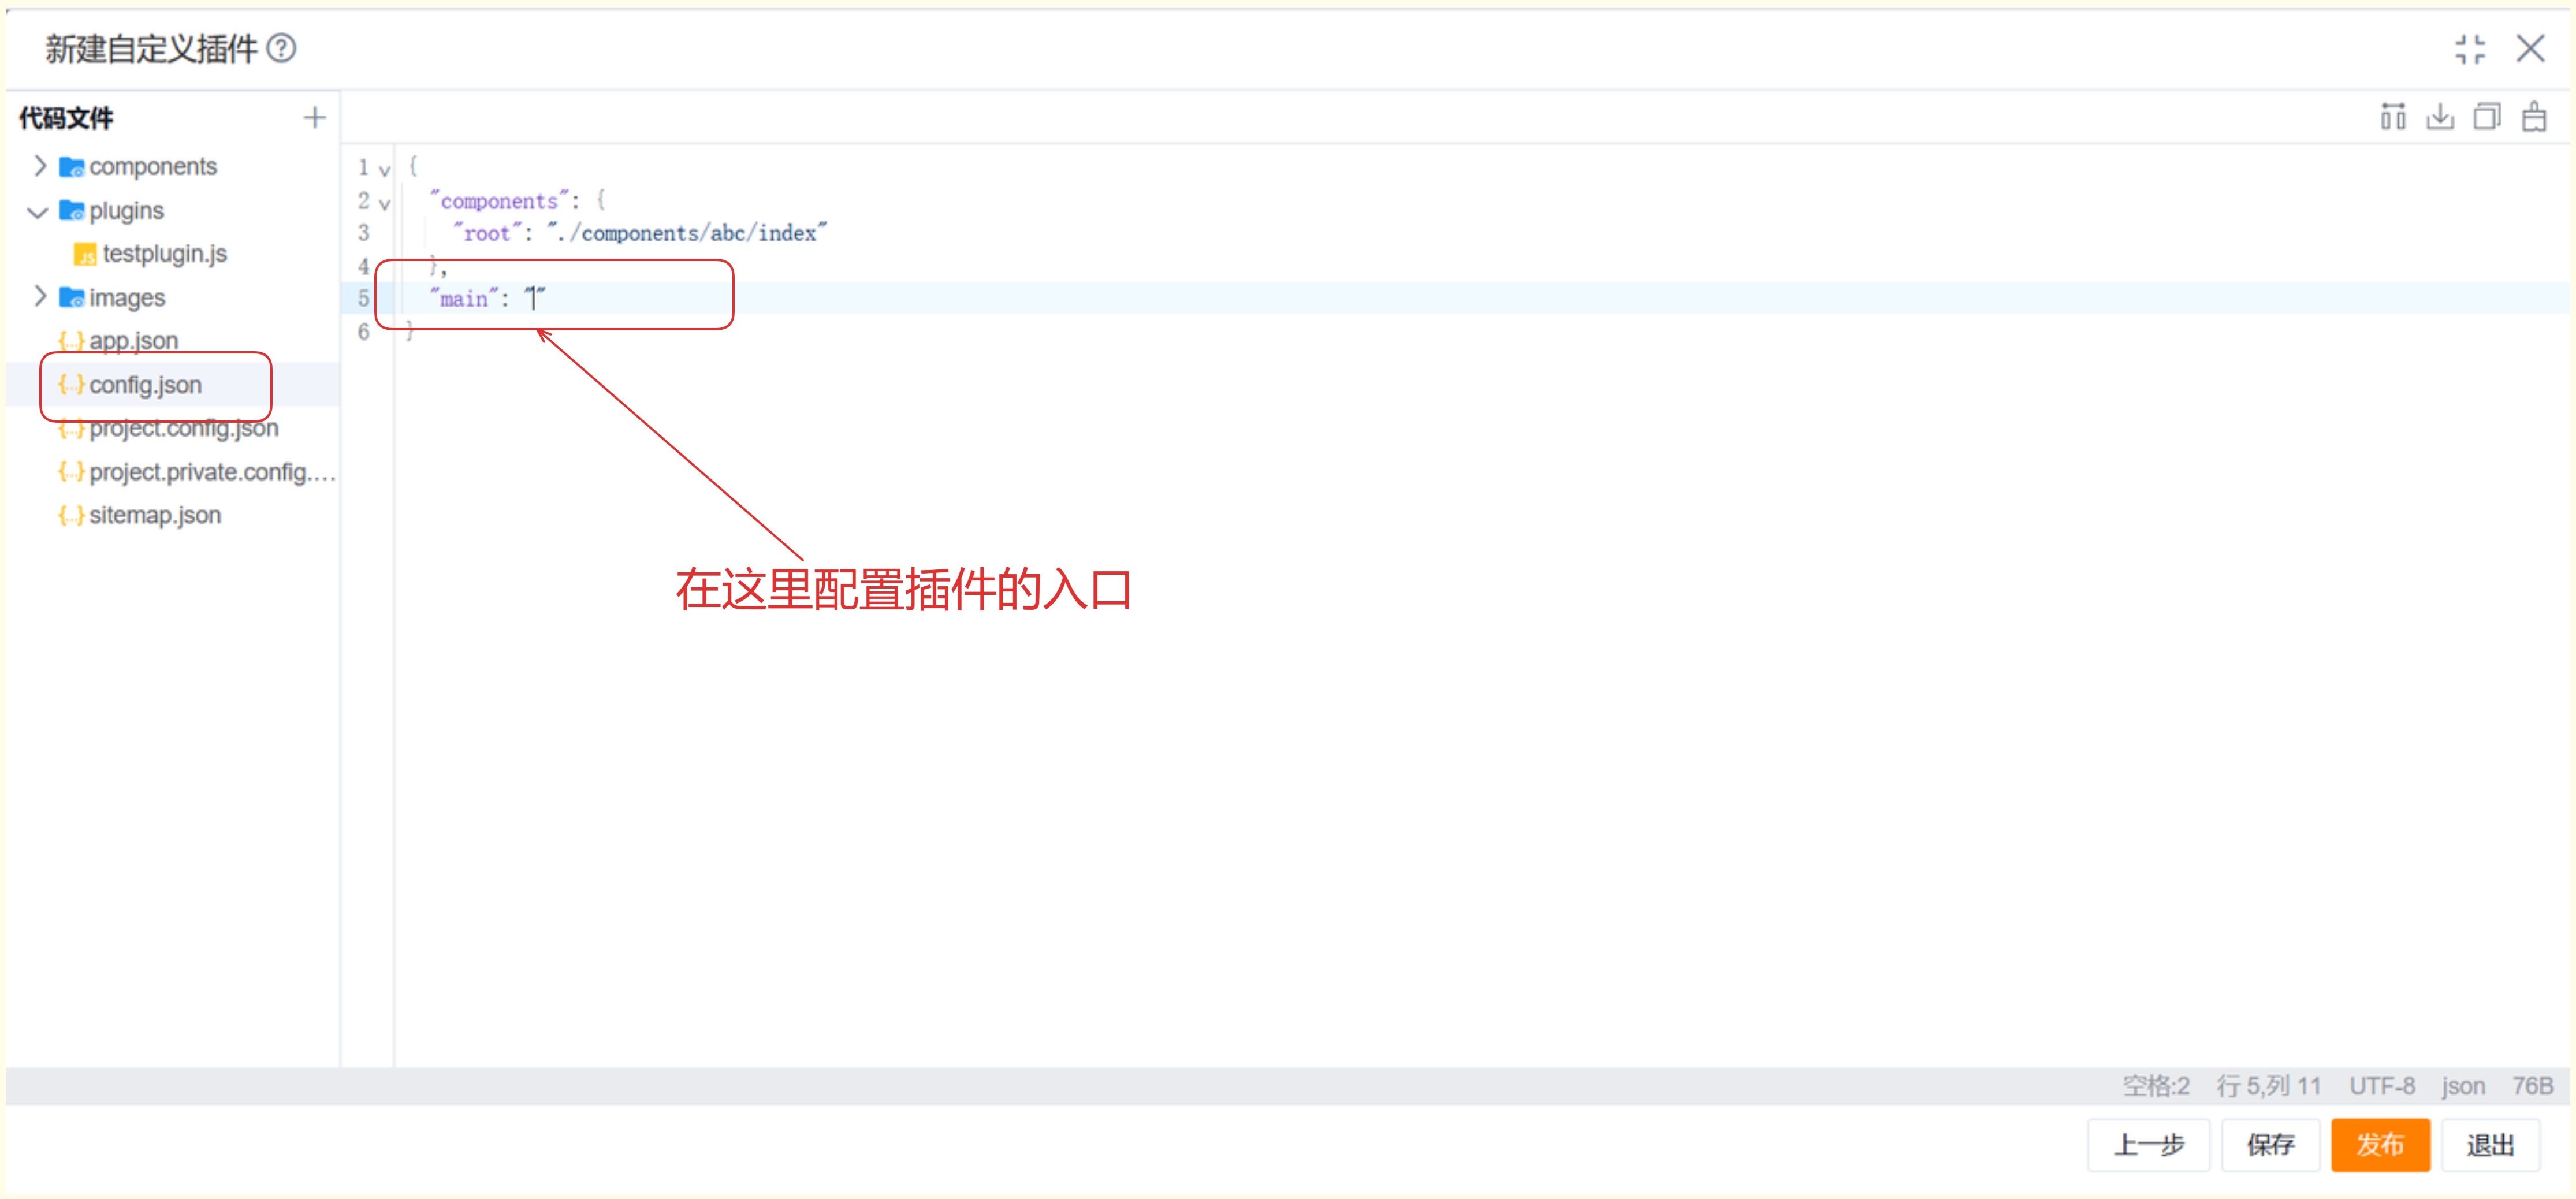
As shown below, write the plugin content and specify the plugin entry, for example:
plugins/testplugin.js. After configuration, click Save or Publish.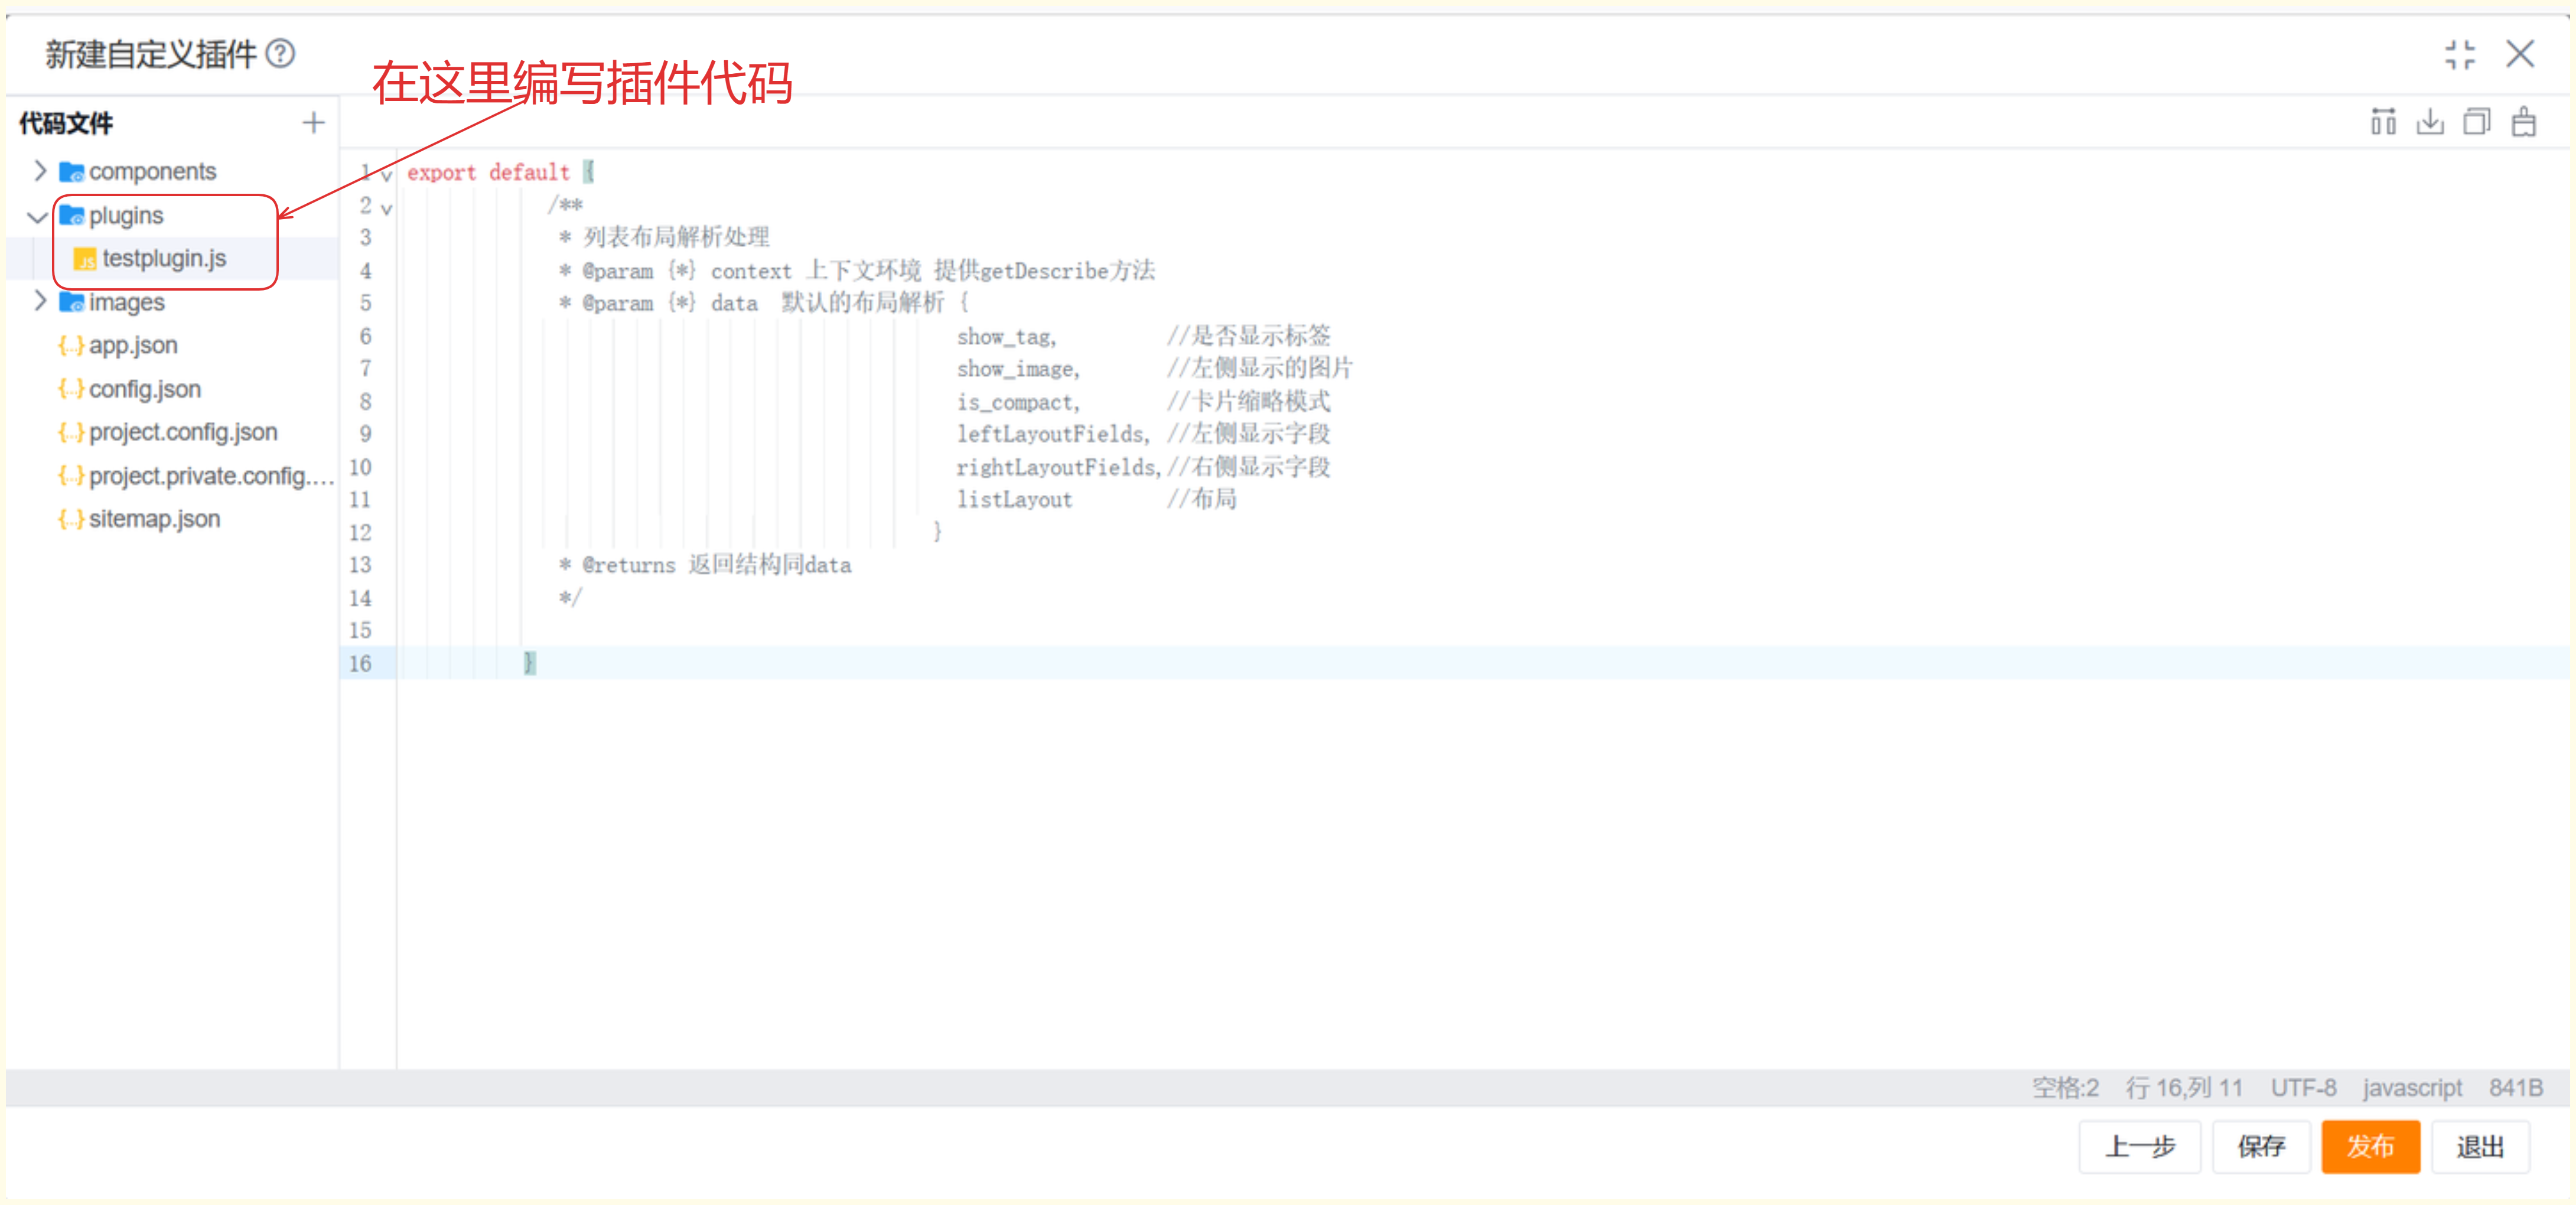
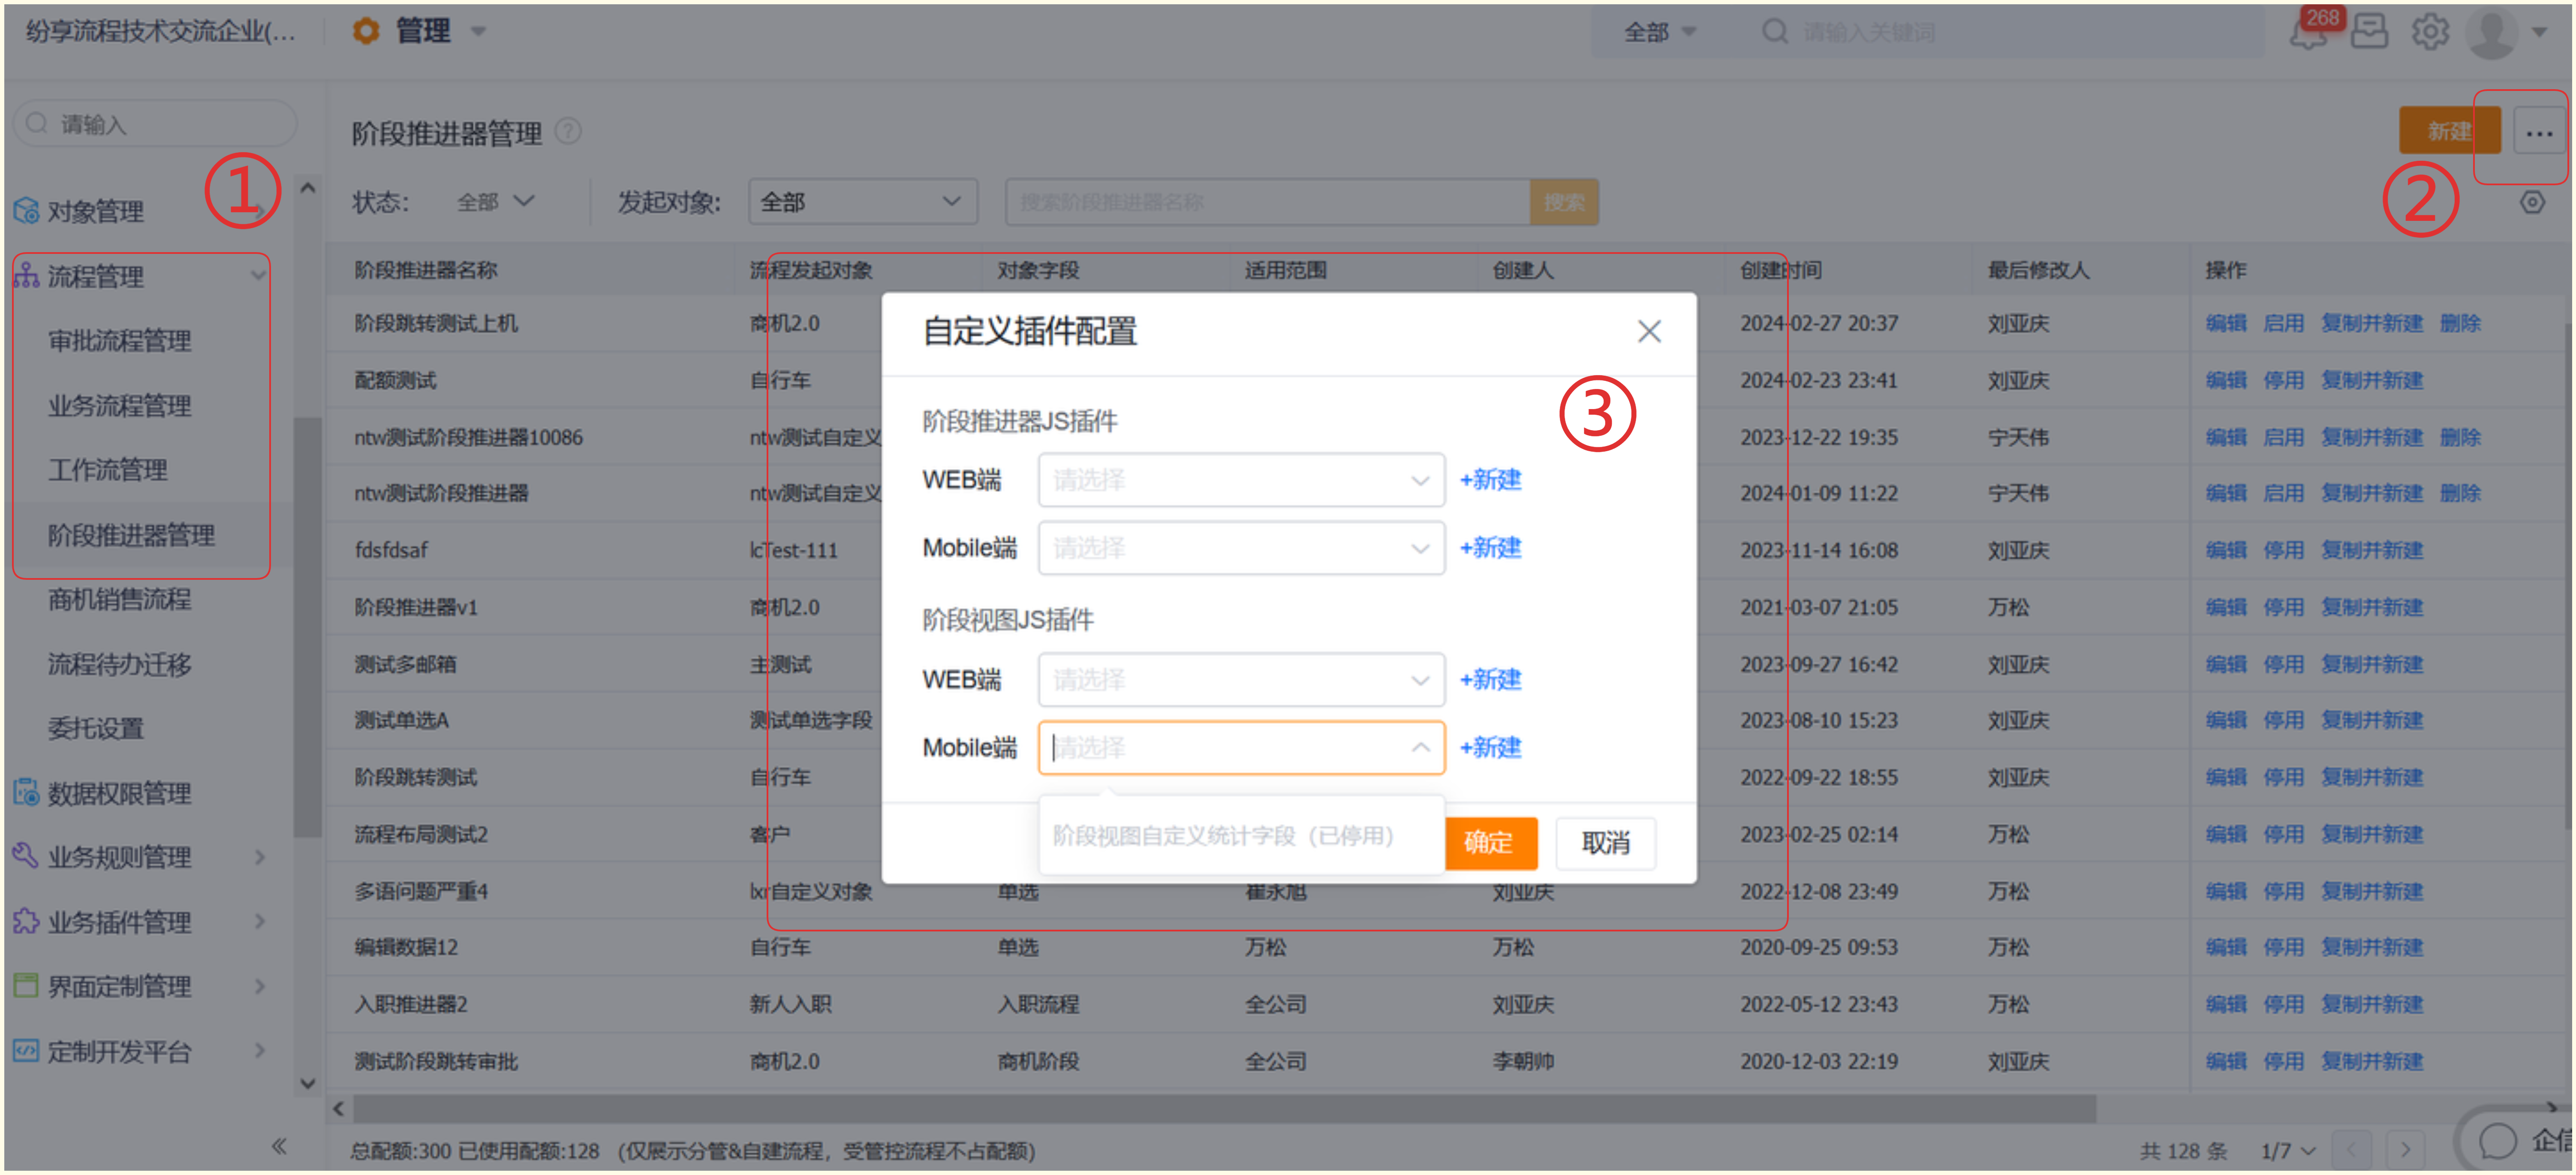
After the plugin is written, go to Advanced Configuration of the corresponding workflow, find Custom Plugin Configuration, and select the plugin you want to use.
Simple Requirement Description
- On the stage view page, if you want to customize the content display of the statistics field area in the stage view, you can implement it by using the Stage View JS plugin.
Code Example
customTotalInfo(params, context) {
console.error(params)
console.error(context)
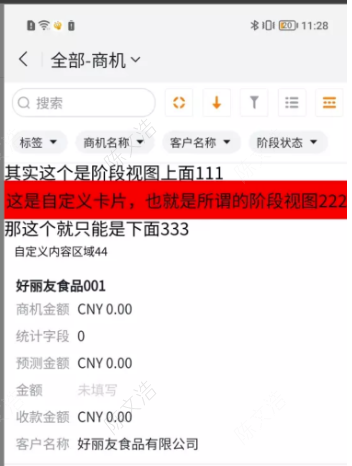
return 'Custom Content Area 44'
}Result Display
As shown below, after the plugin is configured, the statistics field area in the stage view displays Custom Content Area 44.