

简体中文
快速上手
本文通过一个商品详情页名称组件替换示例,介绍订货通商品详情 JS 插件的创建、配置和效果验证流程。
创建自定义插件
登录纷享销客的后台管理页面。
在左侧导航栏中点击 定制开发平台 -> 自定义插件,进入自定义插件管理页面。

点击 新建,填写 名称、支持终端和插件类型,点击 下一步,使用 空模板,新建代码文件并复制以下代码,选择 入口文件,点击 发布。
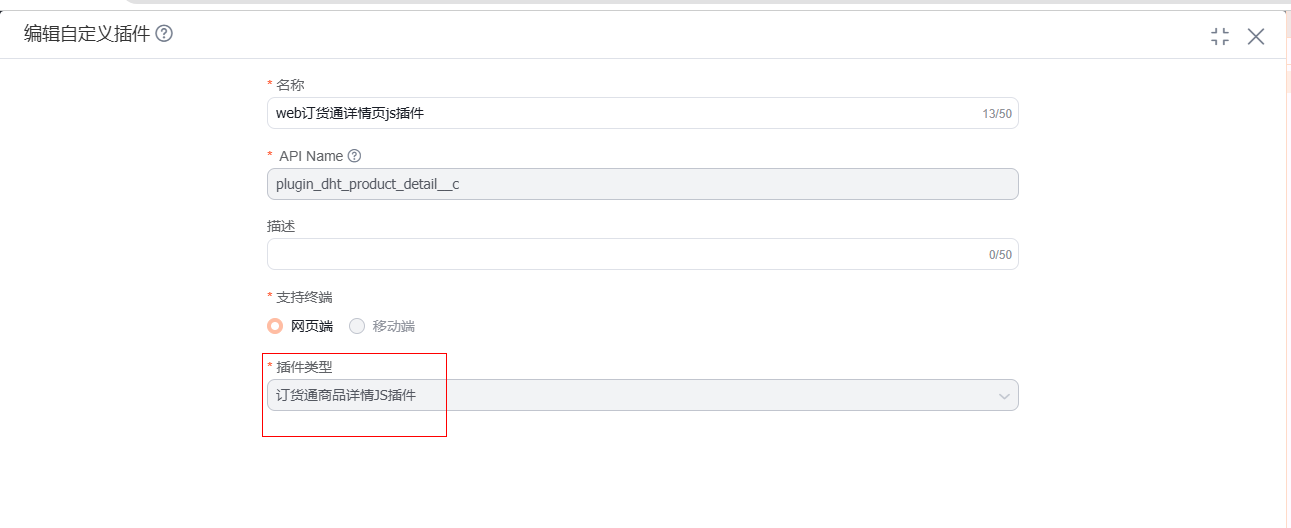
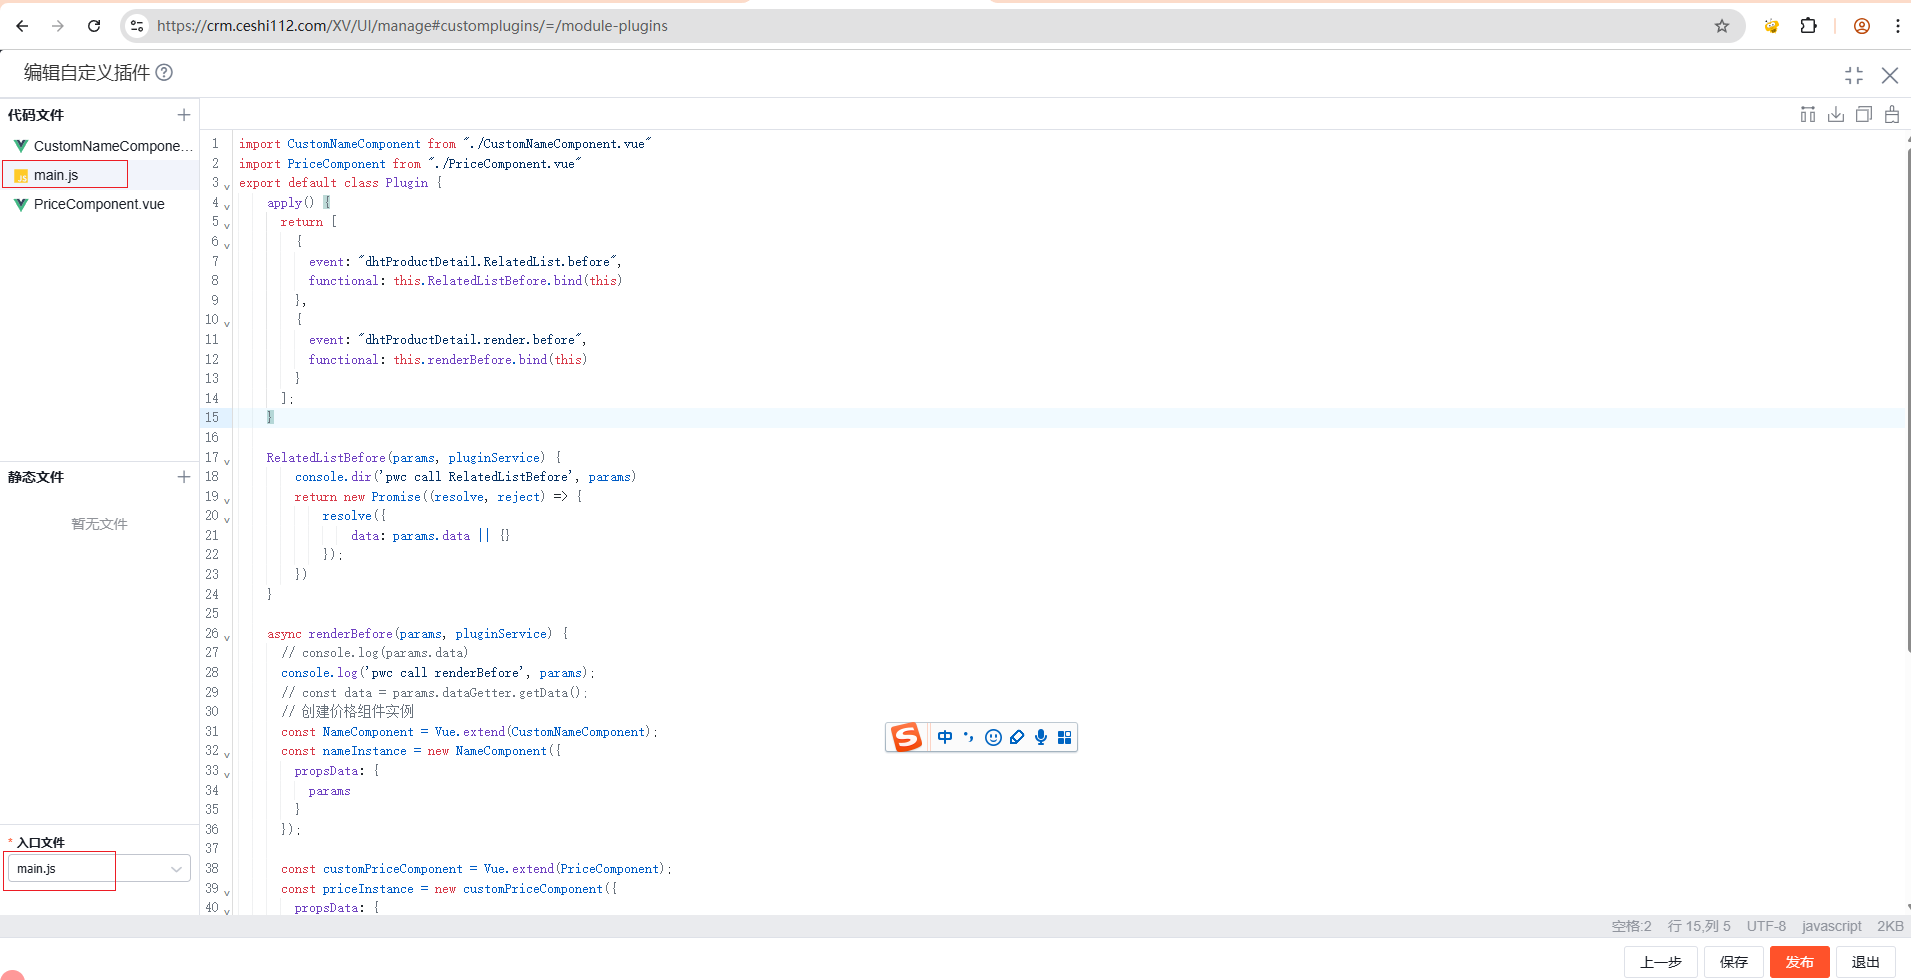
main.js 文件:
import CustomNameComponent from "./CustomNameComponent.vue"
// import PriceComponent from "./PriceComponent.vue"

export default class Plugin {
    apply() {
        return [
            {
                event: "dhtProductDetail.RelatedList.before",
                functional: this.RelatedListBefore.bind(this)
            },
            {
                event: "dhtProductDetail.RelatedList.after",
                functional: this.RelatedListAfter.bind(this)
            },
            {
                event: "dhtProductDetail.render.before",
                functional: this.renderBefore.bind(this)
            }
        ];
    }

    RelatedListBefore(params, pluginService) {
        console.dir("pwc call RelatedListBefore", params)
        return new Promise((resolve, reject) => {
            resolve({
                data: params.data || {}
            });
        })
    }

    RelatedListAfter(params, pluginService) {
        console.dir("RelatedListAfter", params)
        return new Promise((resolve, reject) => {
            resolve({
                data: params.data || {},
            });
        })
    }

    async renderBefore(params, pluginService) {
        // const data = params.dataGetter.getData();
        // data = {
        //     skus: this.skus,
        //     spuData: this.spuData,
        //     currentProduct: this.currentProduct,
        //     allProducts: this.allProducts,
        //     originProducts: this.originProducts,
        //     options: this.options,
        //     subProducts: this.subProducts,
        //     specOrder: this.specOrder,
        //     metaData: this.metaData,
        // }
        console.log("pwc call renderBefore", params);

        const NameComponent = Vue.extend(CustomNameComponent);
        const nameInstance = new NameComponent({
            propsData: {
                params
            }
        });

        // const customPriceComponent = Vue.extend(PriceComponent);
        // const priceInstance = new customPriceComponent({
        //     propsData: {
        //         params
        //     }
        // });

        nameInstance.$mount();
        // priceInstance.$mount();

        return new Promise((resolve, reject) => {
            resolve({
                // 支持隐藏的组件部分:
                // name: 名称(含标签)
                // price: 价格
                // policy: 价格政策
                // operate: 操作按钮
                // quantity: 数量(仅 spu 有)
                // main: 商品主图
                // meta: 商品介绍
                // richtext: 图文详情
                hide: ["name", "quantity"],
                components: {
                    /*
                     * 支持追加组件的位置,配合 hide 可实现组件替换:
                     * pageTop: 整个详情的顶部,上一条、下一条的下面
                     * name: 名称下面
                     * price: 价格下面
                     * policy: 价格政策下面
                     * quantity: 数量下面
                     * operate: 操作下面
                     * main: 主图下面
                     * meta: 商品介绍下面
                     * richtext: 图文详情下面
                     * pageBottom: 整个详情的底部
                     */
                    name: nameInstance,
                    // price: priceInstance
                }
            })
        })
    }
}
CustomNameComponent.vue 文件:
<template>
<div class="test-container">
    <div style="background-color: yellow; color: red; padding: 10px; font-size: 16px;">
        名称组件替换: {{ testName }}
    </div>
</div>
</template>

<script>
export default {
    props: {
        params: {
            type: Object,
            default: () => {}
        }
    },
    data() {
        return {
            testName: "pwc组件名称"
        }
    },
    mounted() {
        // const data = this.params.dataGetter.getData();
        // console.log(data);
        // this.testName = JSON.stringify(data);
    }
}
</script>
配置自定义插件
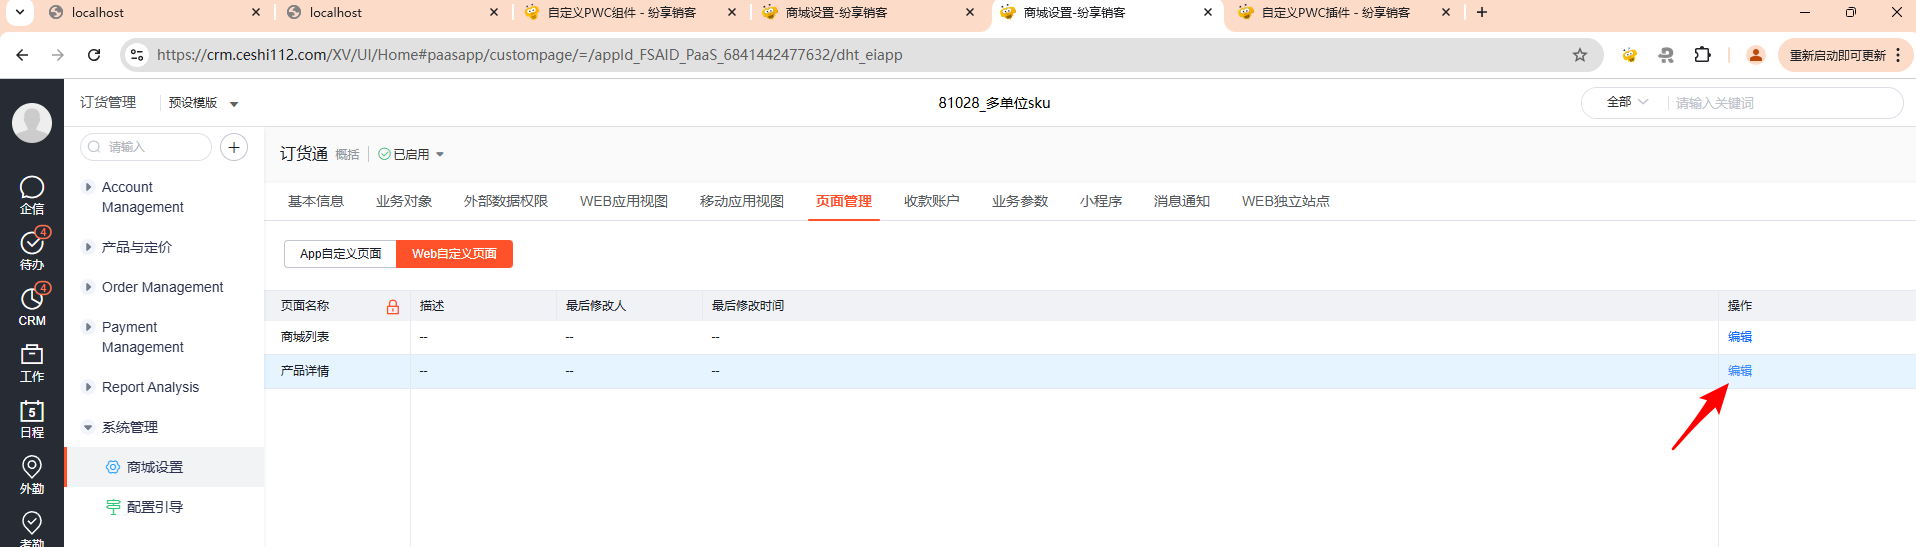
从 订货管理 -> 商城设置 -> 页面管理 -> Web 自定义页面 -> 商品(或产品)详情 进入编辑页面。
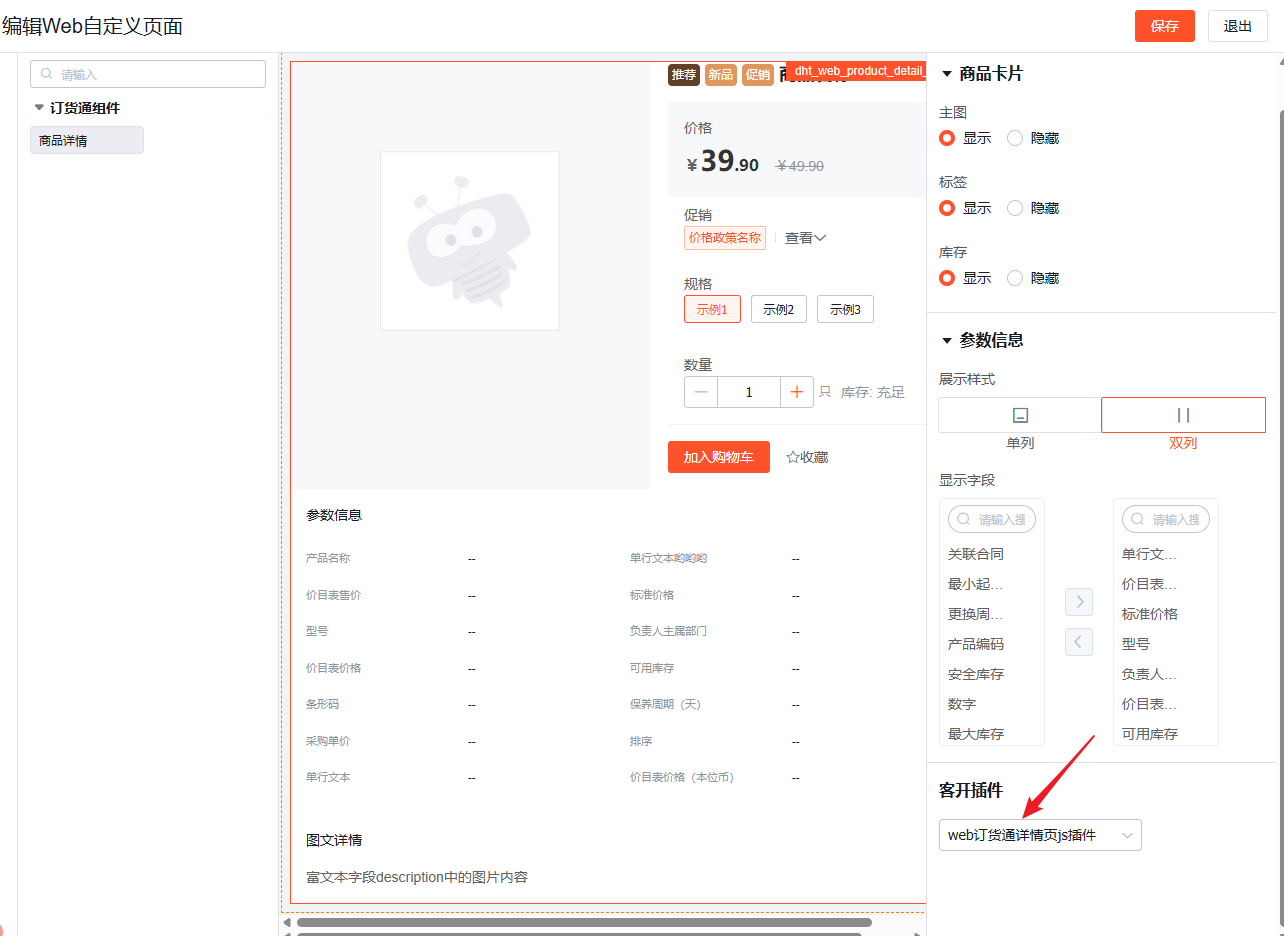
点击中间的商品详情组件,在右侧的客开插件中选择上一步发布的 JS 插件,然后点击保存。
效果体验
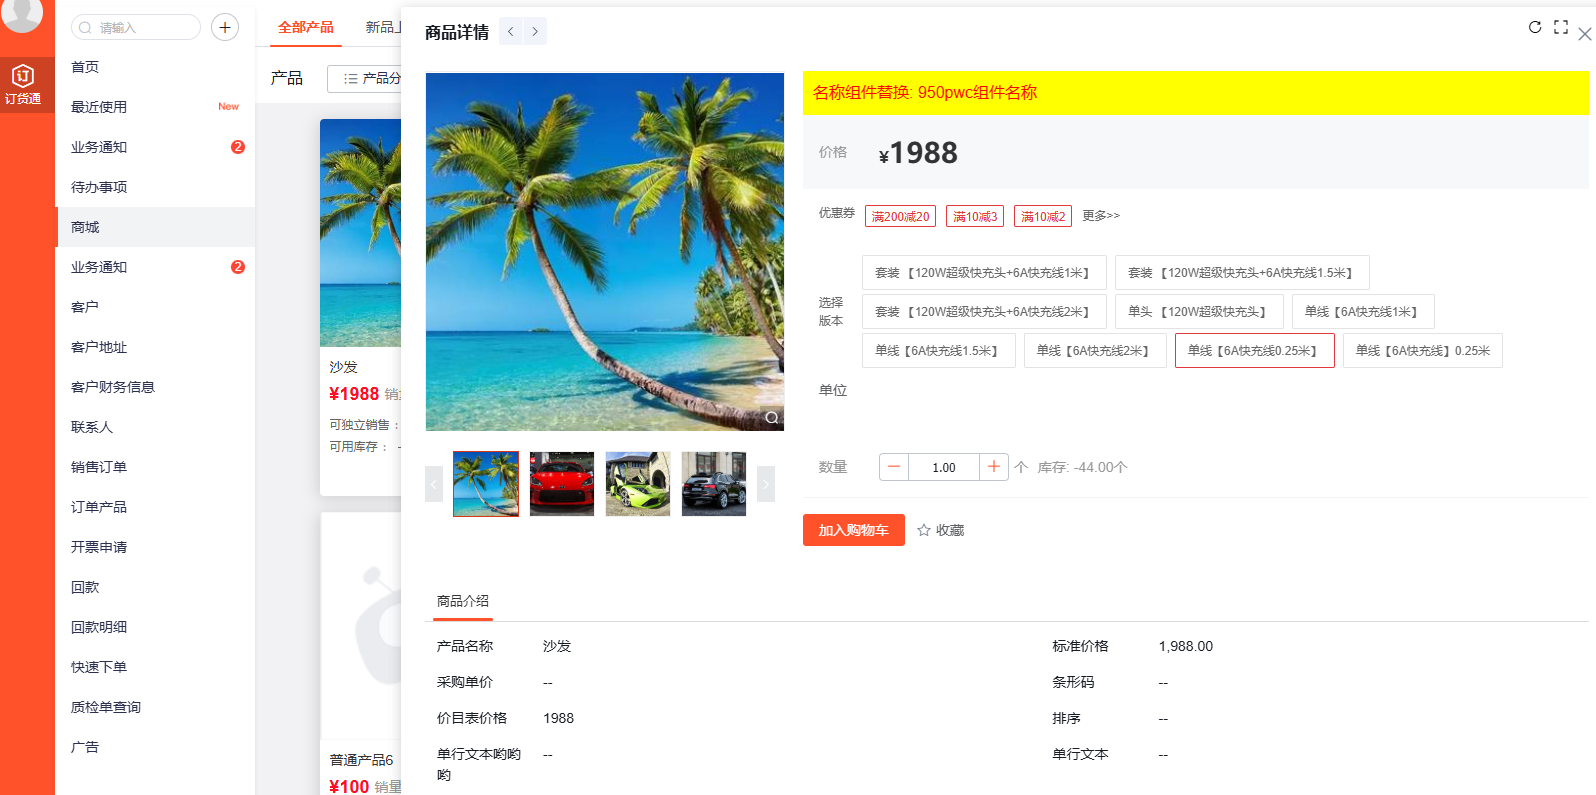
进入下游订货通商品详情页,可以看到插件对商品详情页组件的隐藏、替换或追加效果。
事件
| 事件名称 | 功能 |
|---|---|
| dhtProductDetail.RelatedList.before | 该事件用于向详情页接口 RelatedList 中传入额外的定制参数 |
| dhtProductDetail.RelatedList.after | 该事件用于处理详情页接口 RelatedList 返回的数据,做二次加工 |
| dhtProductDetail.render.before | 该事件用于在详情页渲染之前做组件隐藏、替换或插入 |