
English
Overview
This article introduces how to use the approval detail page JS plugin and how to extend approval actions through Fxiaoke platform capabilities, so as to achieve the following scenario:
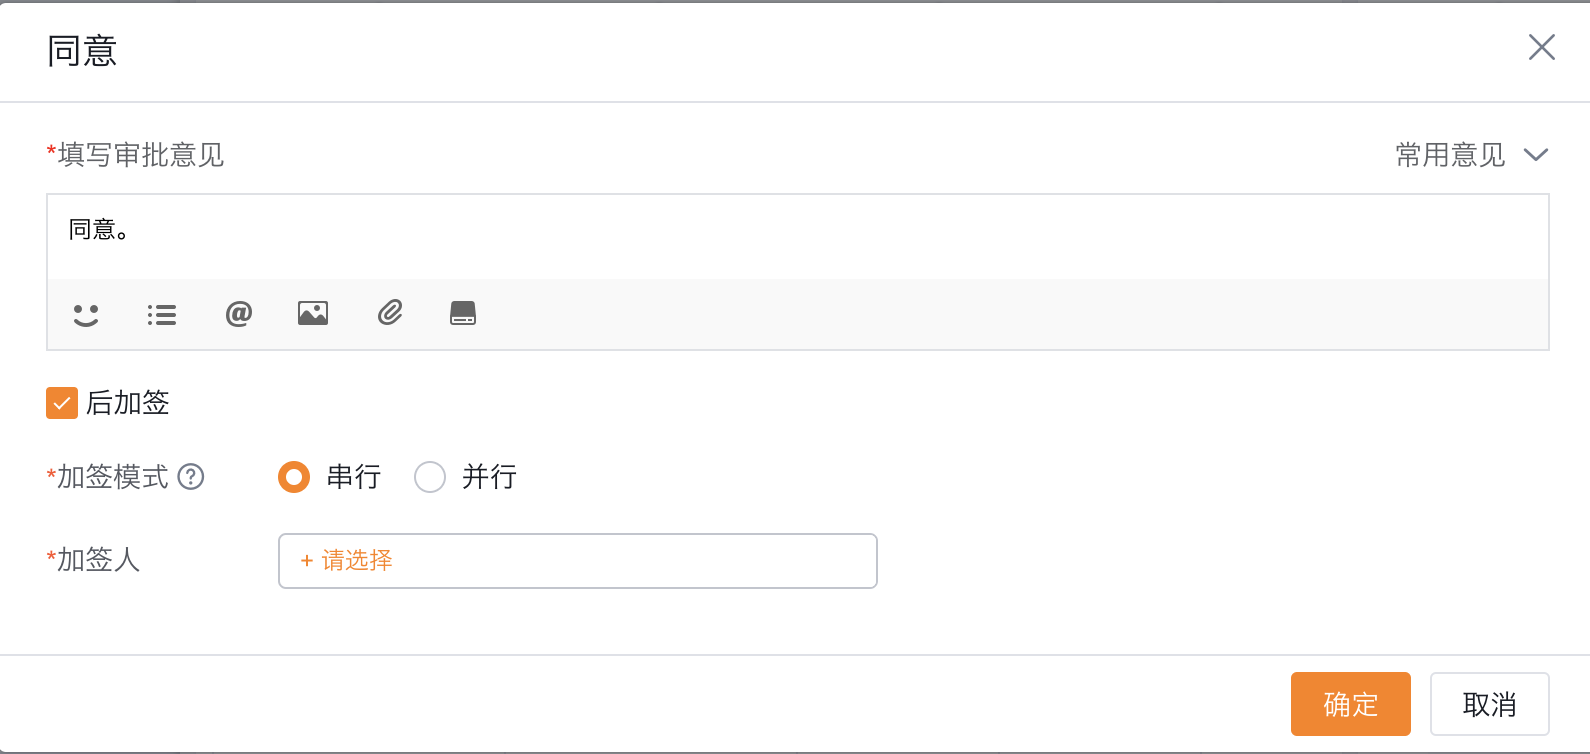
- Customize the approval agree popup
This tutorial will help you understand how to develop an approval detail page plugin from scratch and implement the above feature.
Overview
The approval detail page plugin is an extension mechanism designed to help users create flexible and highly interactive popup pages. The plugin allows users to easily customize UI-level behavior, or determine from data whether a task can be completed directly, force an edit-content popup, and more, so as to meet different business scenario requirements.
Main Features
The following extension capabilities are currently supported:
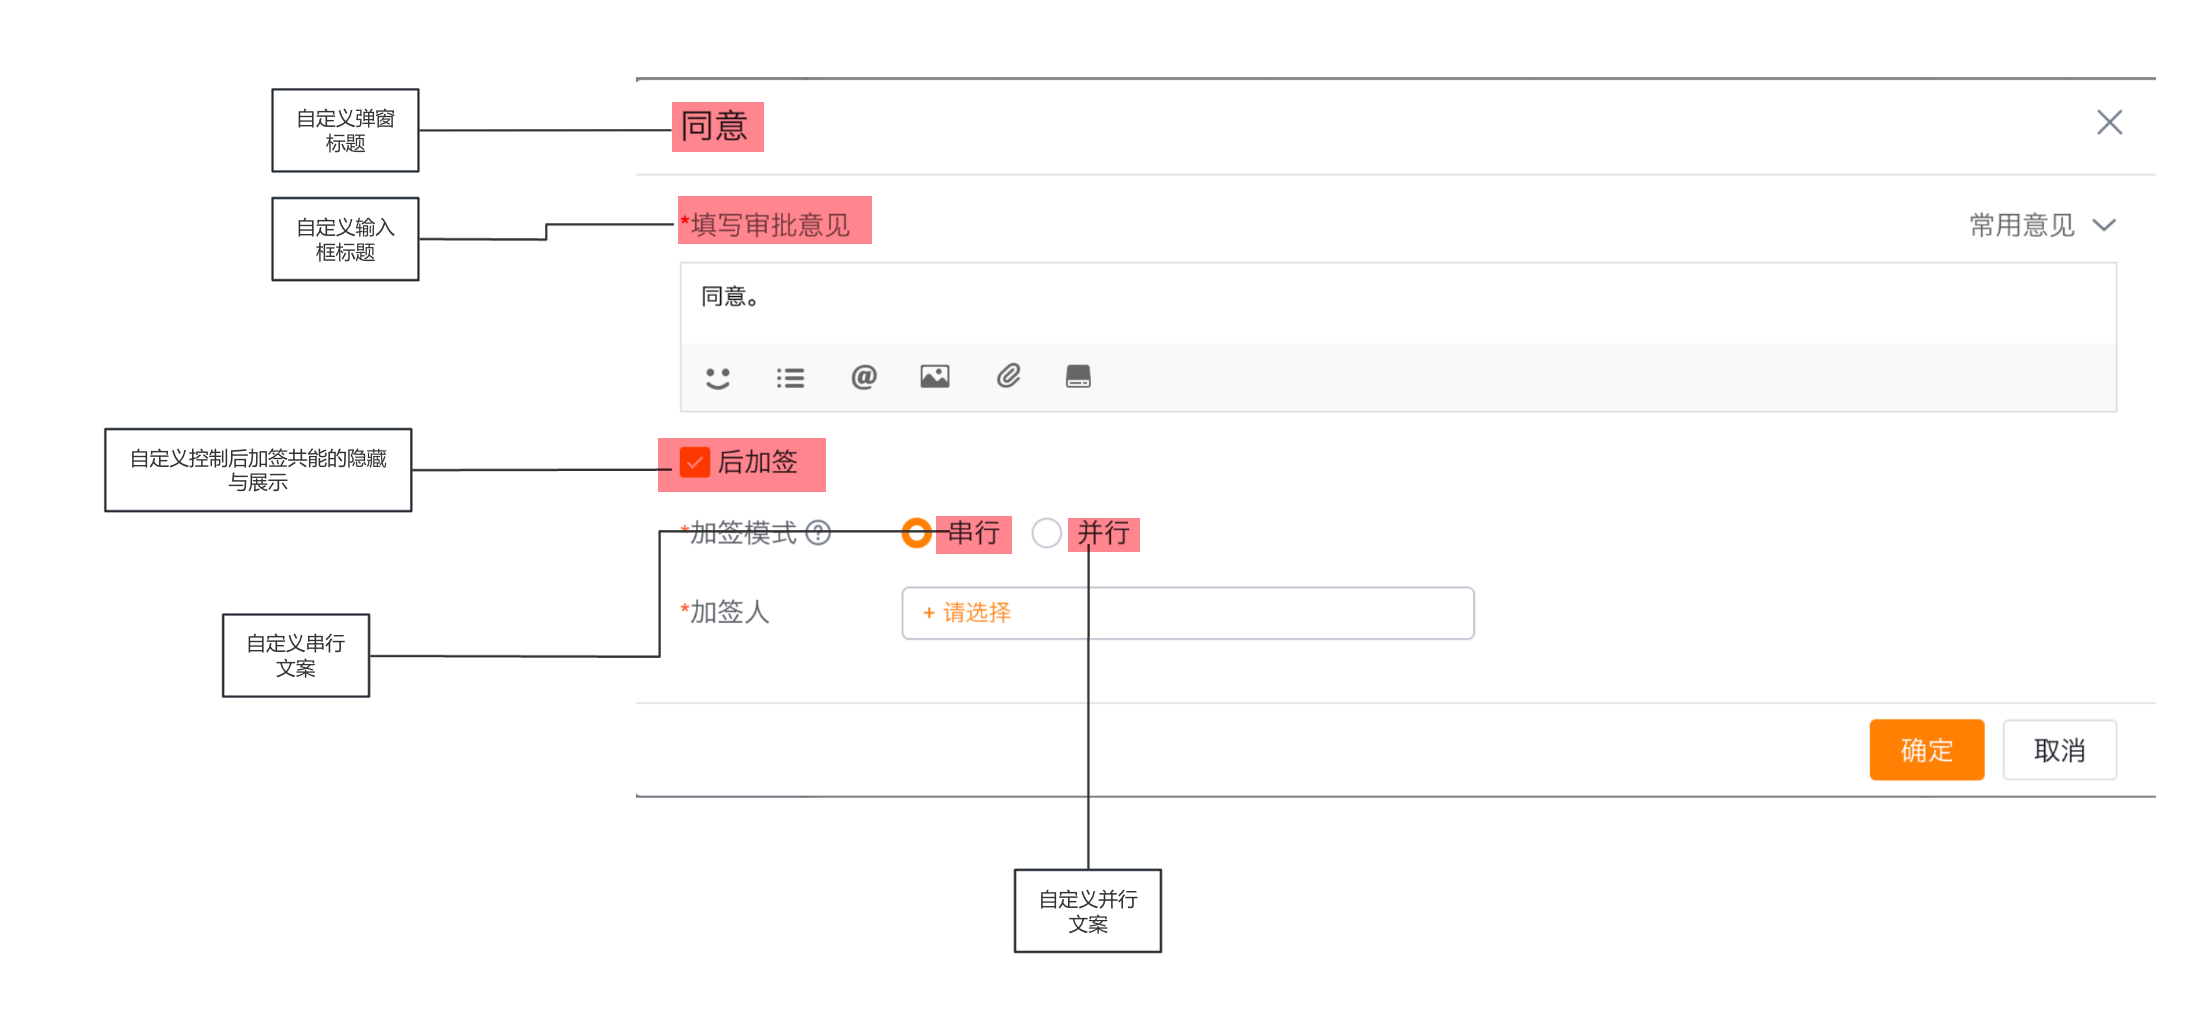
- Customization of: popup title, opinion input title, serial/parallel add-sign text, hiding/showing post-add-sign functionality, and the content in the "whether to process approval at the same time" area.
- Extensions such as: determining from data whether the task can be completed directly, forcing an edit-content popup, etc.
Development Guide
How to Develop an Approval Detail Page Plugin from Scratch
Step 1: Create a Custom Plugin
Log in to the Fxiaoke admin backend.
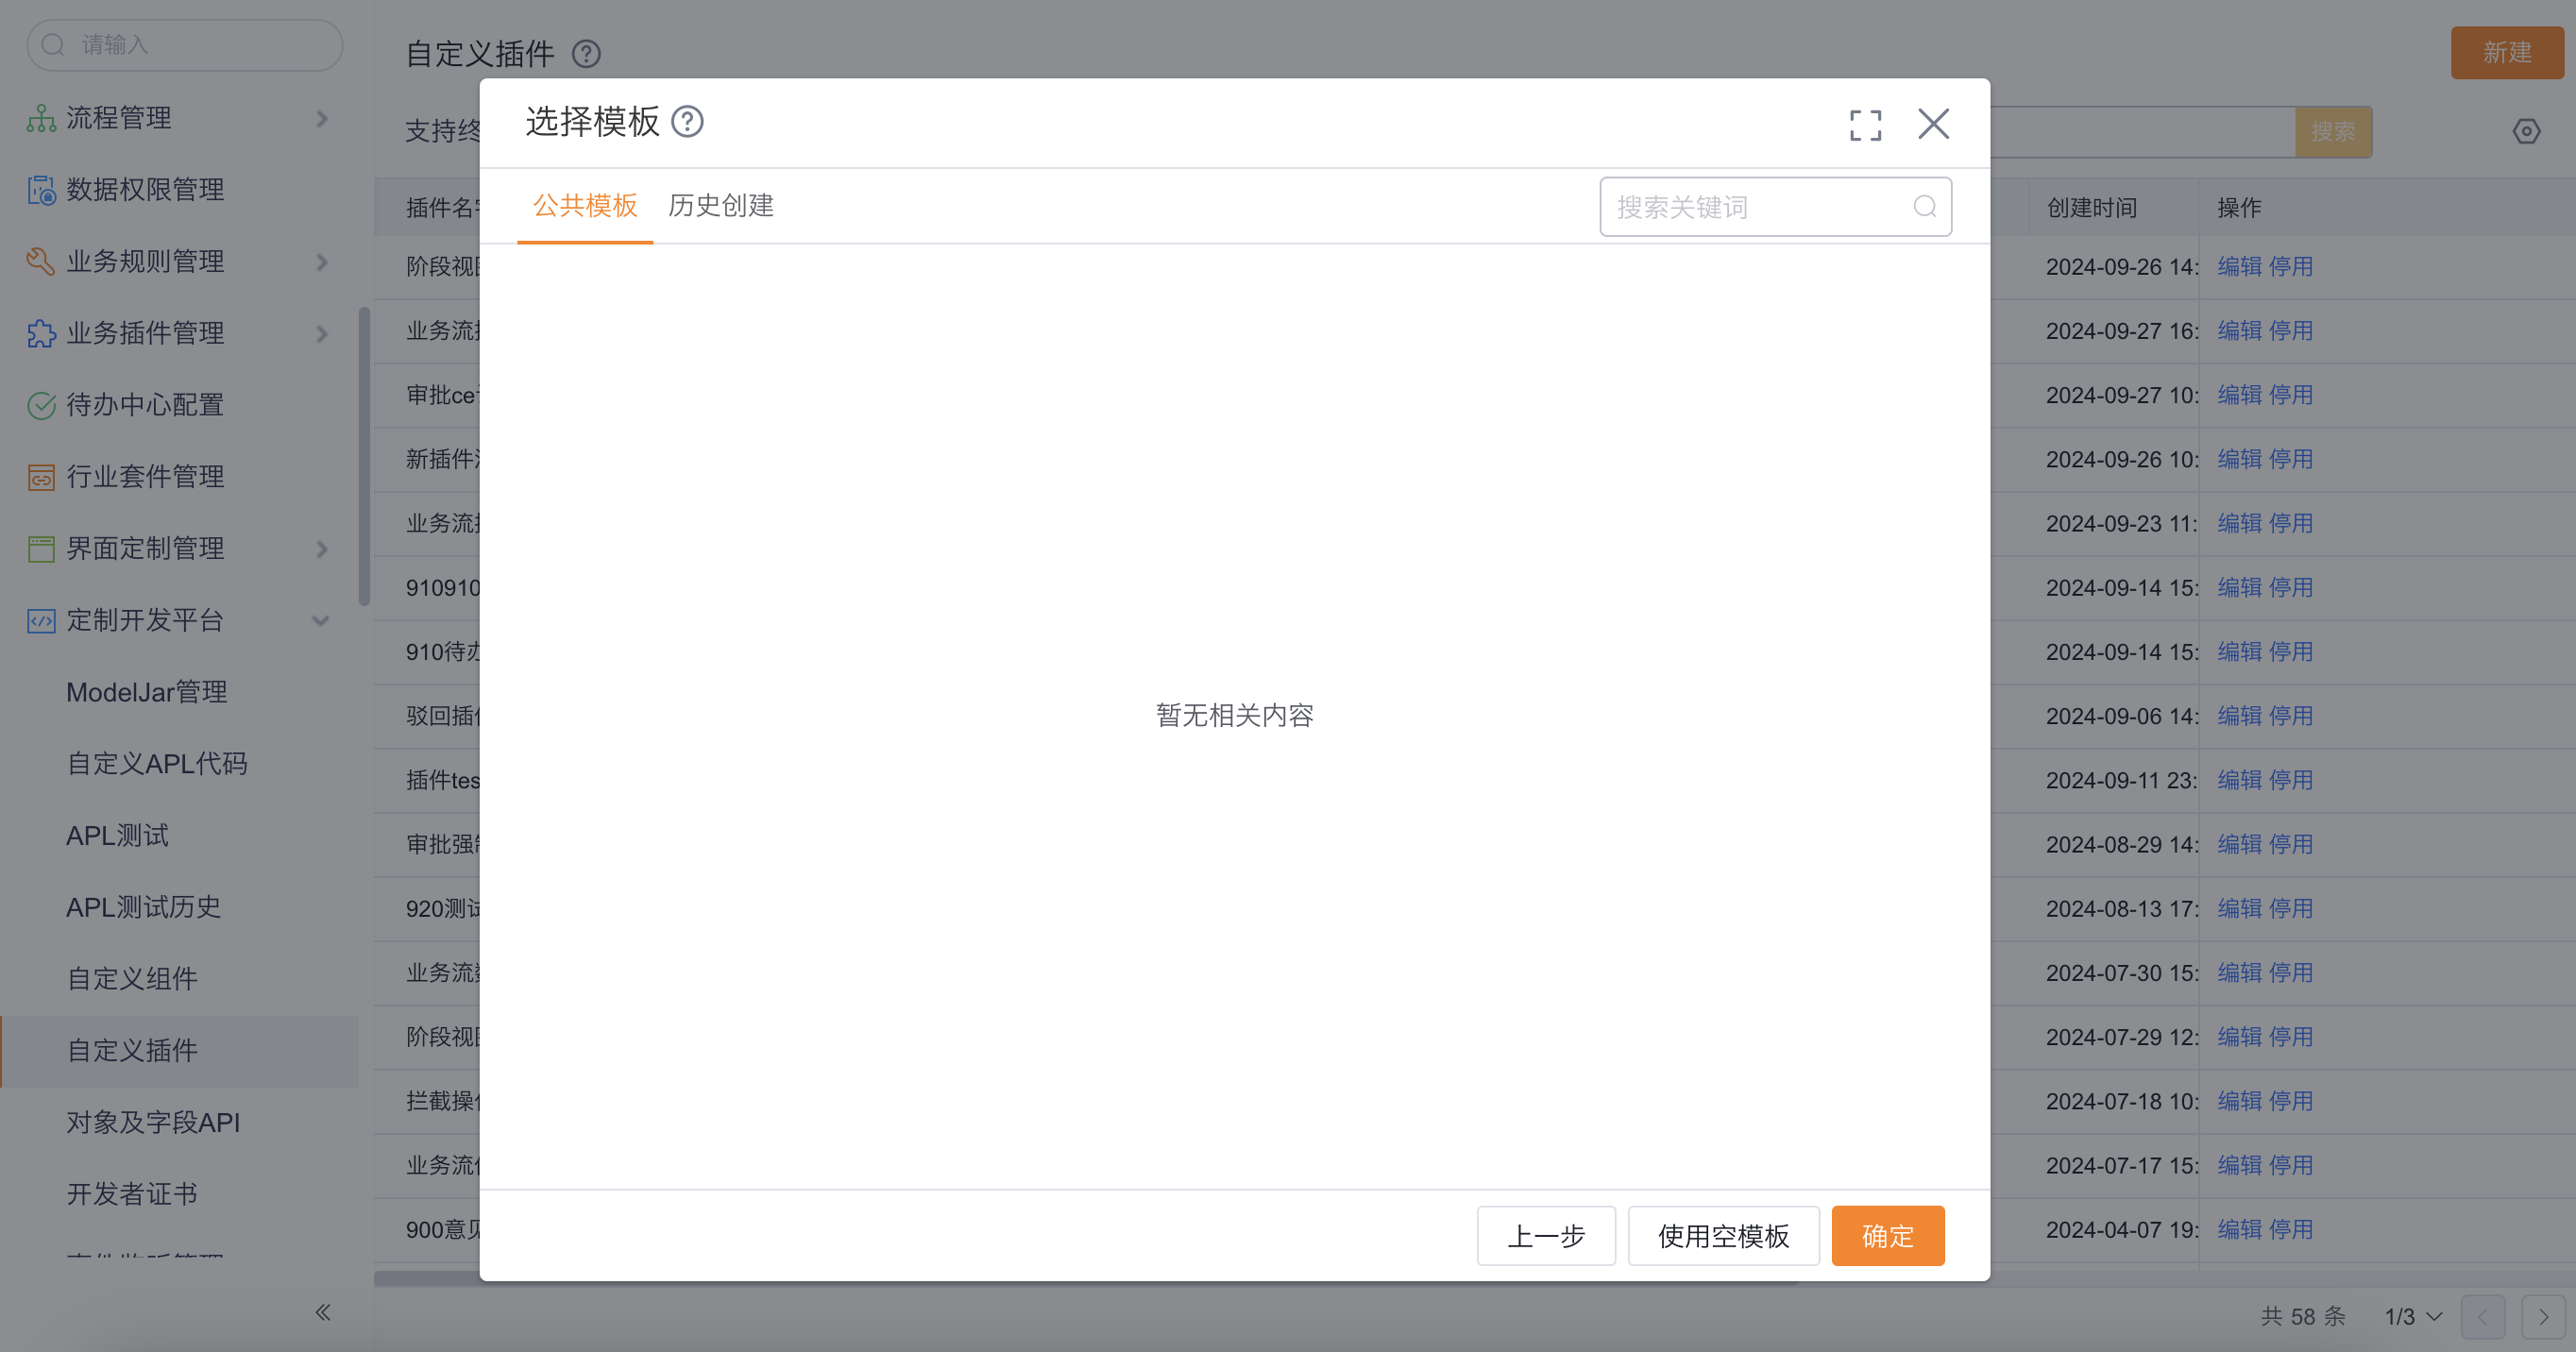
In the left navigation bar, click "Custom Development Platform" -> "Custom Plugin" to enter the custom plugin management page.
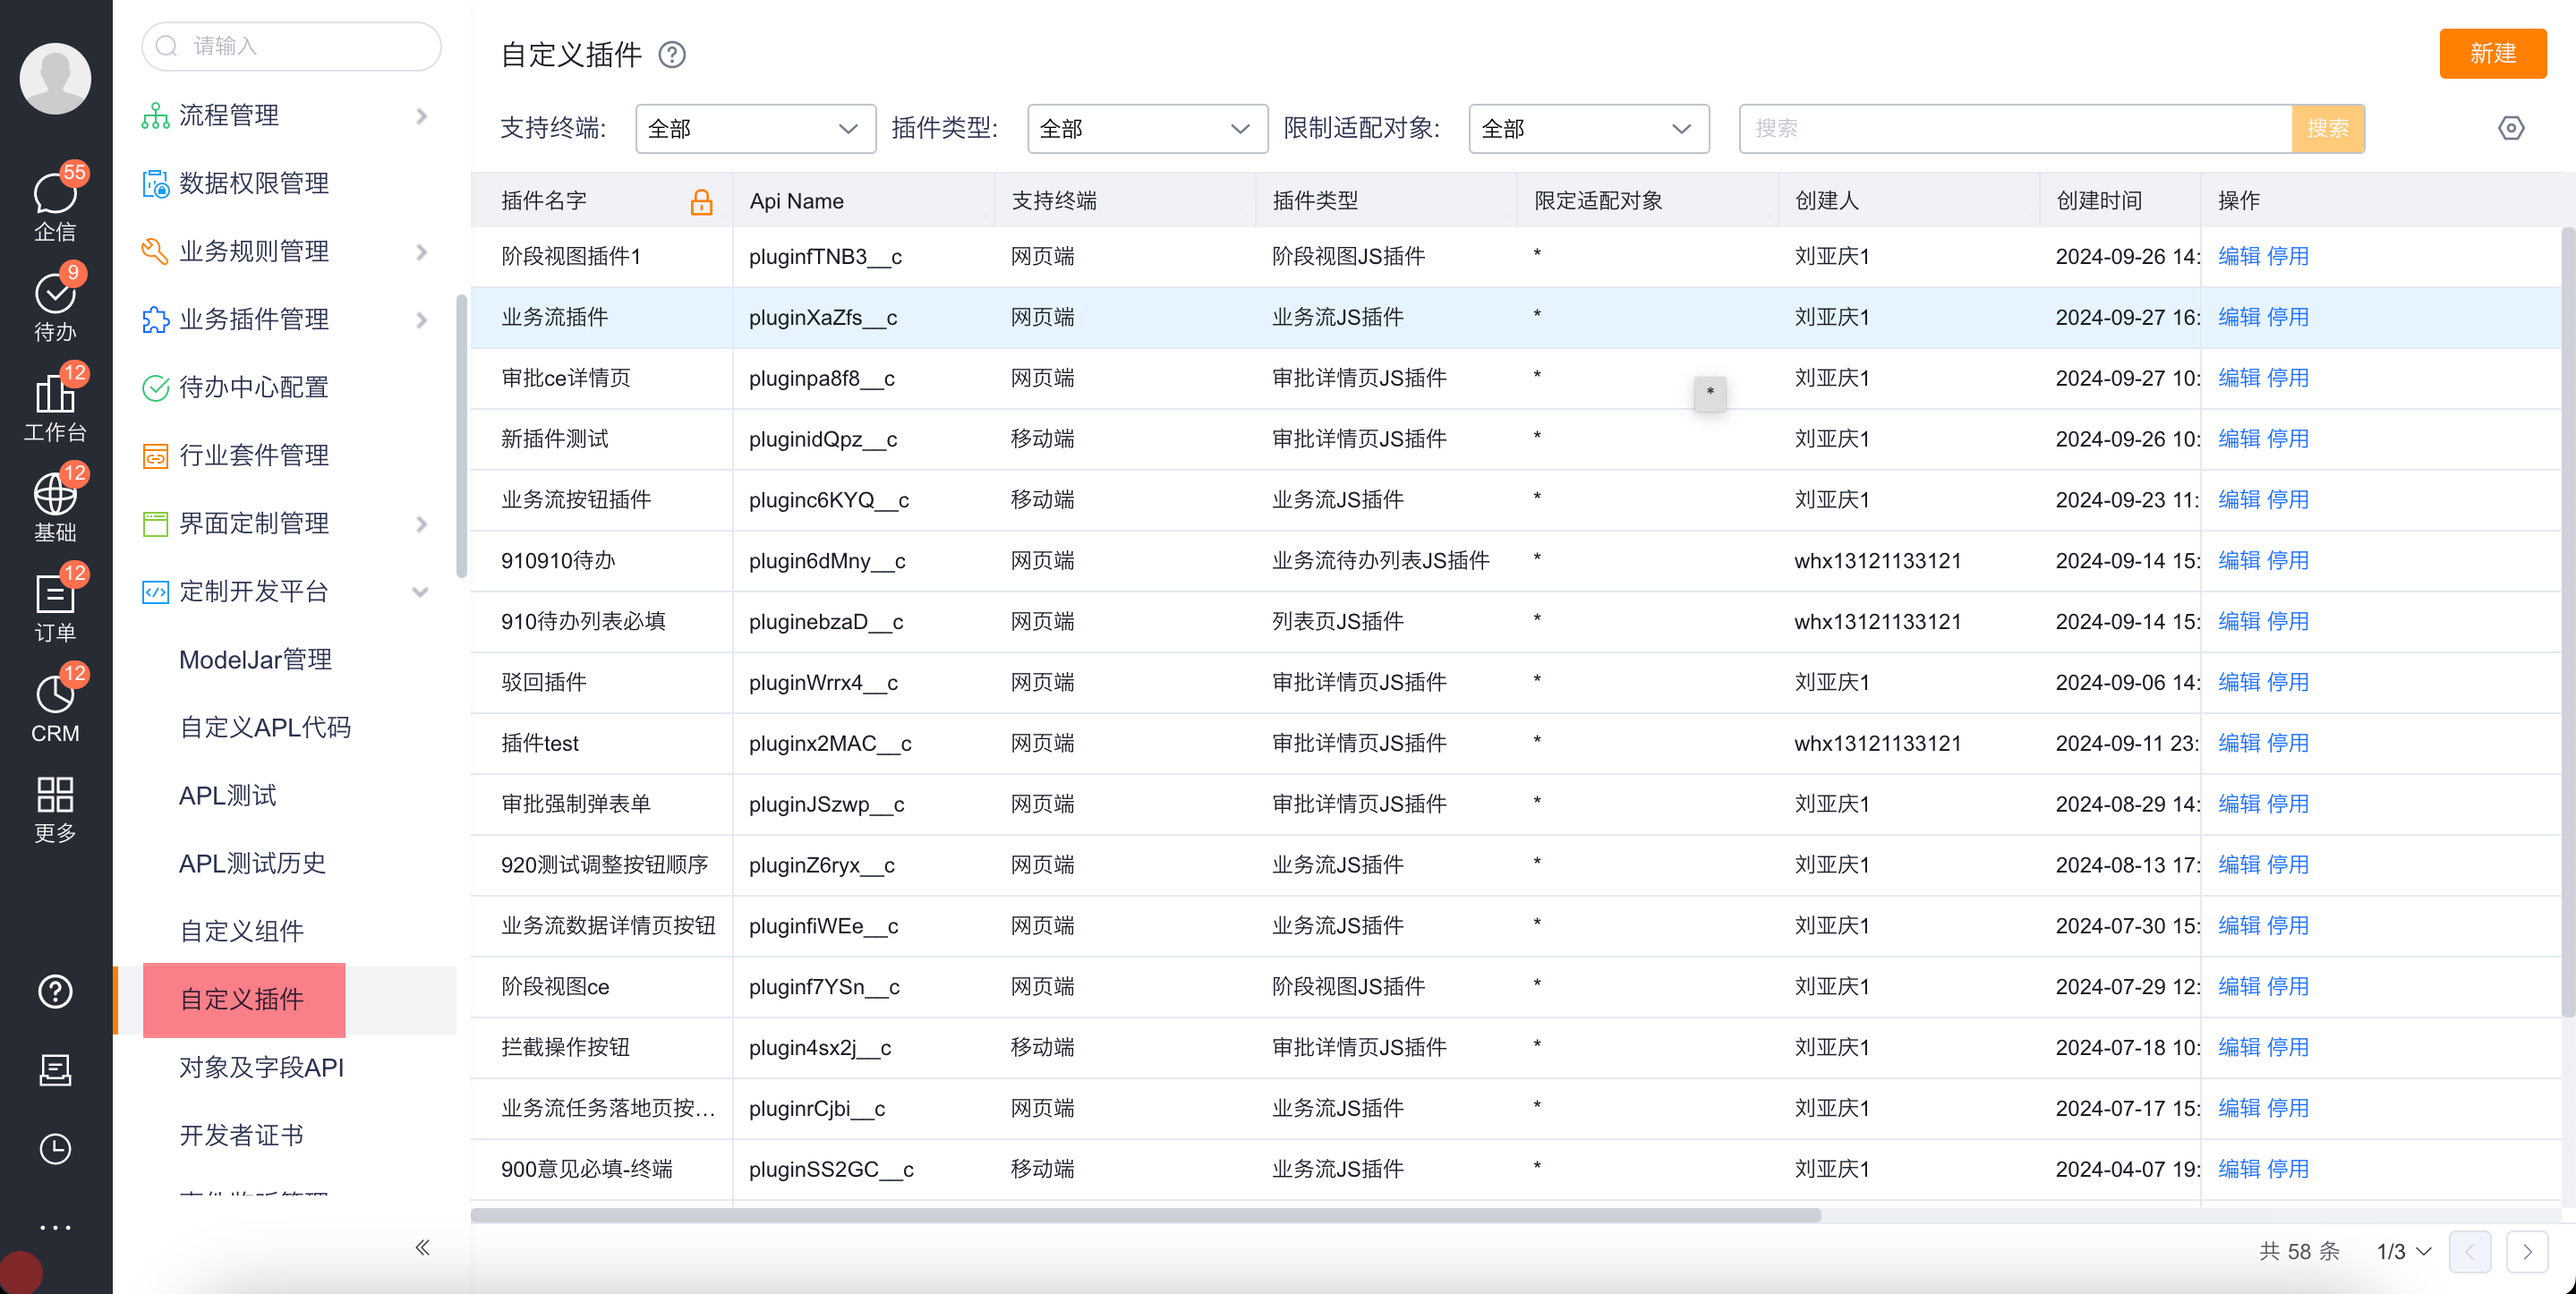
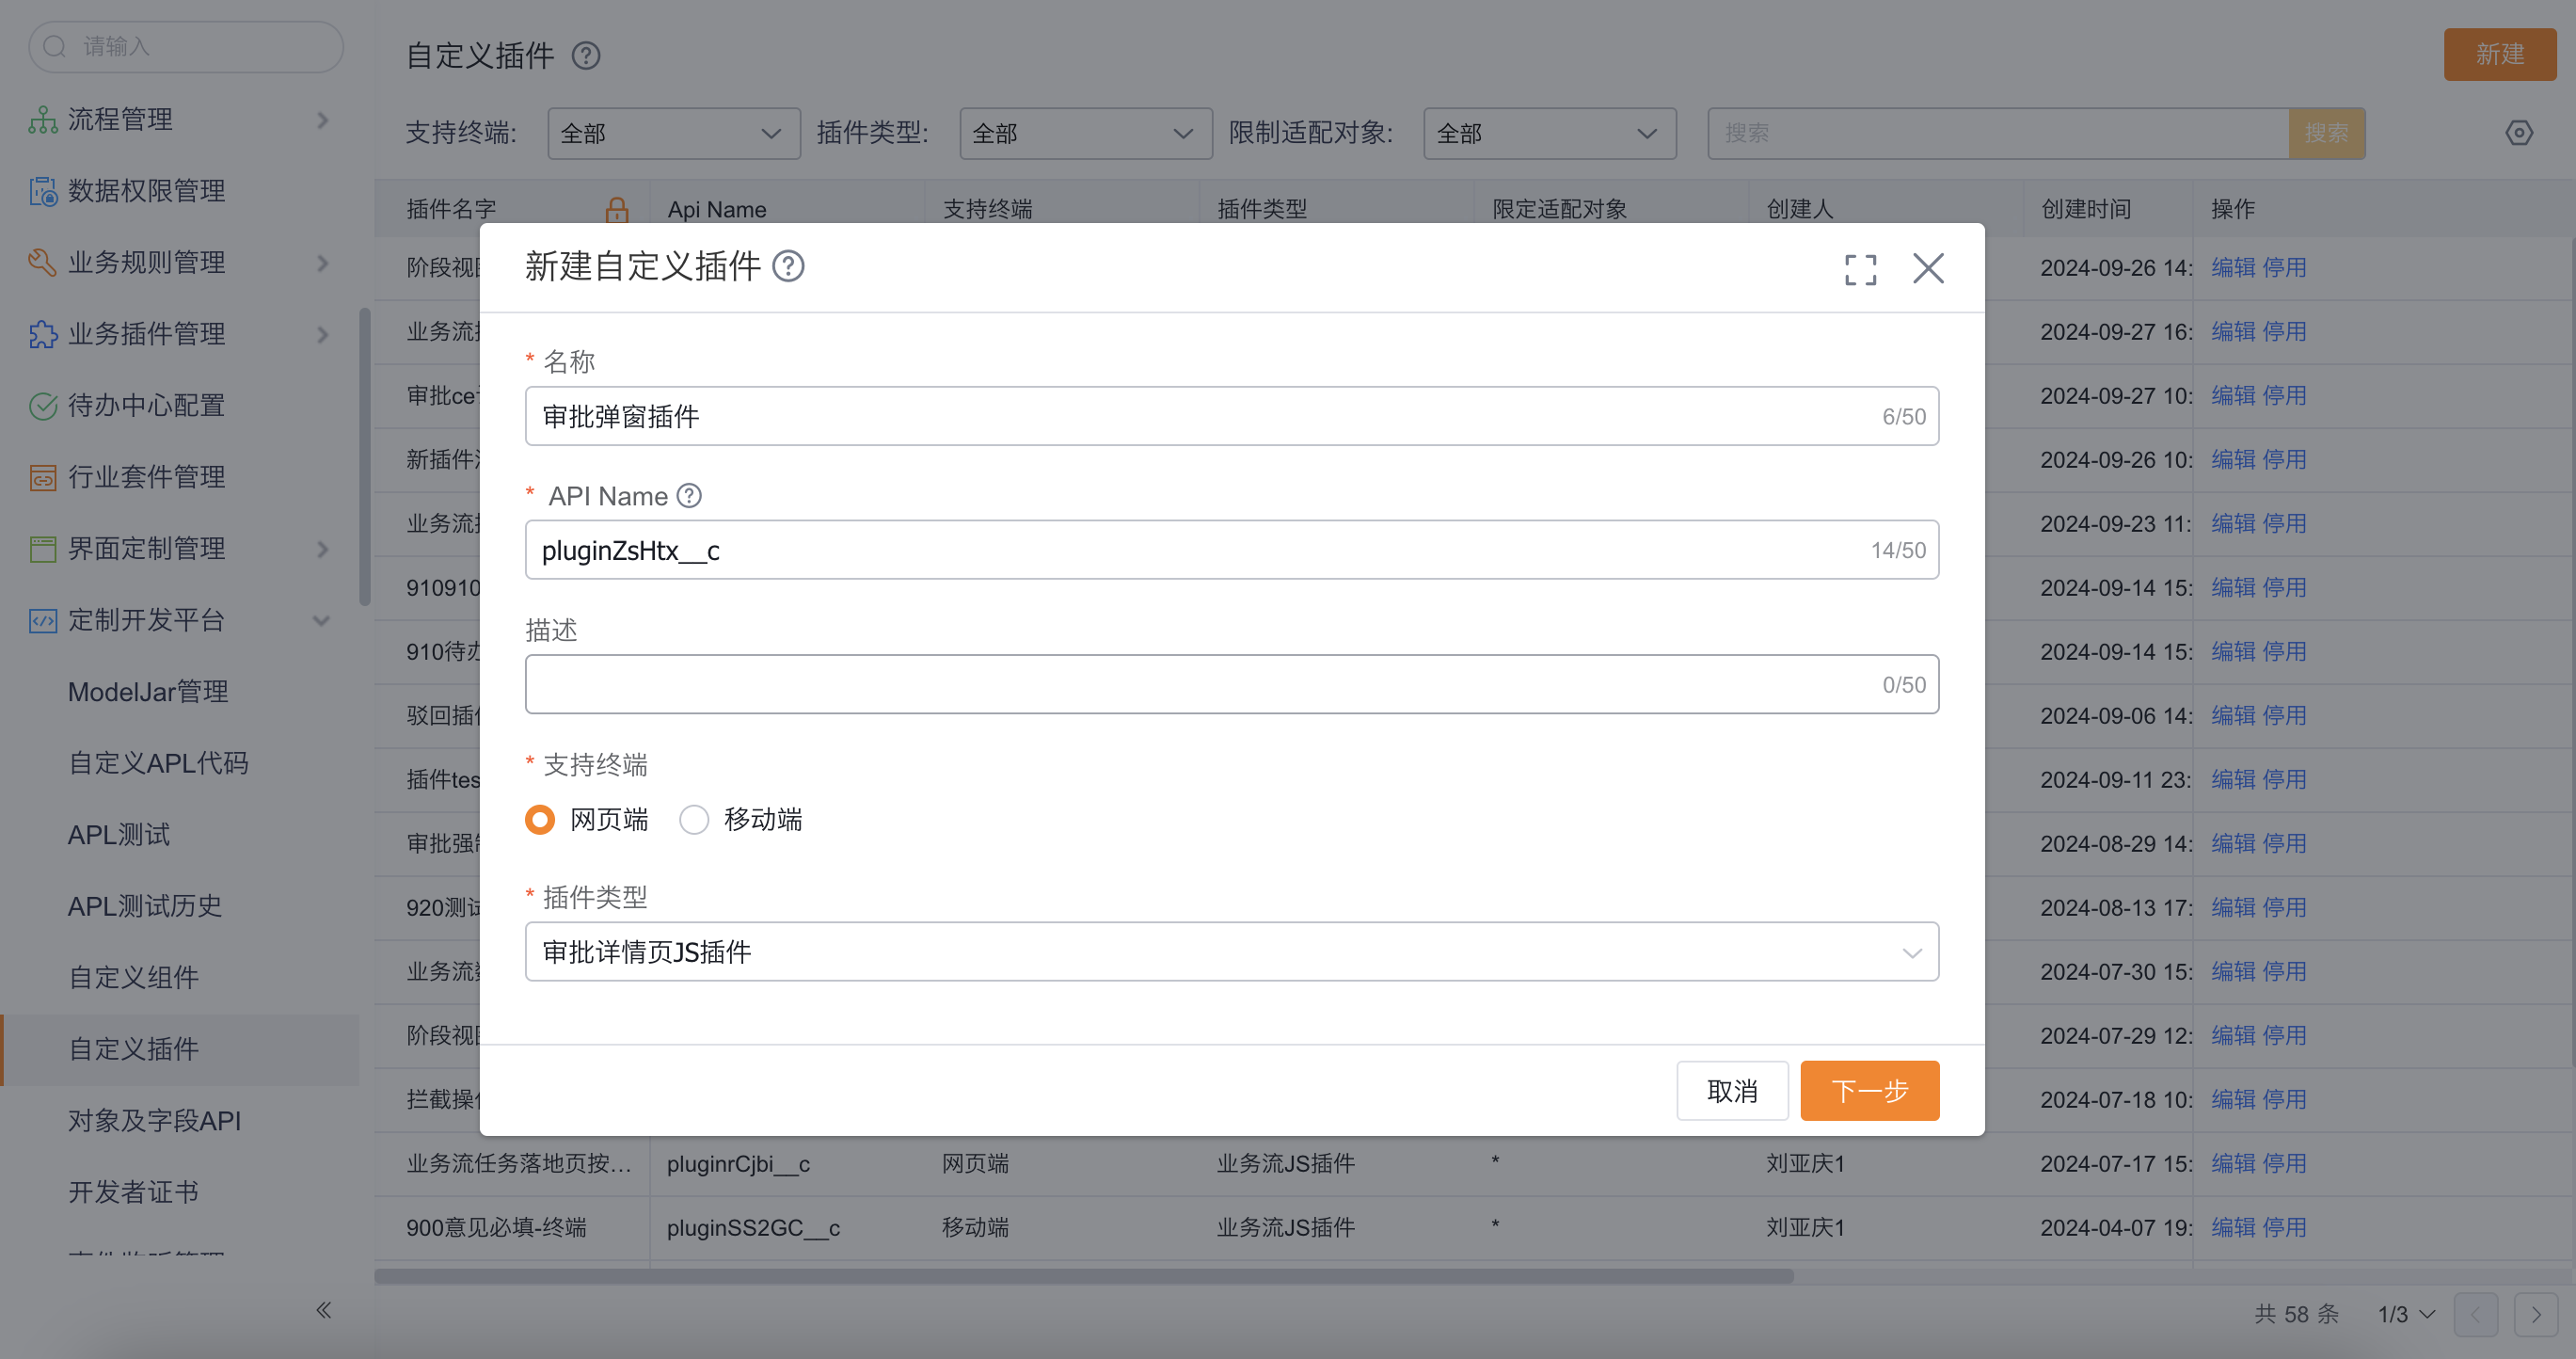
Click Create, fill in Name, Supported Terminal, and Plugin Type, click Next, choose Use Empty Template, create a new code file, paste the following code, select the Entry File, and click Publish.
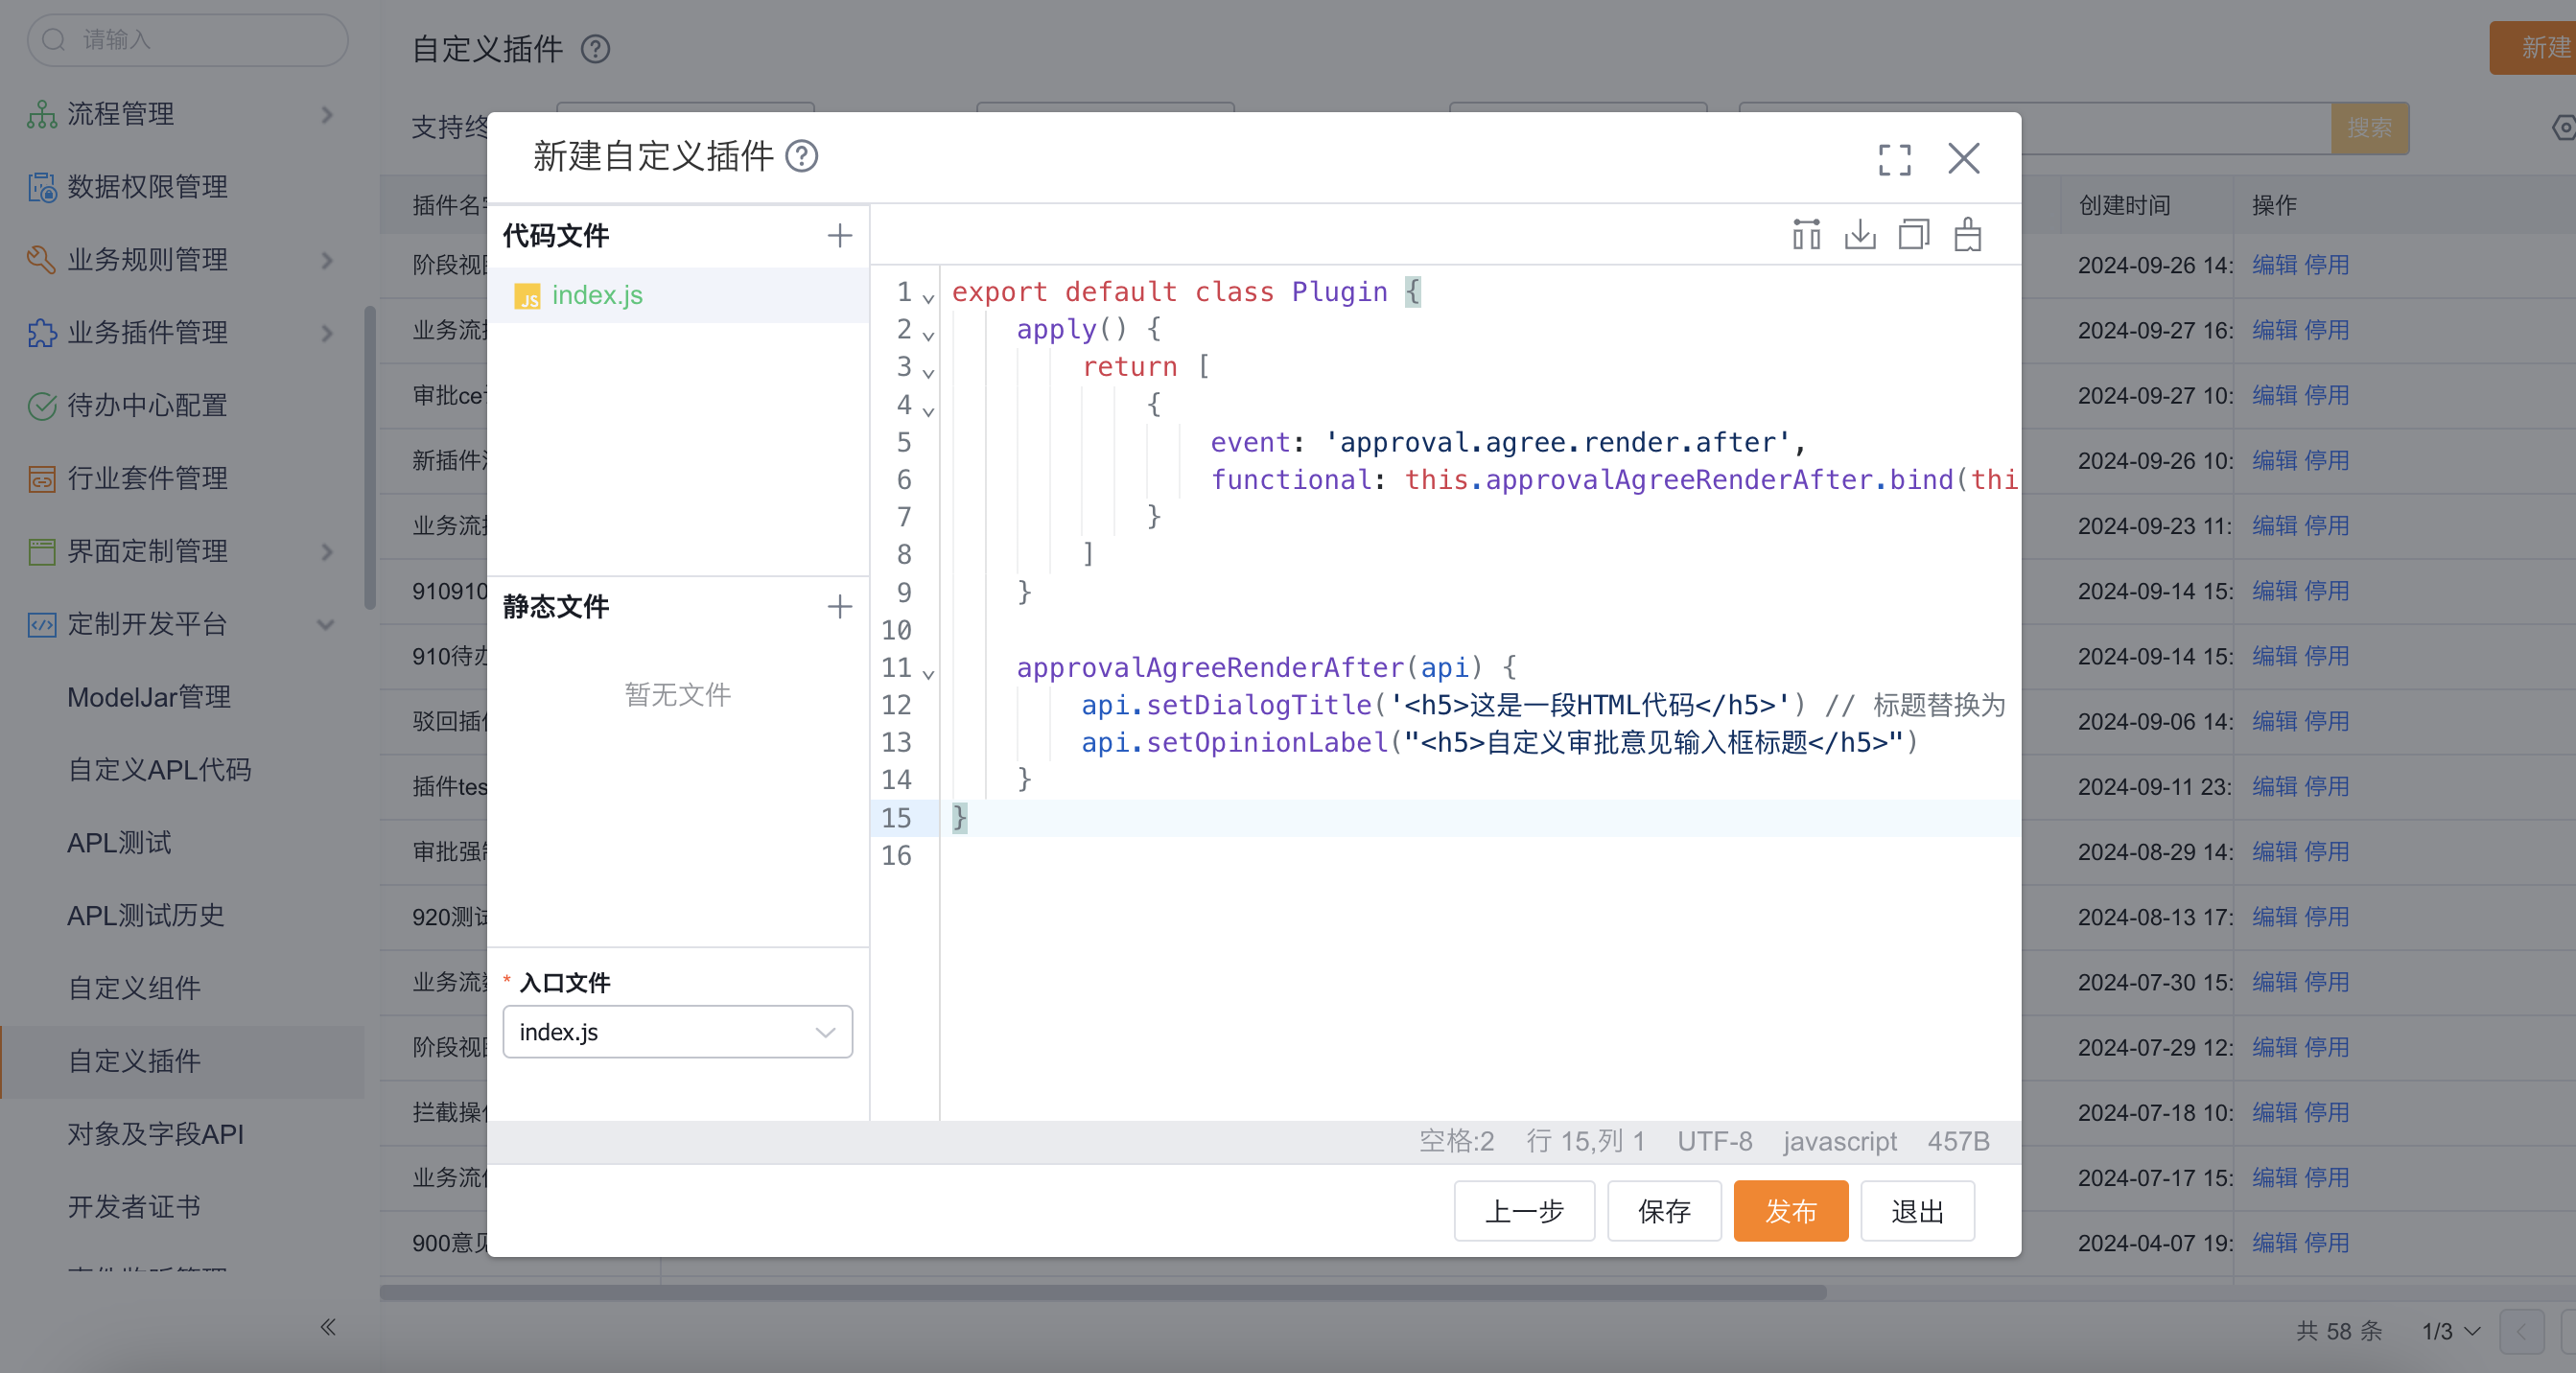
export default class Plugin {
    apply() {
        return [
            {
                event: 'approval.agree.render.after',
                functional: this.approvalAgreeRenderAfter.bind(this)
            }
        ]
    }

    approvalAgreeRenderAfter(api) {
        api.setDialogTitle('<h5>This is a piece of HTML code</h5>')
        api.setOpinionLabel("<h5>Custom Approval Opinion Input Title</h5>")
    }
}
Step 2: Configure the Custom Plugin
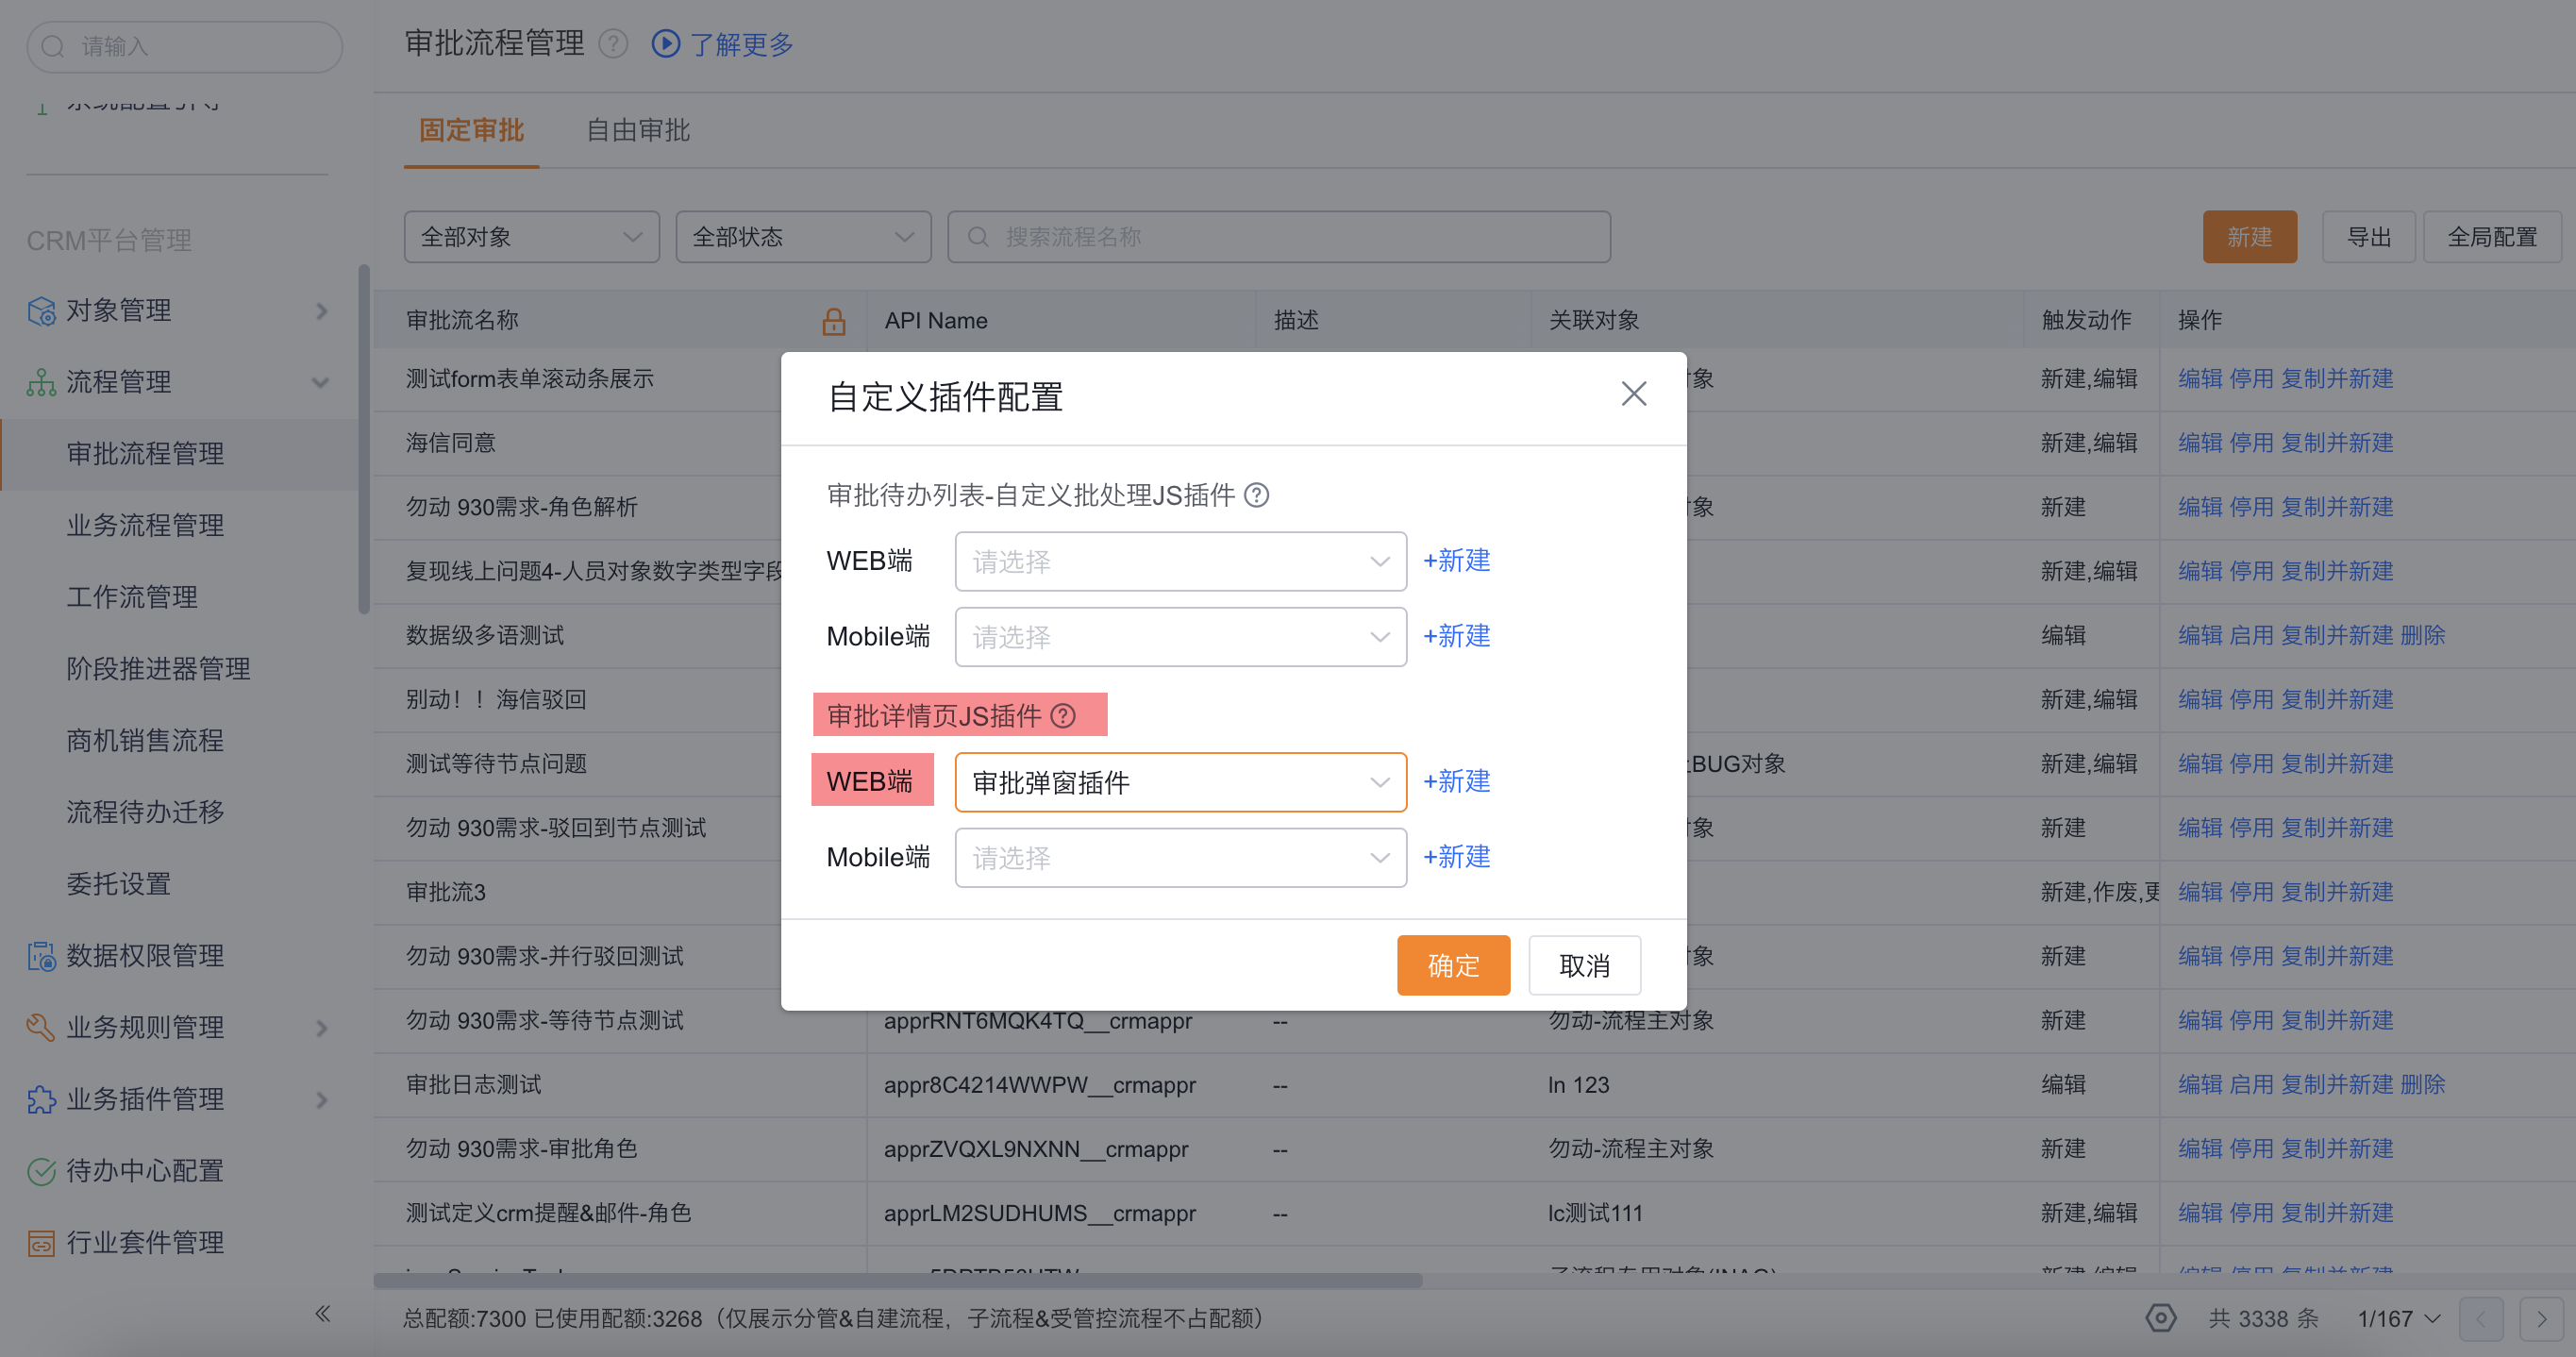
In the left navigation bar, enter the Approval Workflow Management page.
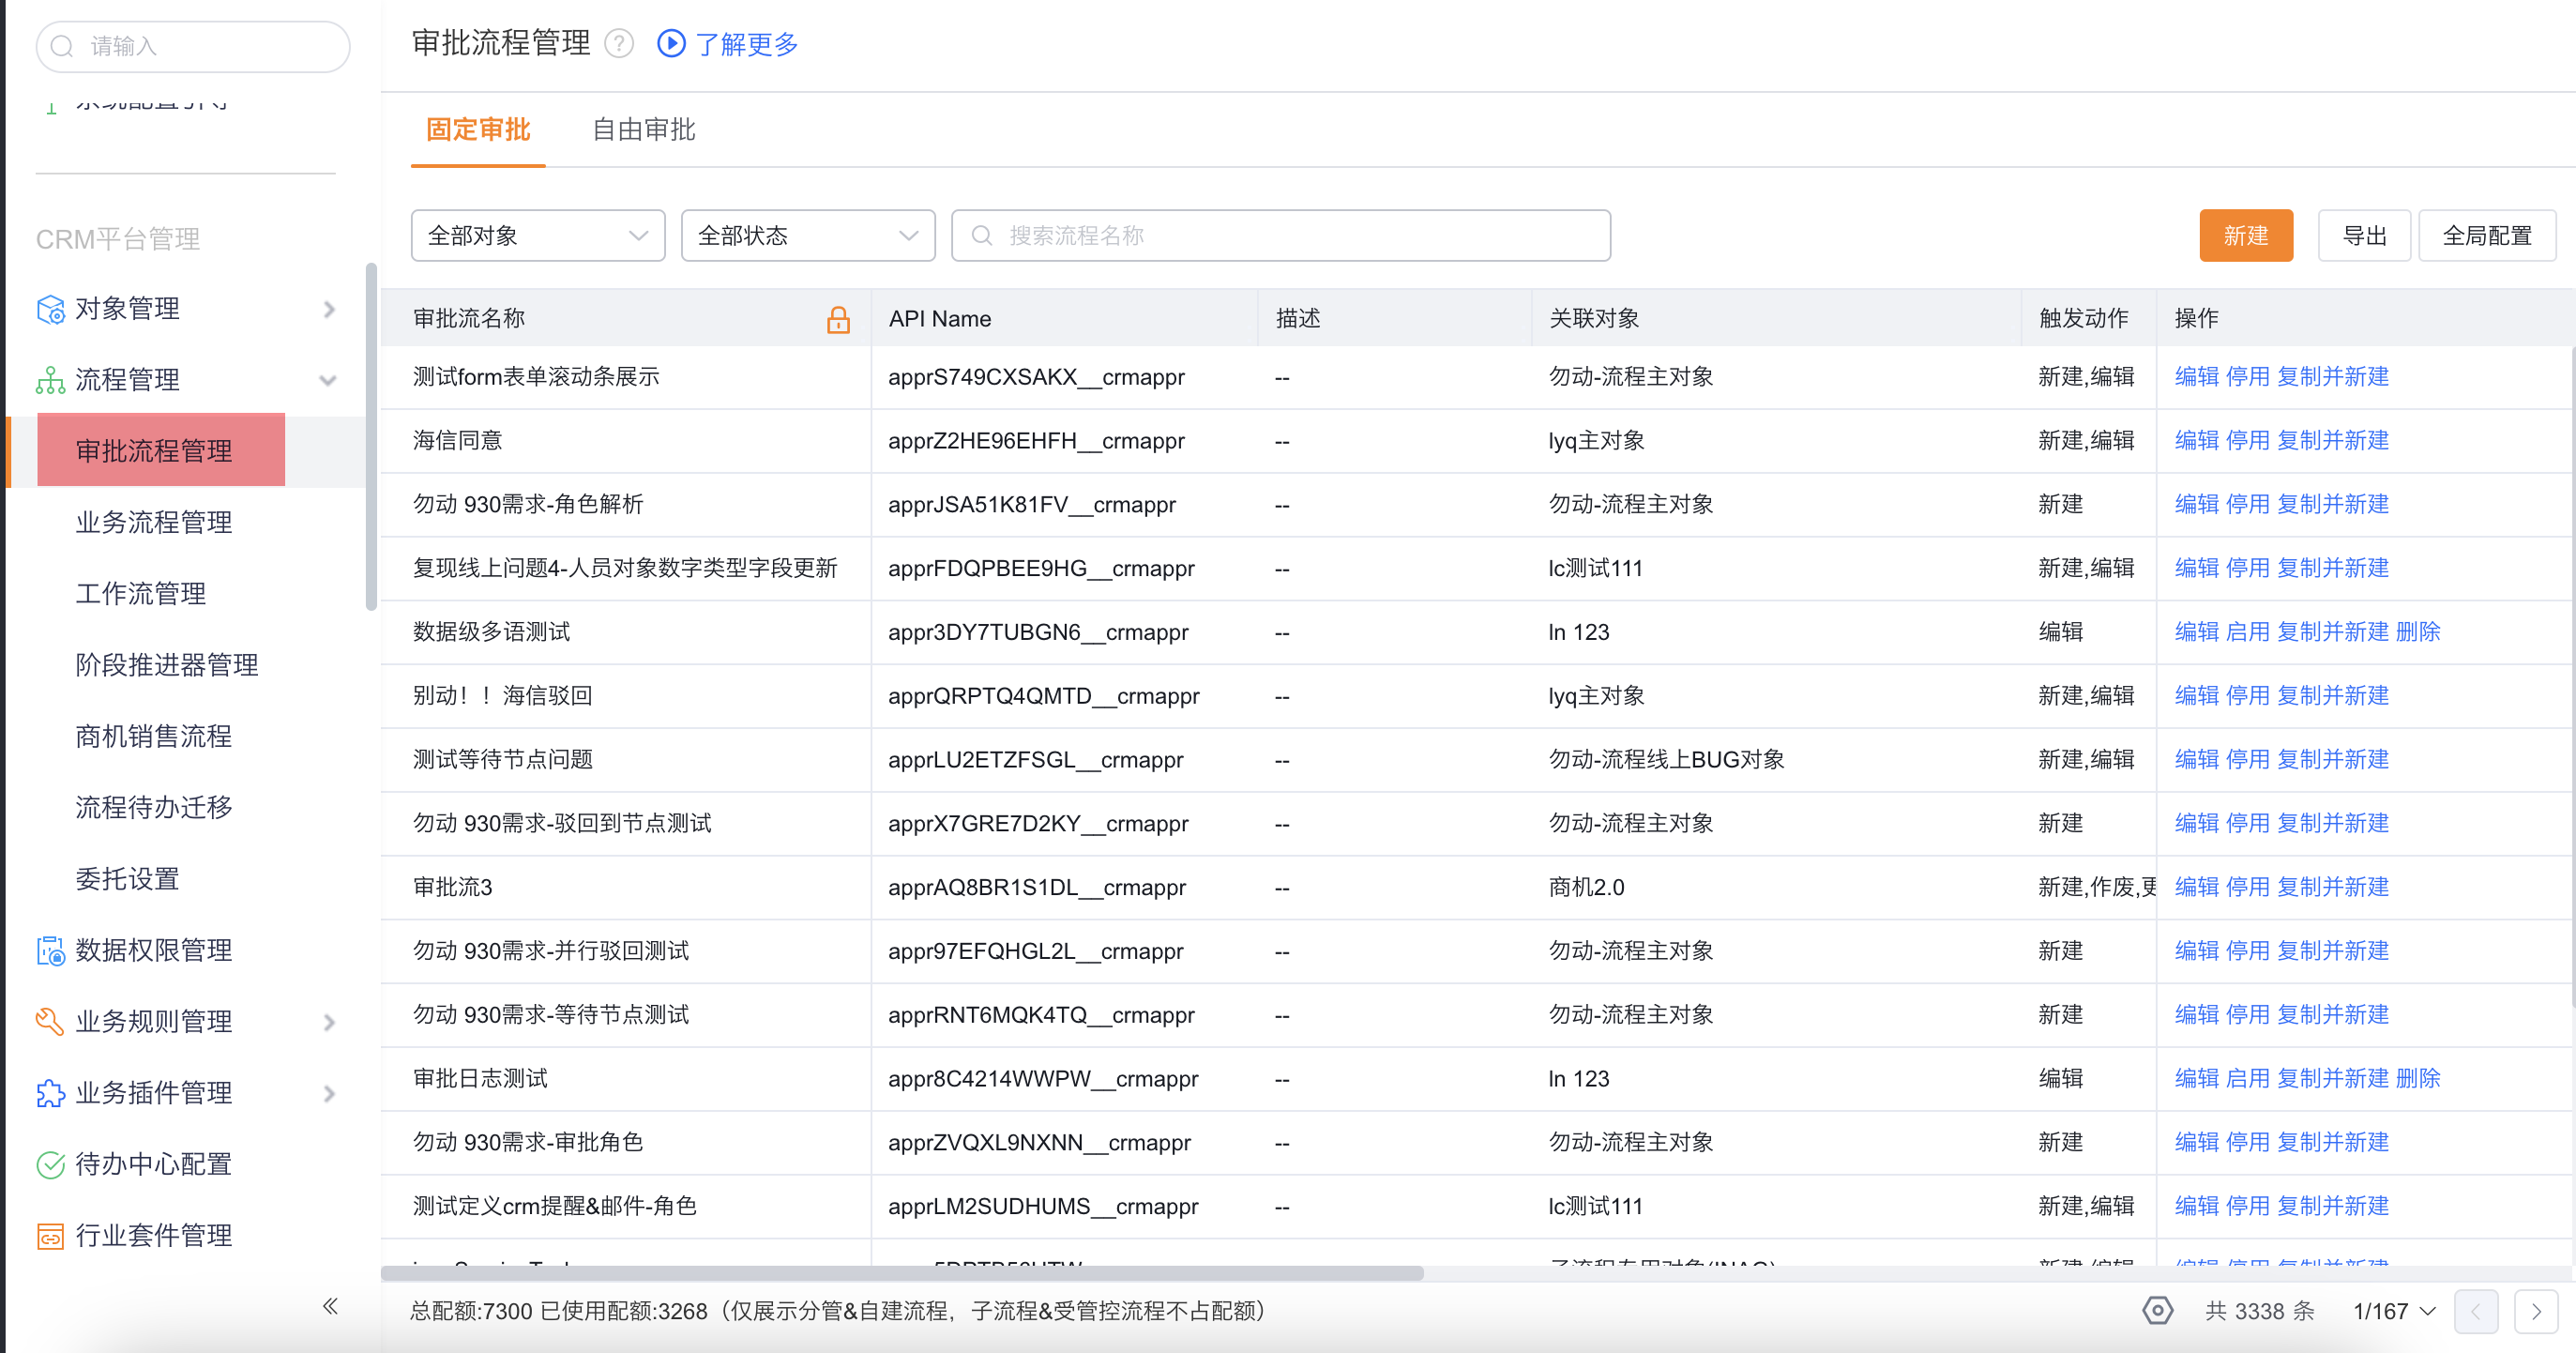
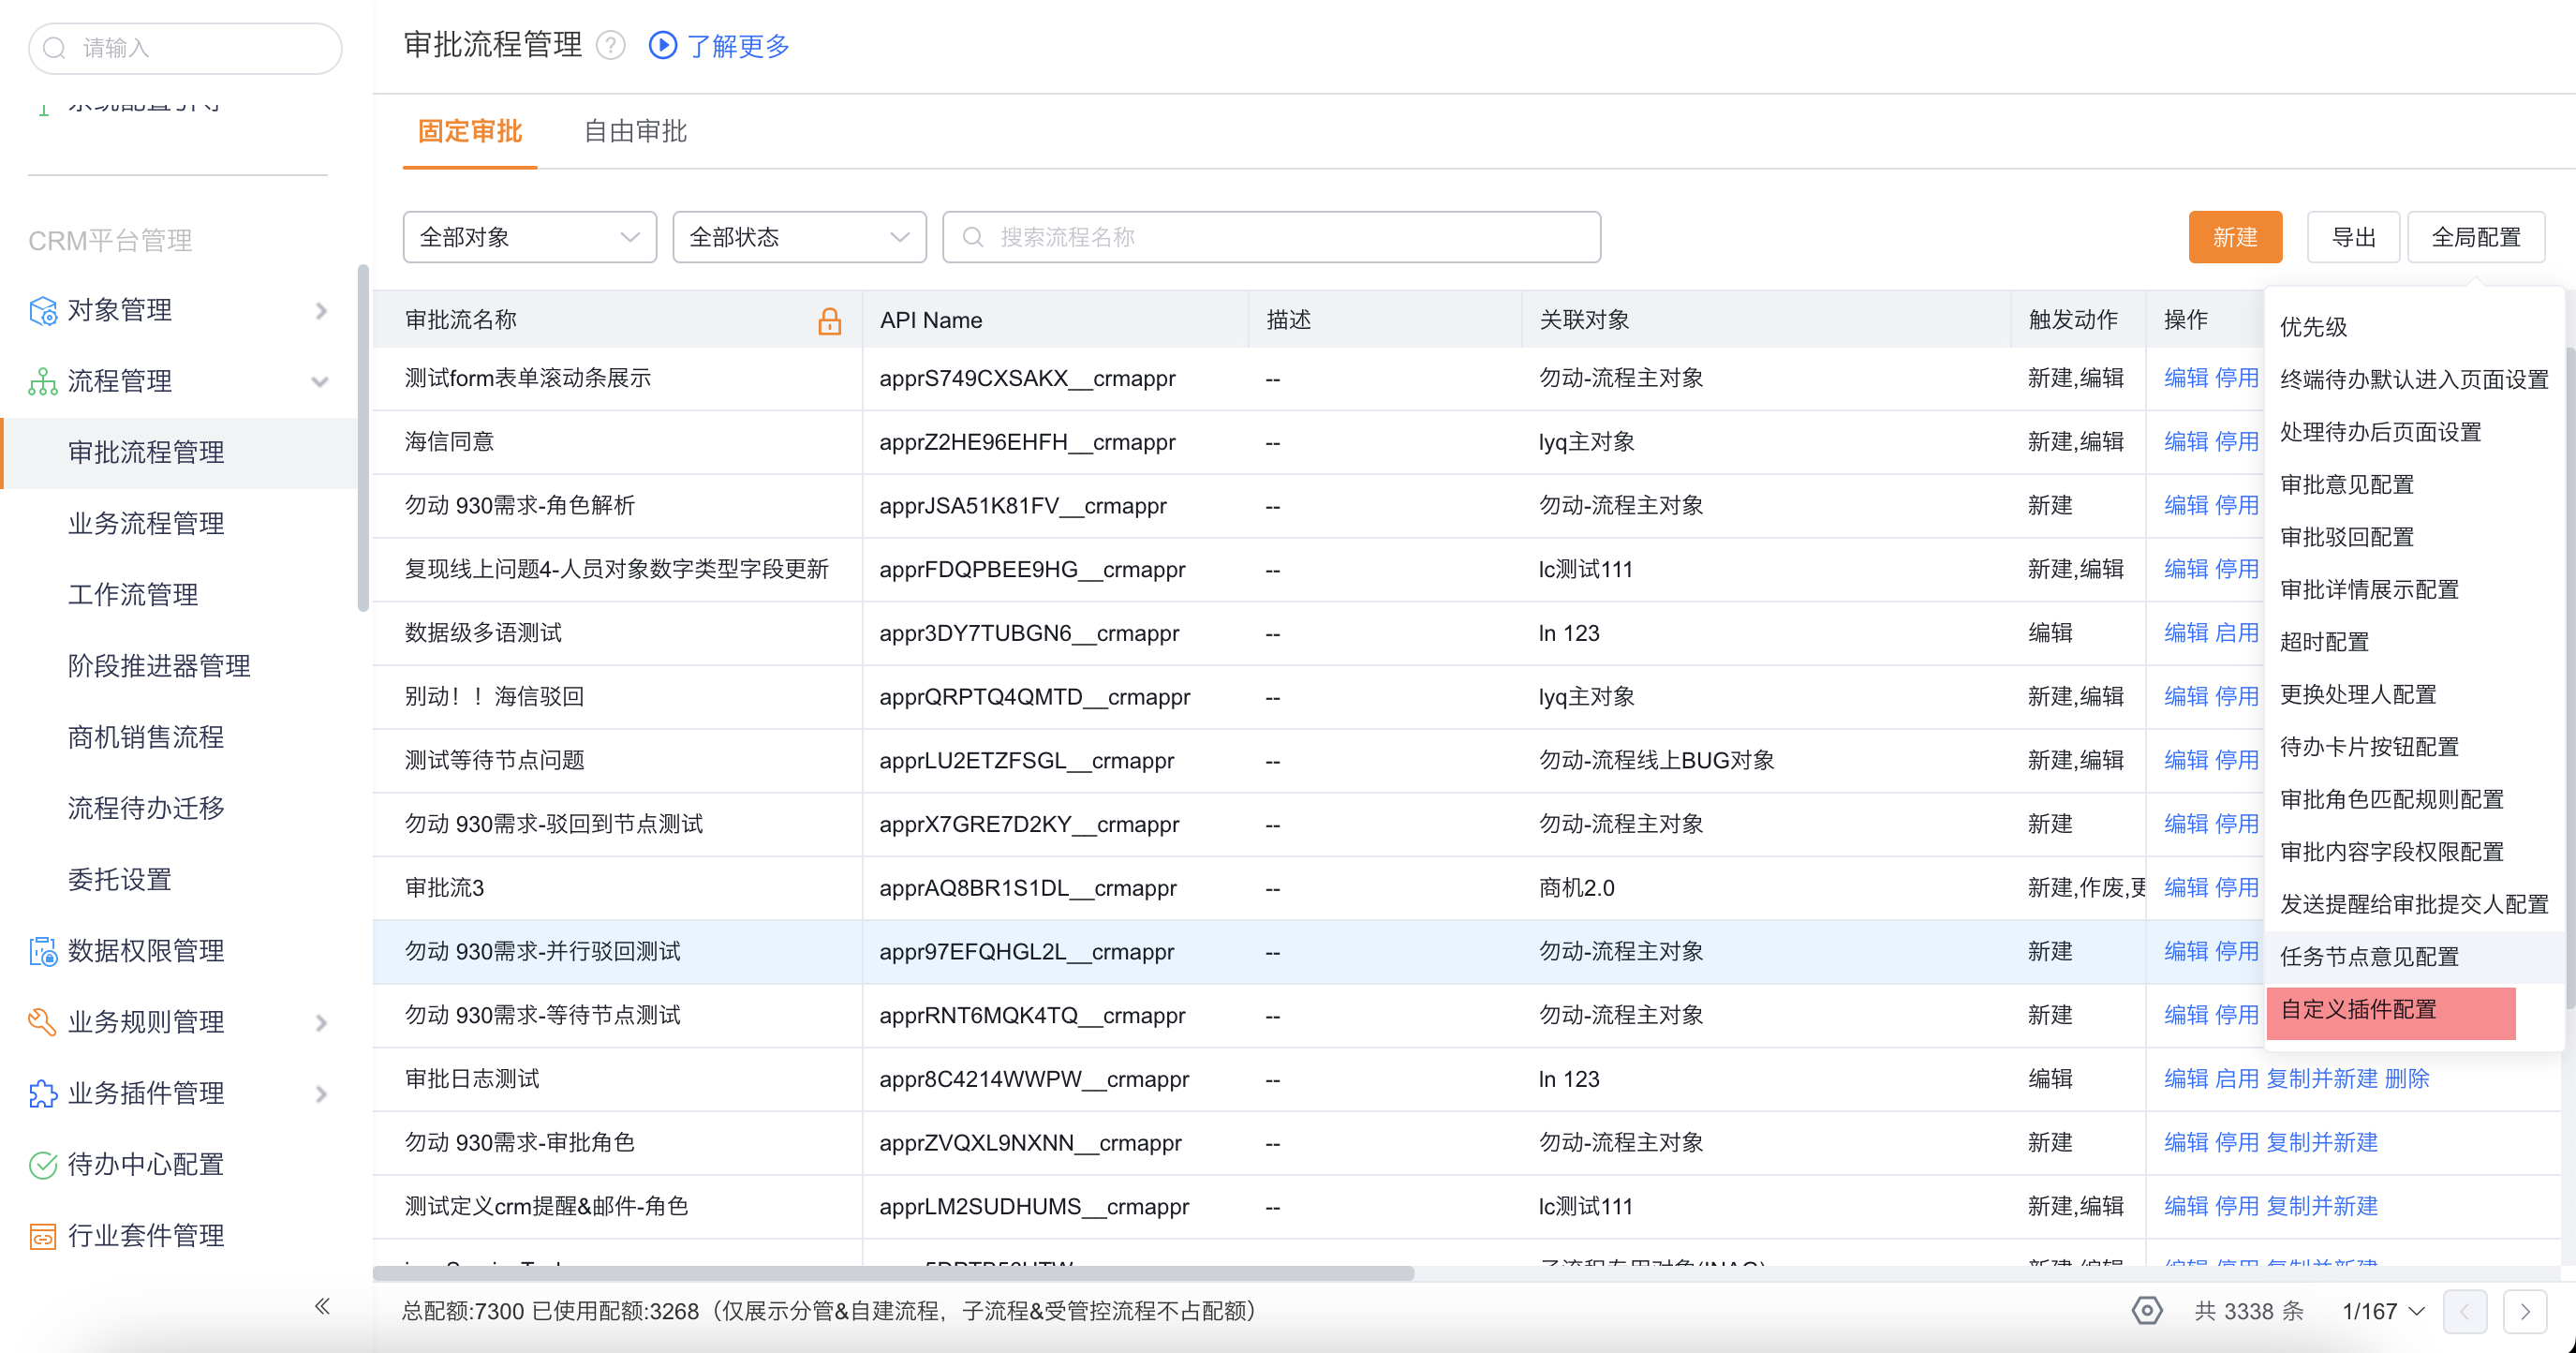
Click Global Configuration, click Custom Plugin, click the Web-side single-select option, choose Approval Popup Plugin, and click Confirm.
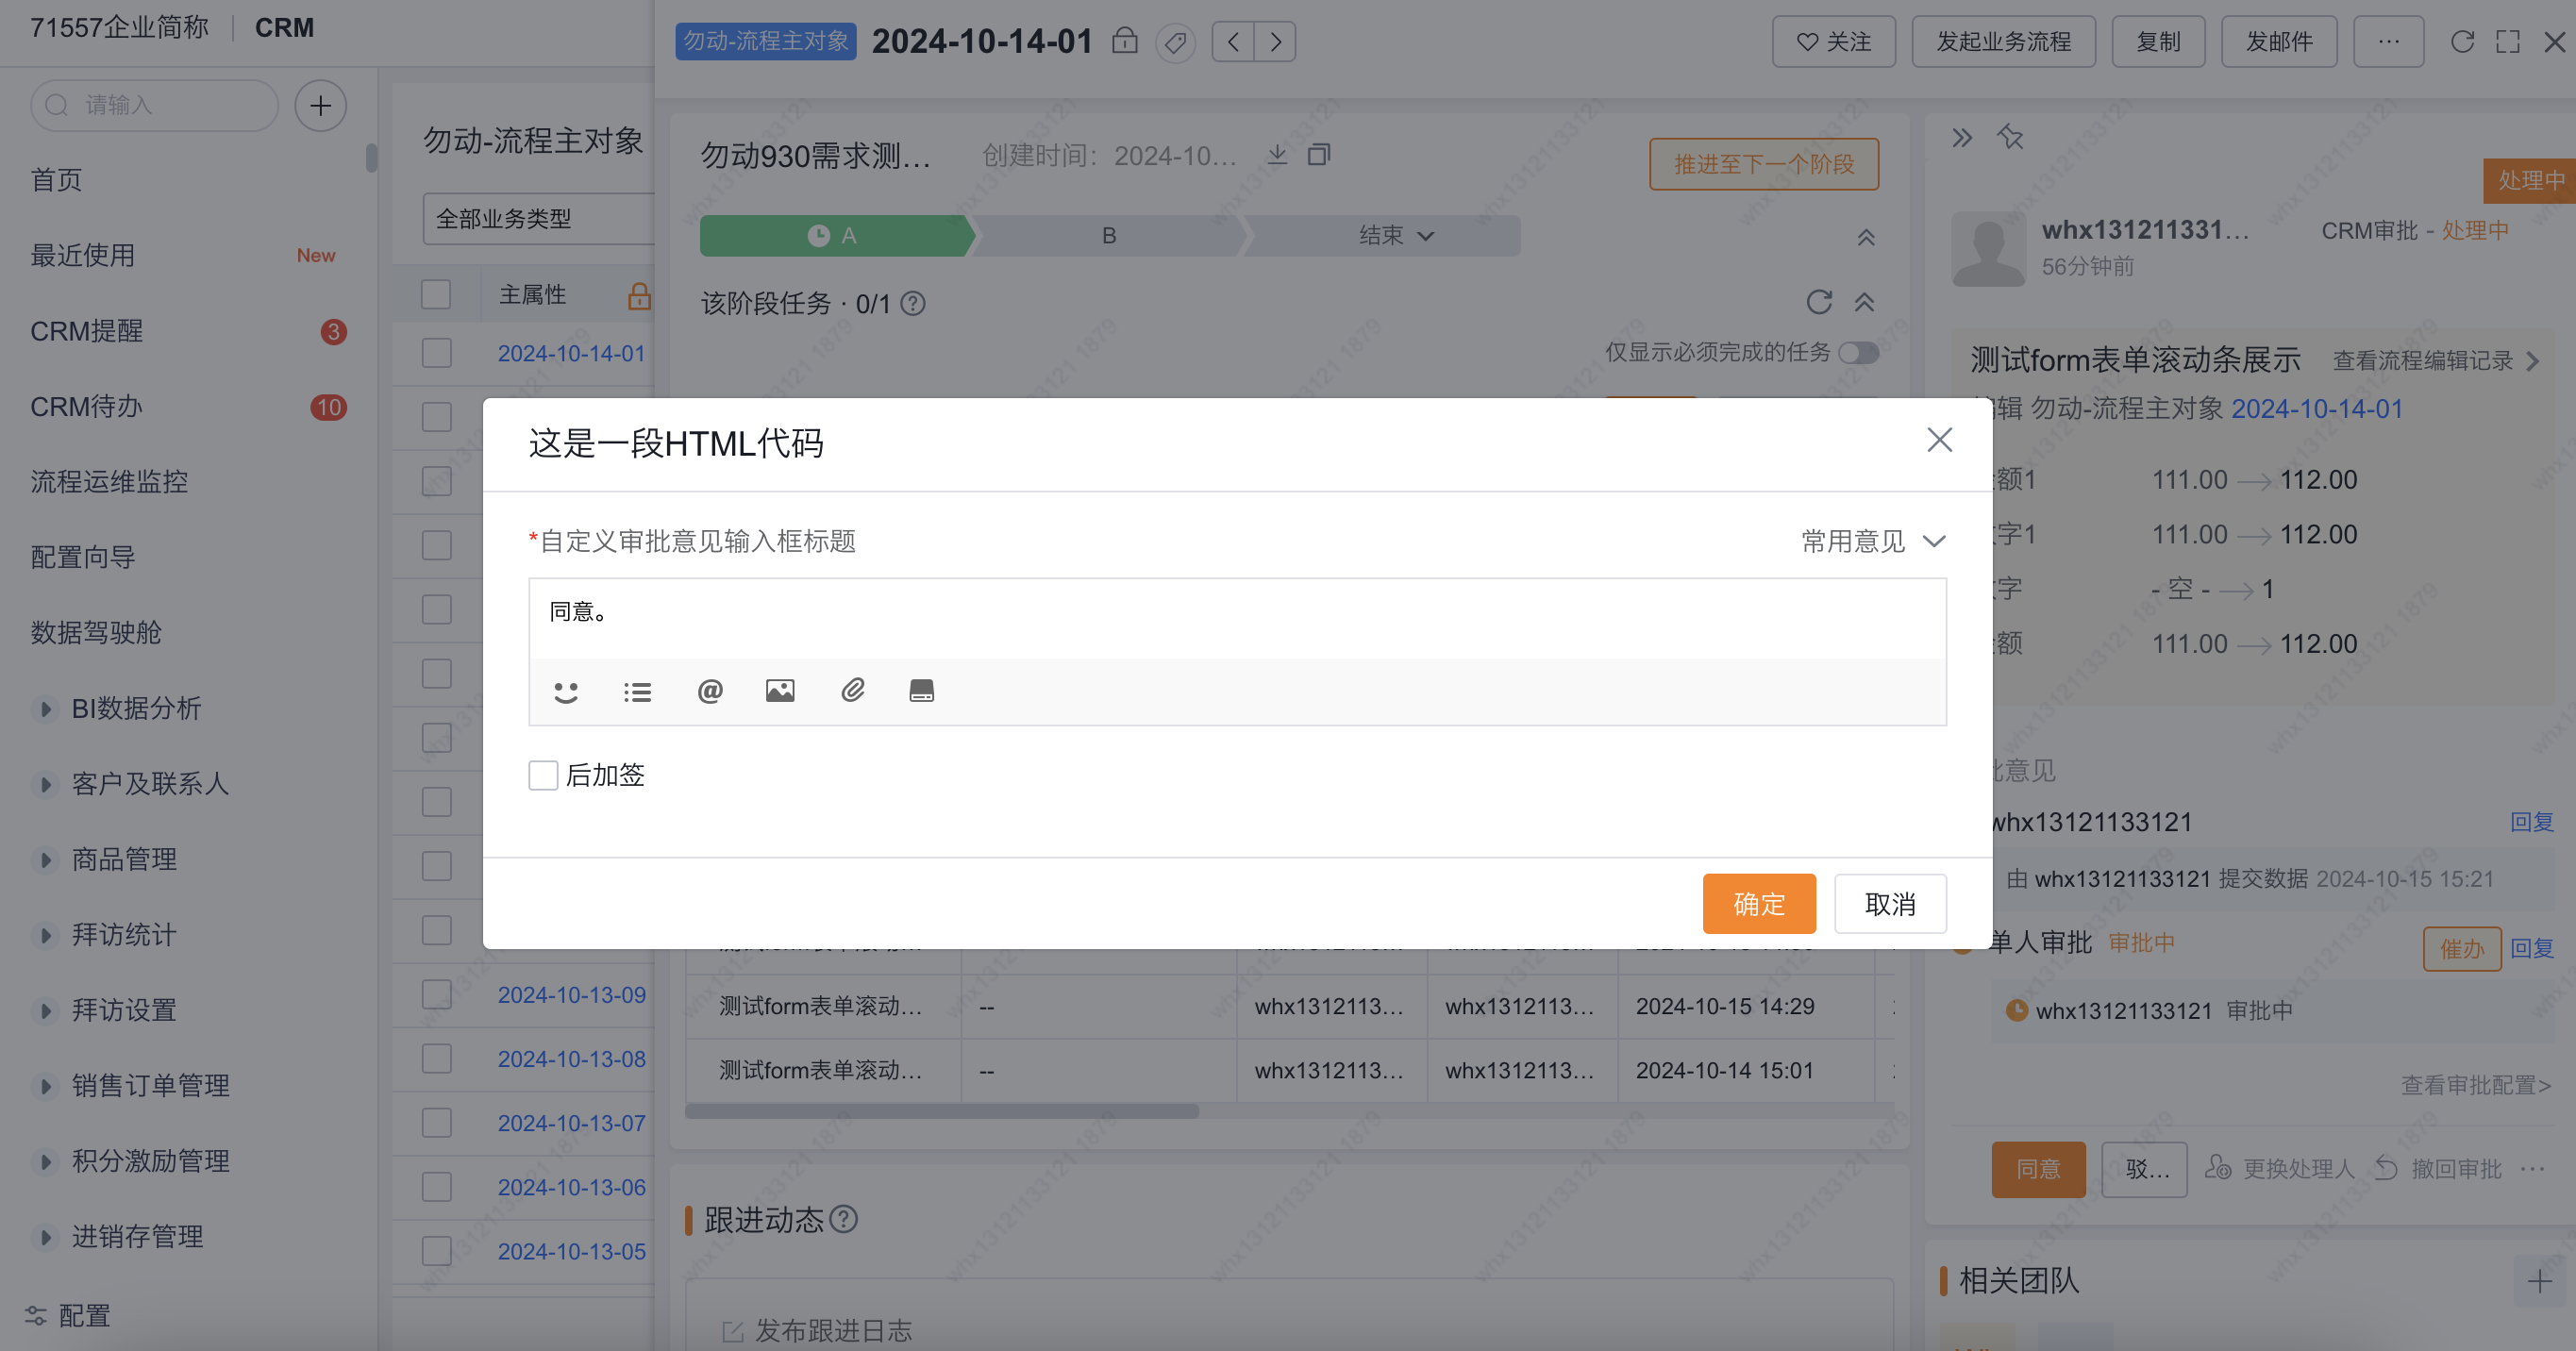
Step 3: Experience the Result
Open the detail page of an approval workflow. You will see that the popup follows the custom popup title and opinion input title.
Events
| Event Name | Function |
|---|---|
| approval.agree.render.before | This event customizes the approval agree popup before rendering |
| approval.agree.render.after | This event customizes the approval agree popup after rendering |
| approval.reject.render.before | This event customizes the approval reject popup before rendering |
| approval.reject.render.after | This event customizes the approval reject popup after rendering |
| approval.content.render,after | This event customizes the approval content page after rendering |
| approval.opinions.render.before | This event customizes the approval opinion area before rendering |
| approval.changeApprover.render.before | This event customizes the change-approver popup before rendering |